snapshots month 10 - car
/


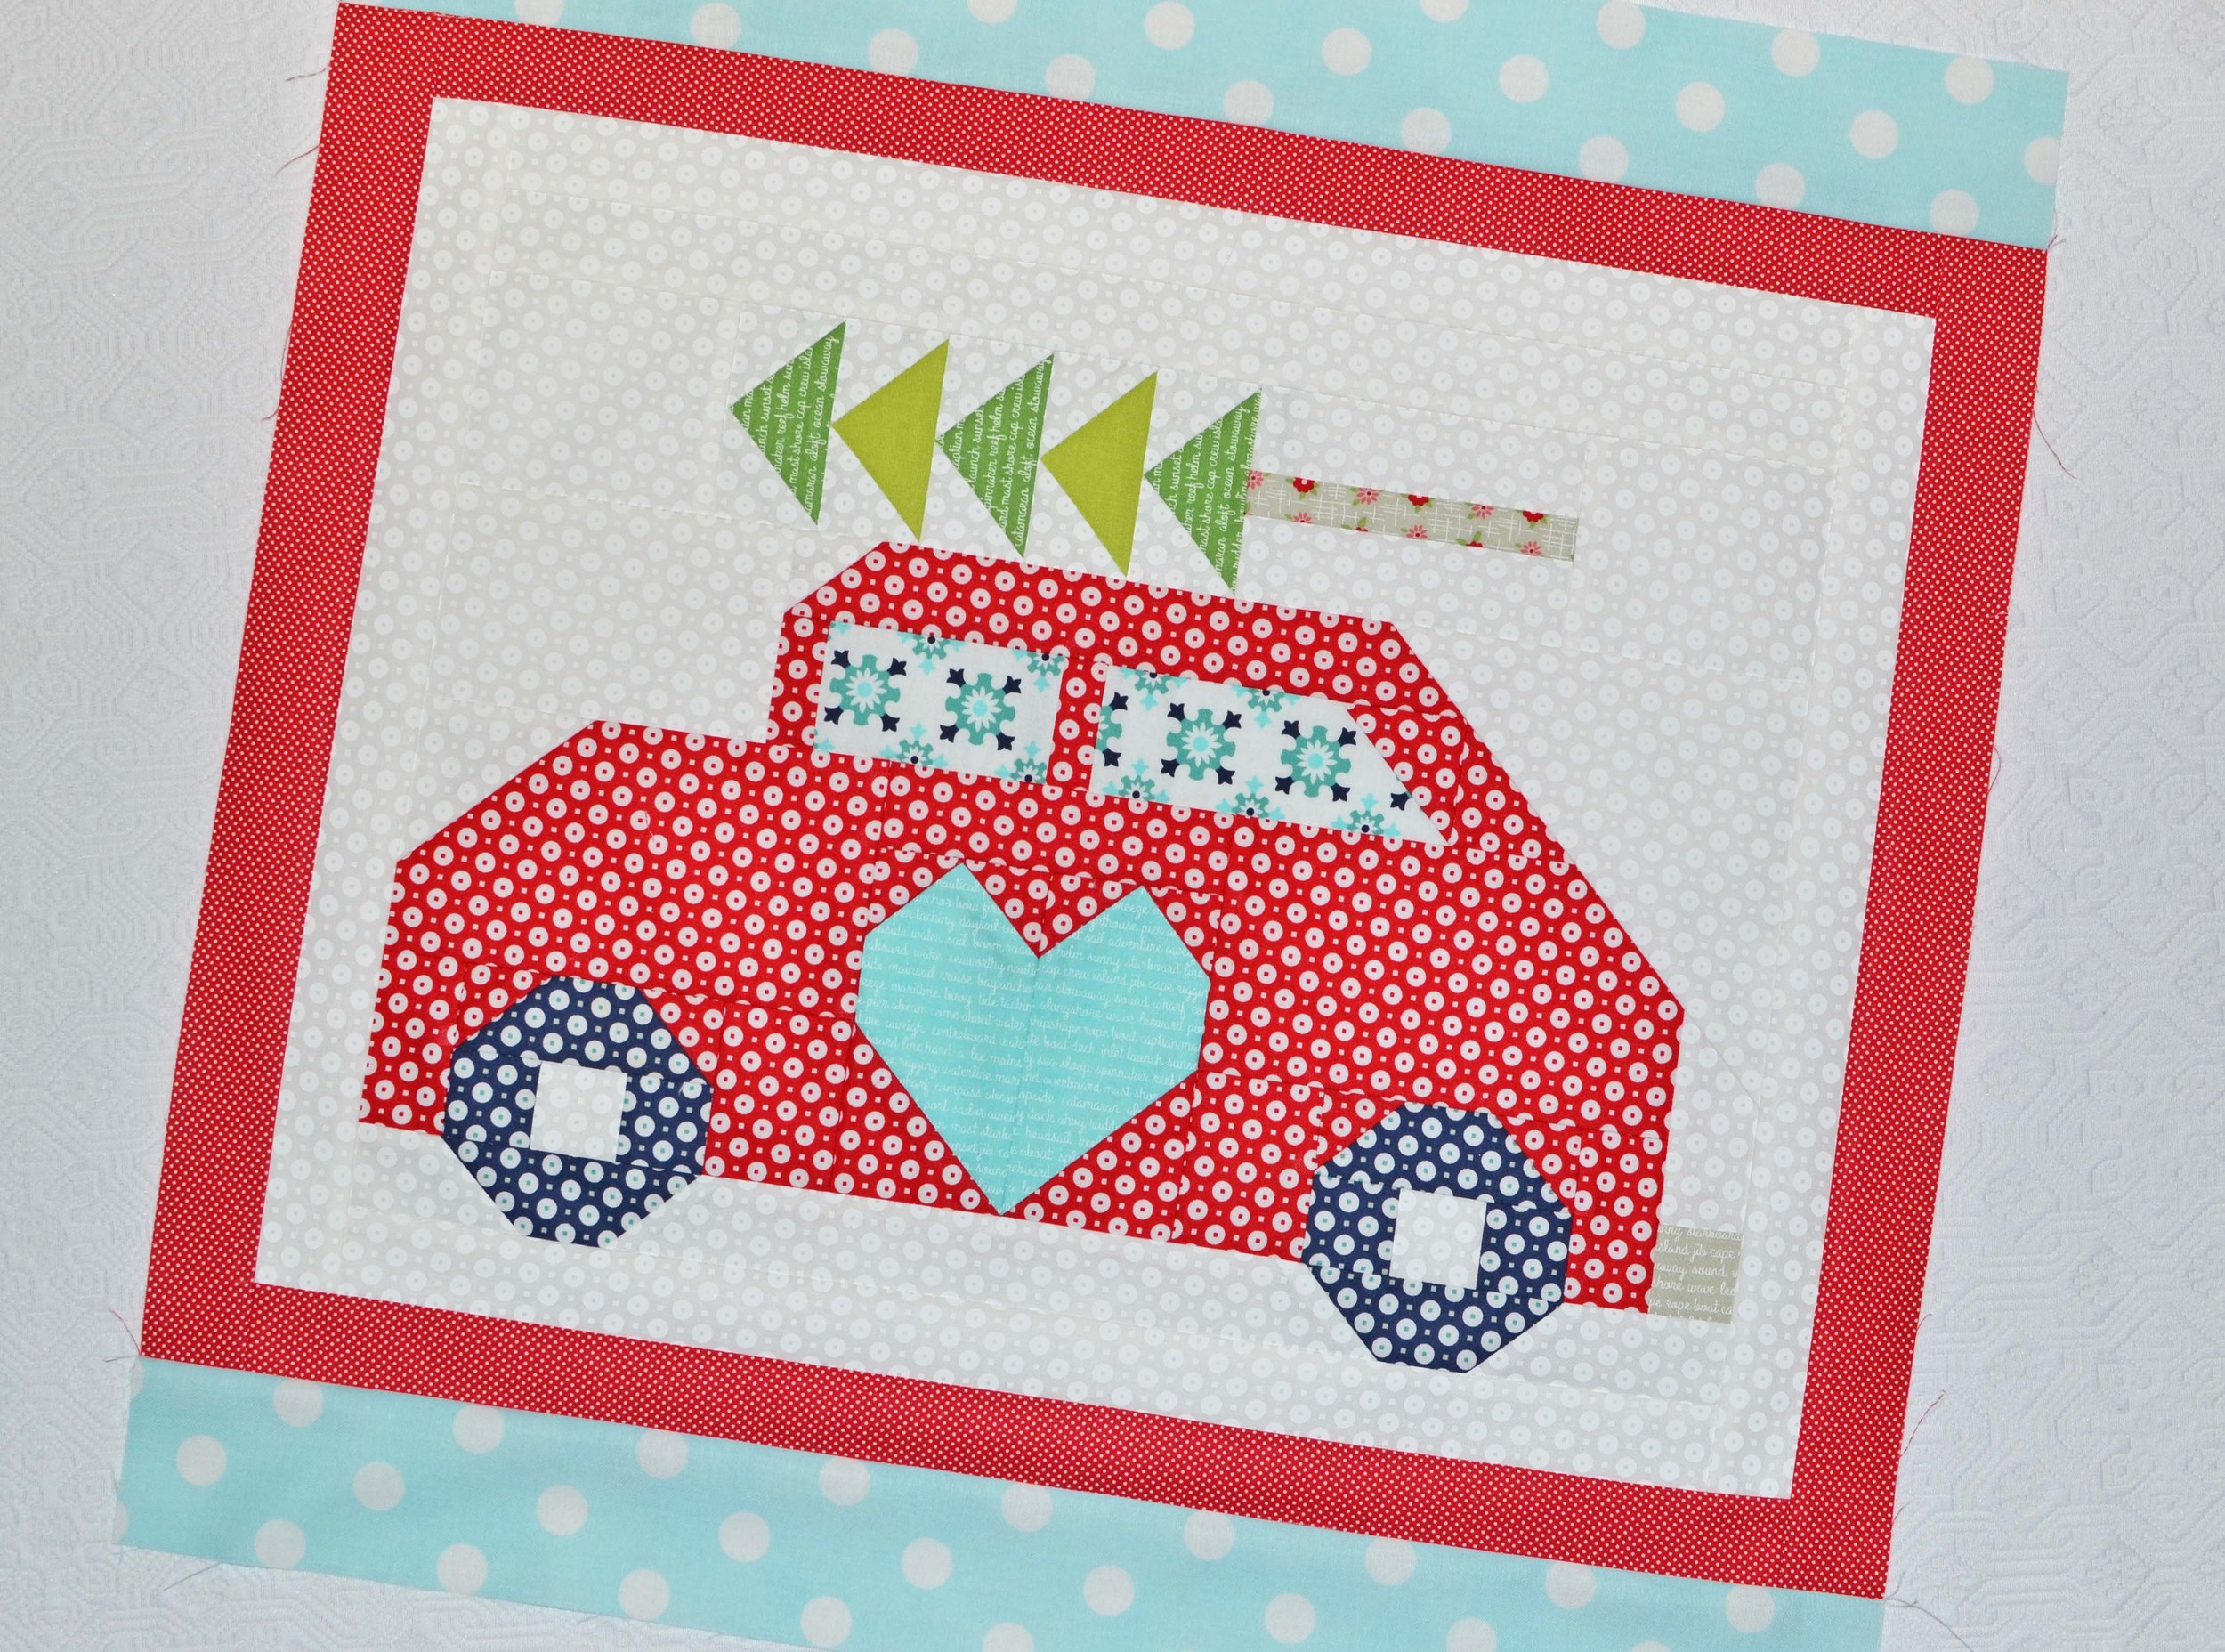
Wow, we are on month 10 of the Snapshots charitable quilt along! This month we are making a sporty red car on the way to the beach with a surfboard on the roof. The block is called "Gone Surfin." But wait... I have a tree on my roof! Ok, let me explain.
I don't surf. I don't own a surfboard. But I recently "Gone to Indiana" in a new Suburu. And since this quilt is a snapshot of important moments in our lives, I thought about moments that are important to me. Christmas is important, with lots of significance as well as opportunities to decorate, eat and relax. So how about adding a Christmas tree to my car?!
I'll tell you all about how to make a Christmas tree just like mine. First, a small disclaimer. Y'alll know that I'm not a professional pattern writer, but I think you'll be able to follow along. First, digitally drive over to the Fat Quarter Shop and download your free Gone Surfin block pattern (and please consider making a $5 donation for the use of the pattern to St Jude Children's Research Hospital here.) Build your car just like the pattern specifies.

Now of course, you can go ahead and make the really cute surf board. But If you want to try a tree, here's how I made mine. For the "branches", you'll need to make 5 flying geese that measure 1 3/4" x 3" unfinished. Use your favorite method, like maybe (2) 1 3/4" background "sky" squares and (1) 1 3/4 x 3" green "branch" rectangle for each goose, sewn with the stitch and flip method. Or I used the Mini Fit To Be Geese ruler. Sew the 5 green flying geese together in a row.
Next, build your tree trunk. I sewed a grey print measuring 1" x 5" between two background white prints measuring 1 1/2" x 5" each. Press towards the grey trunk.
Now add the pieced grey trunk unit to the base of the flying geese branches unit. Trim the short end of the trunk so that the entire tree unit measures 3" x 10 1/2" - voila, it's the exact same size as the surfboard! Now add the "C" background rectangles (refer to pattern cutting directions) to both ends of the tree. It will now measure 3" x 16 1/2" long. Then add the completed tree unit to the car and you're done!


In the craziness of my recent move, I completely forgot to show you last month's Quilty Cat block! (Chloe and Mia said that this is their favorite block, but maybe they're a little biased.) You'll find the pattern download right here, next to the car pattern. I've also started to add the sashing to each block as I sew. The assembly pattern is already posted on the Fat Quarter Shop link, so why not? It will make it a whole lot quicker to assemble the quilt top very soon!
Oh, one more thing. There are still some Snapshot fabric kits available here, as well as a backing set. I've enhanced the kit with other Bonnie & Camille prints from my stash.
Thanks for stopping by! Now go sew!