farm girl vintage - vegetables and fruits

Hi everybody! I hope that you had a great weekend! I've been enjoying the (very slightly) cooler temperatures here in Southern Indiana and the (barely) less humid air. I know that fall is supposed to be coming! I see plenty of leaves falling from the trees. But what's strange is that they aren't turning all those pretty colors that I expected to see. They go right from green on the tree to brown and crunchy on the ground. Where's the yellow? Where's the orange and red? I go for a long walk several times each week - I'm able to walk to Target and the grocery store, and there's ALWAYS a stop at DQ for a burger or ice cream, or usually both. Anyway, I love to step on as many leaves as I can while I'm walking. And when I step on a mushy leaf, well, that's just a wasted opportunity!

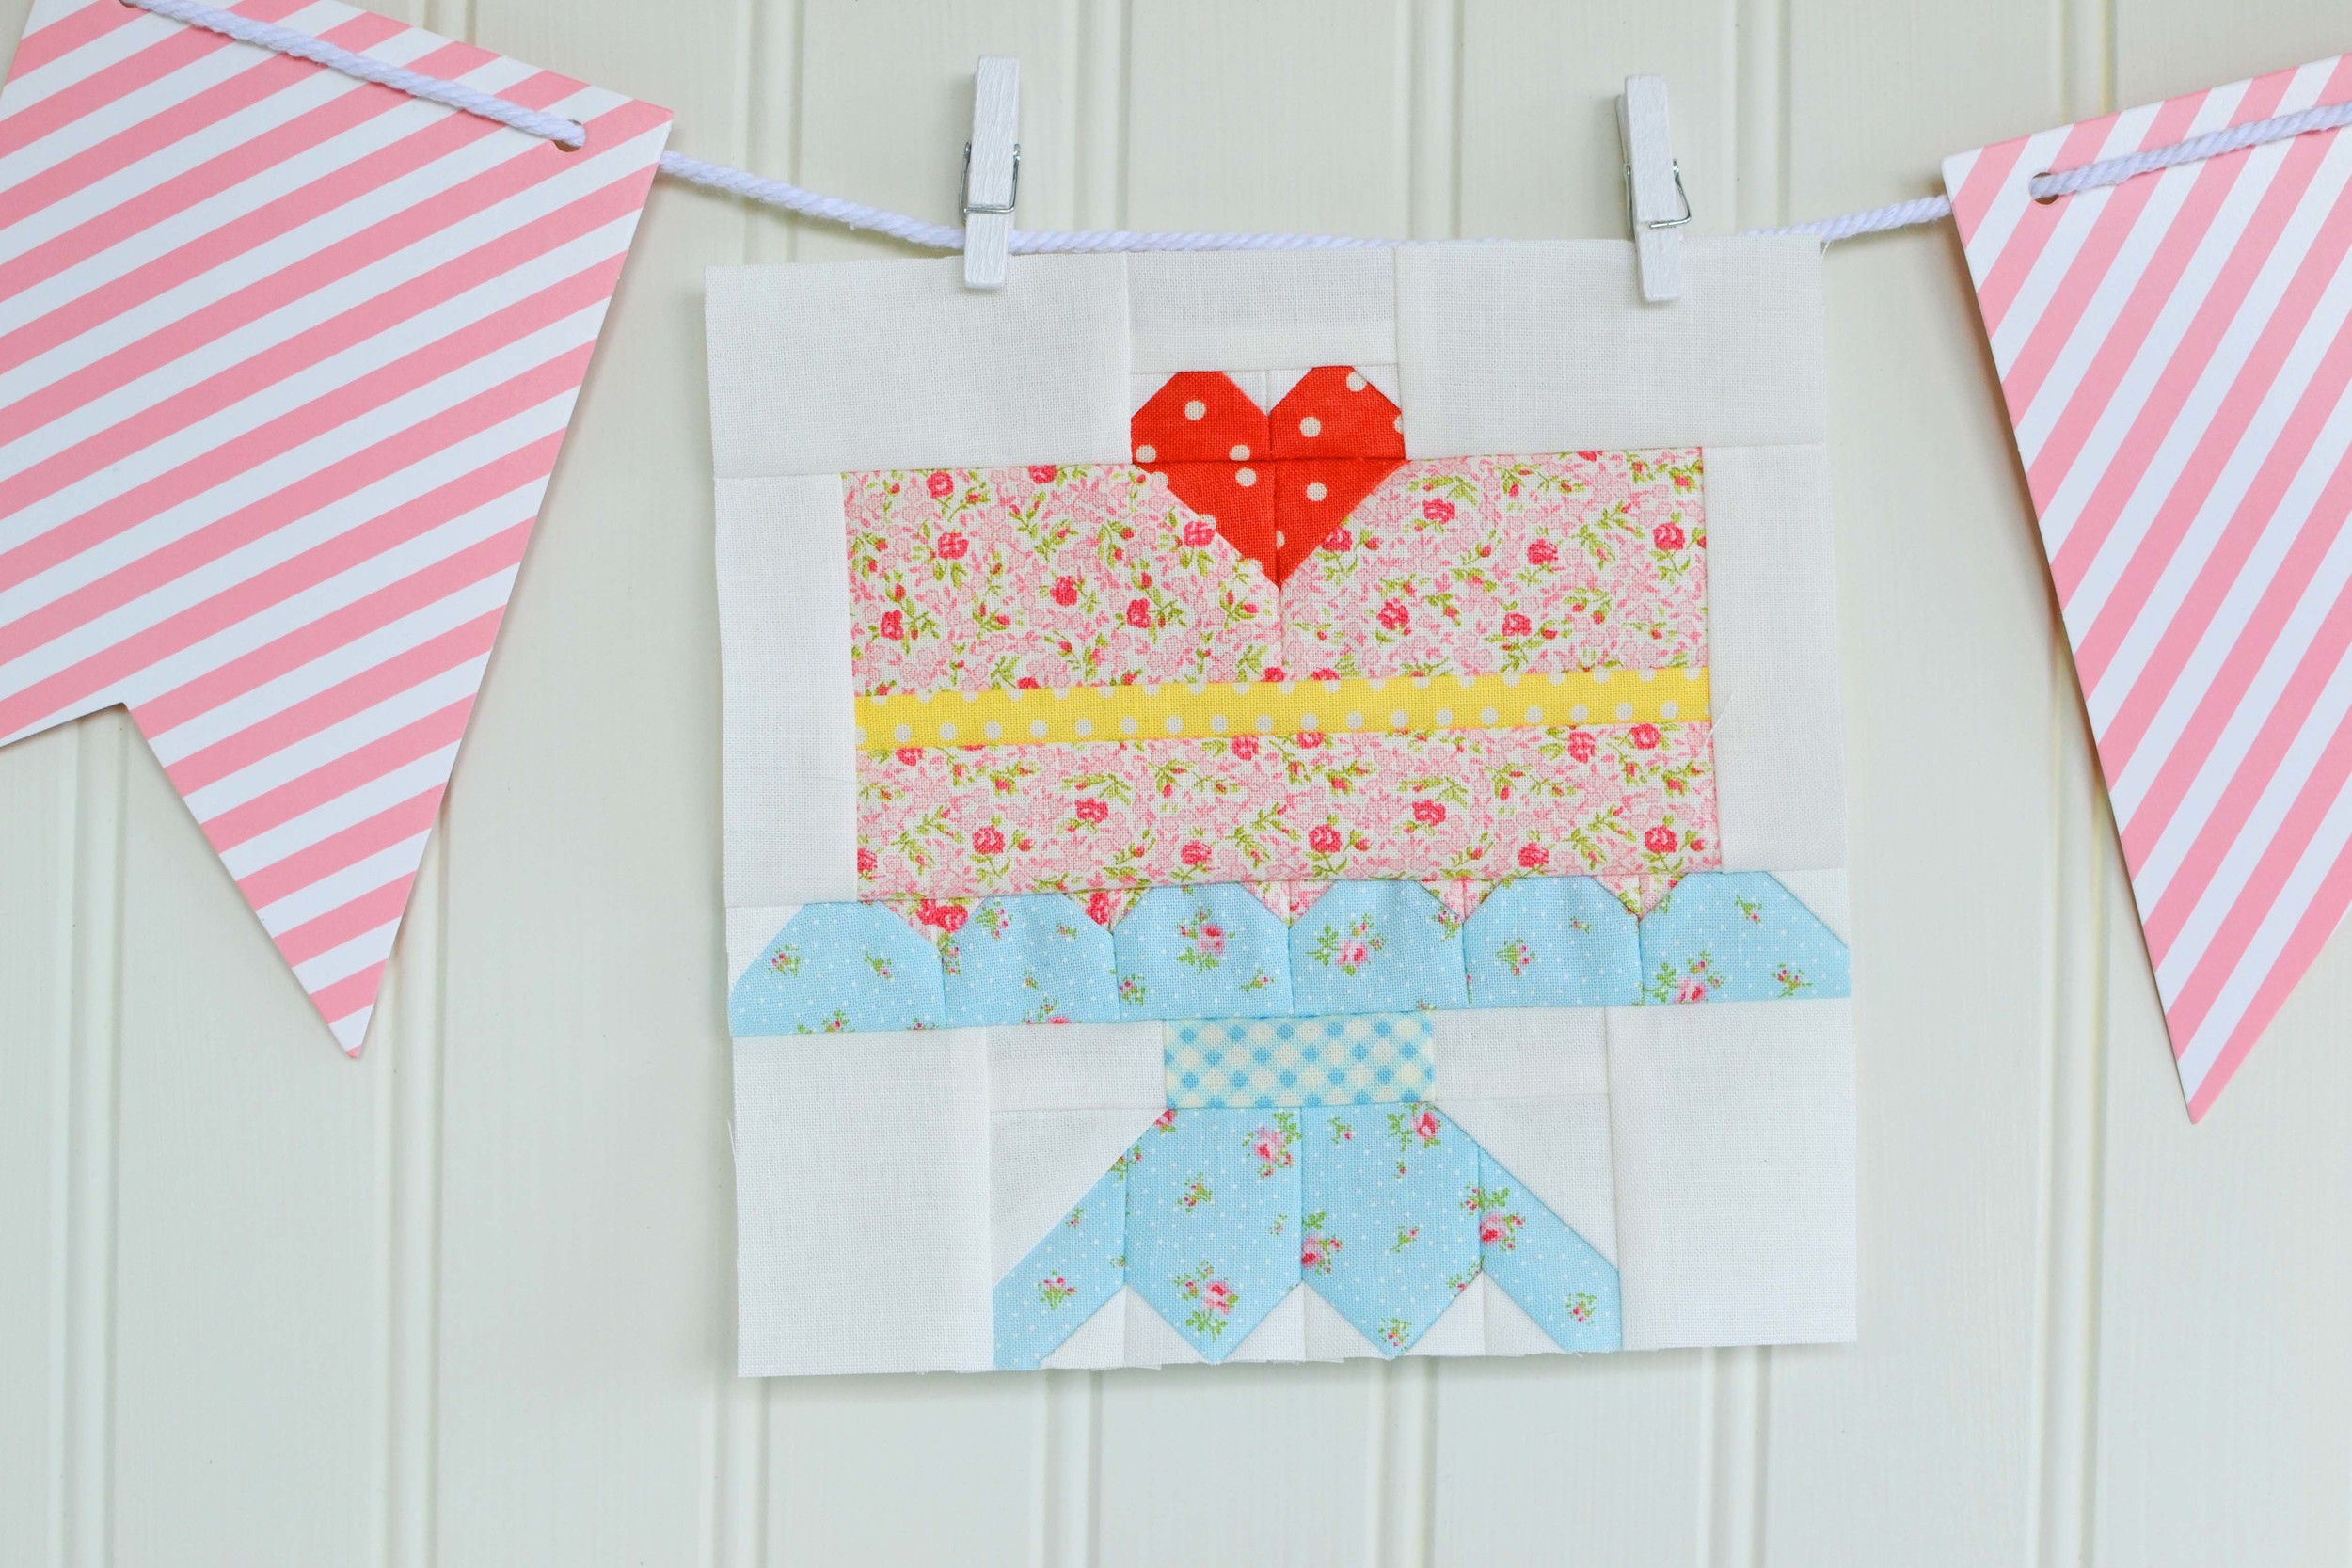
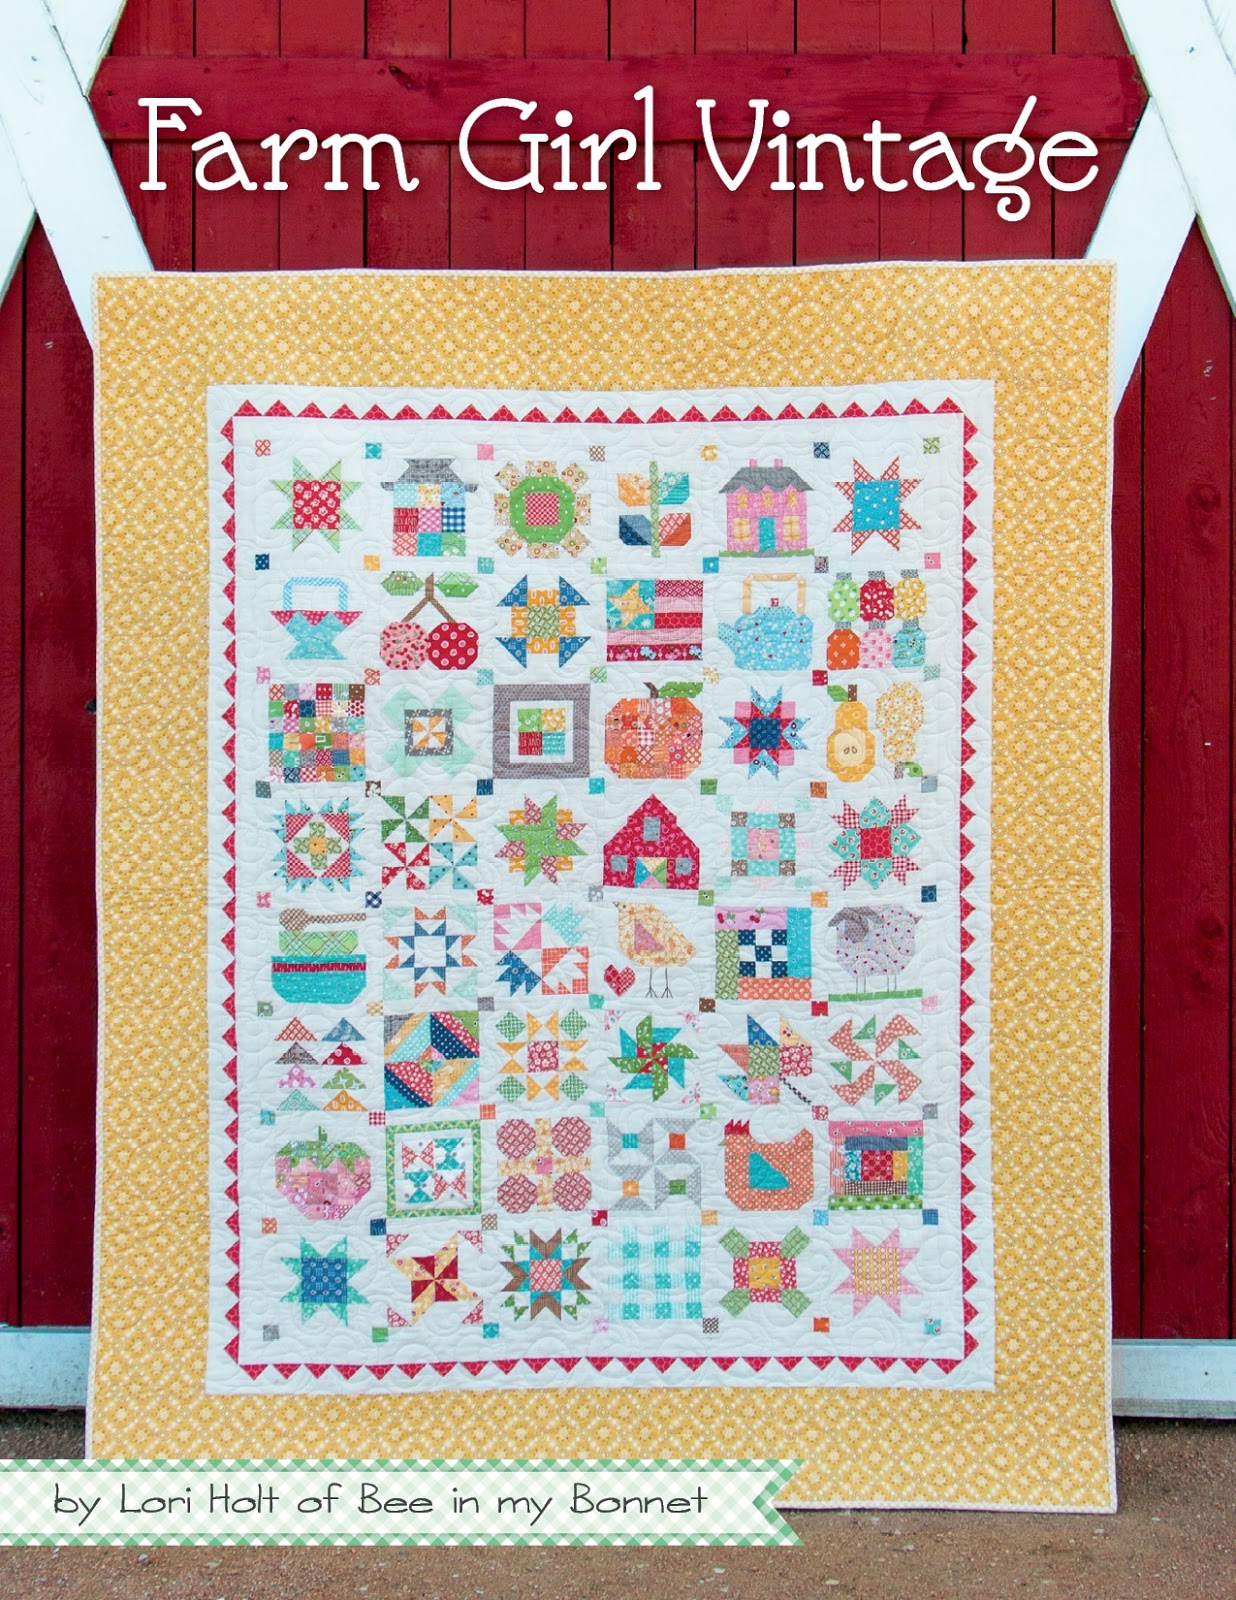
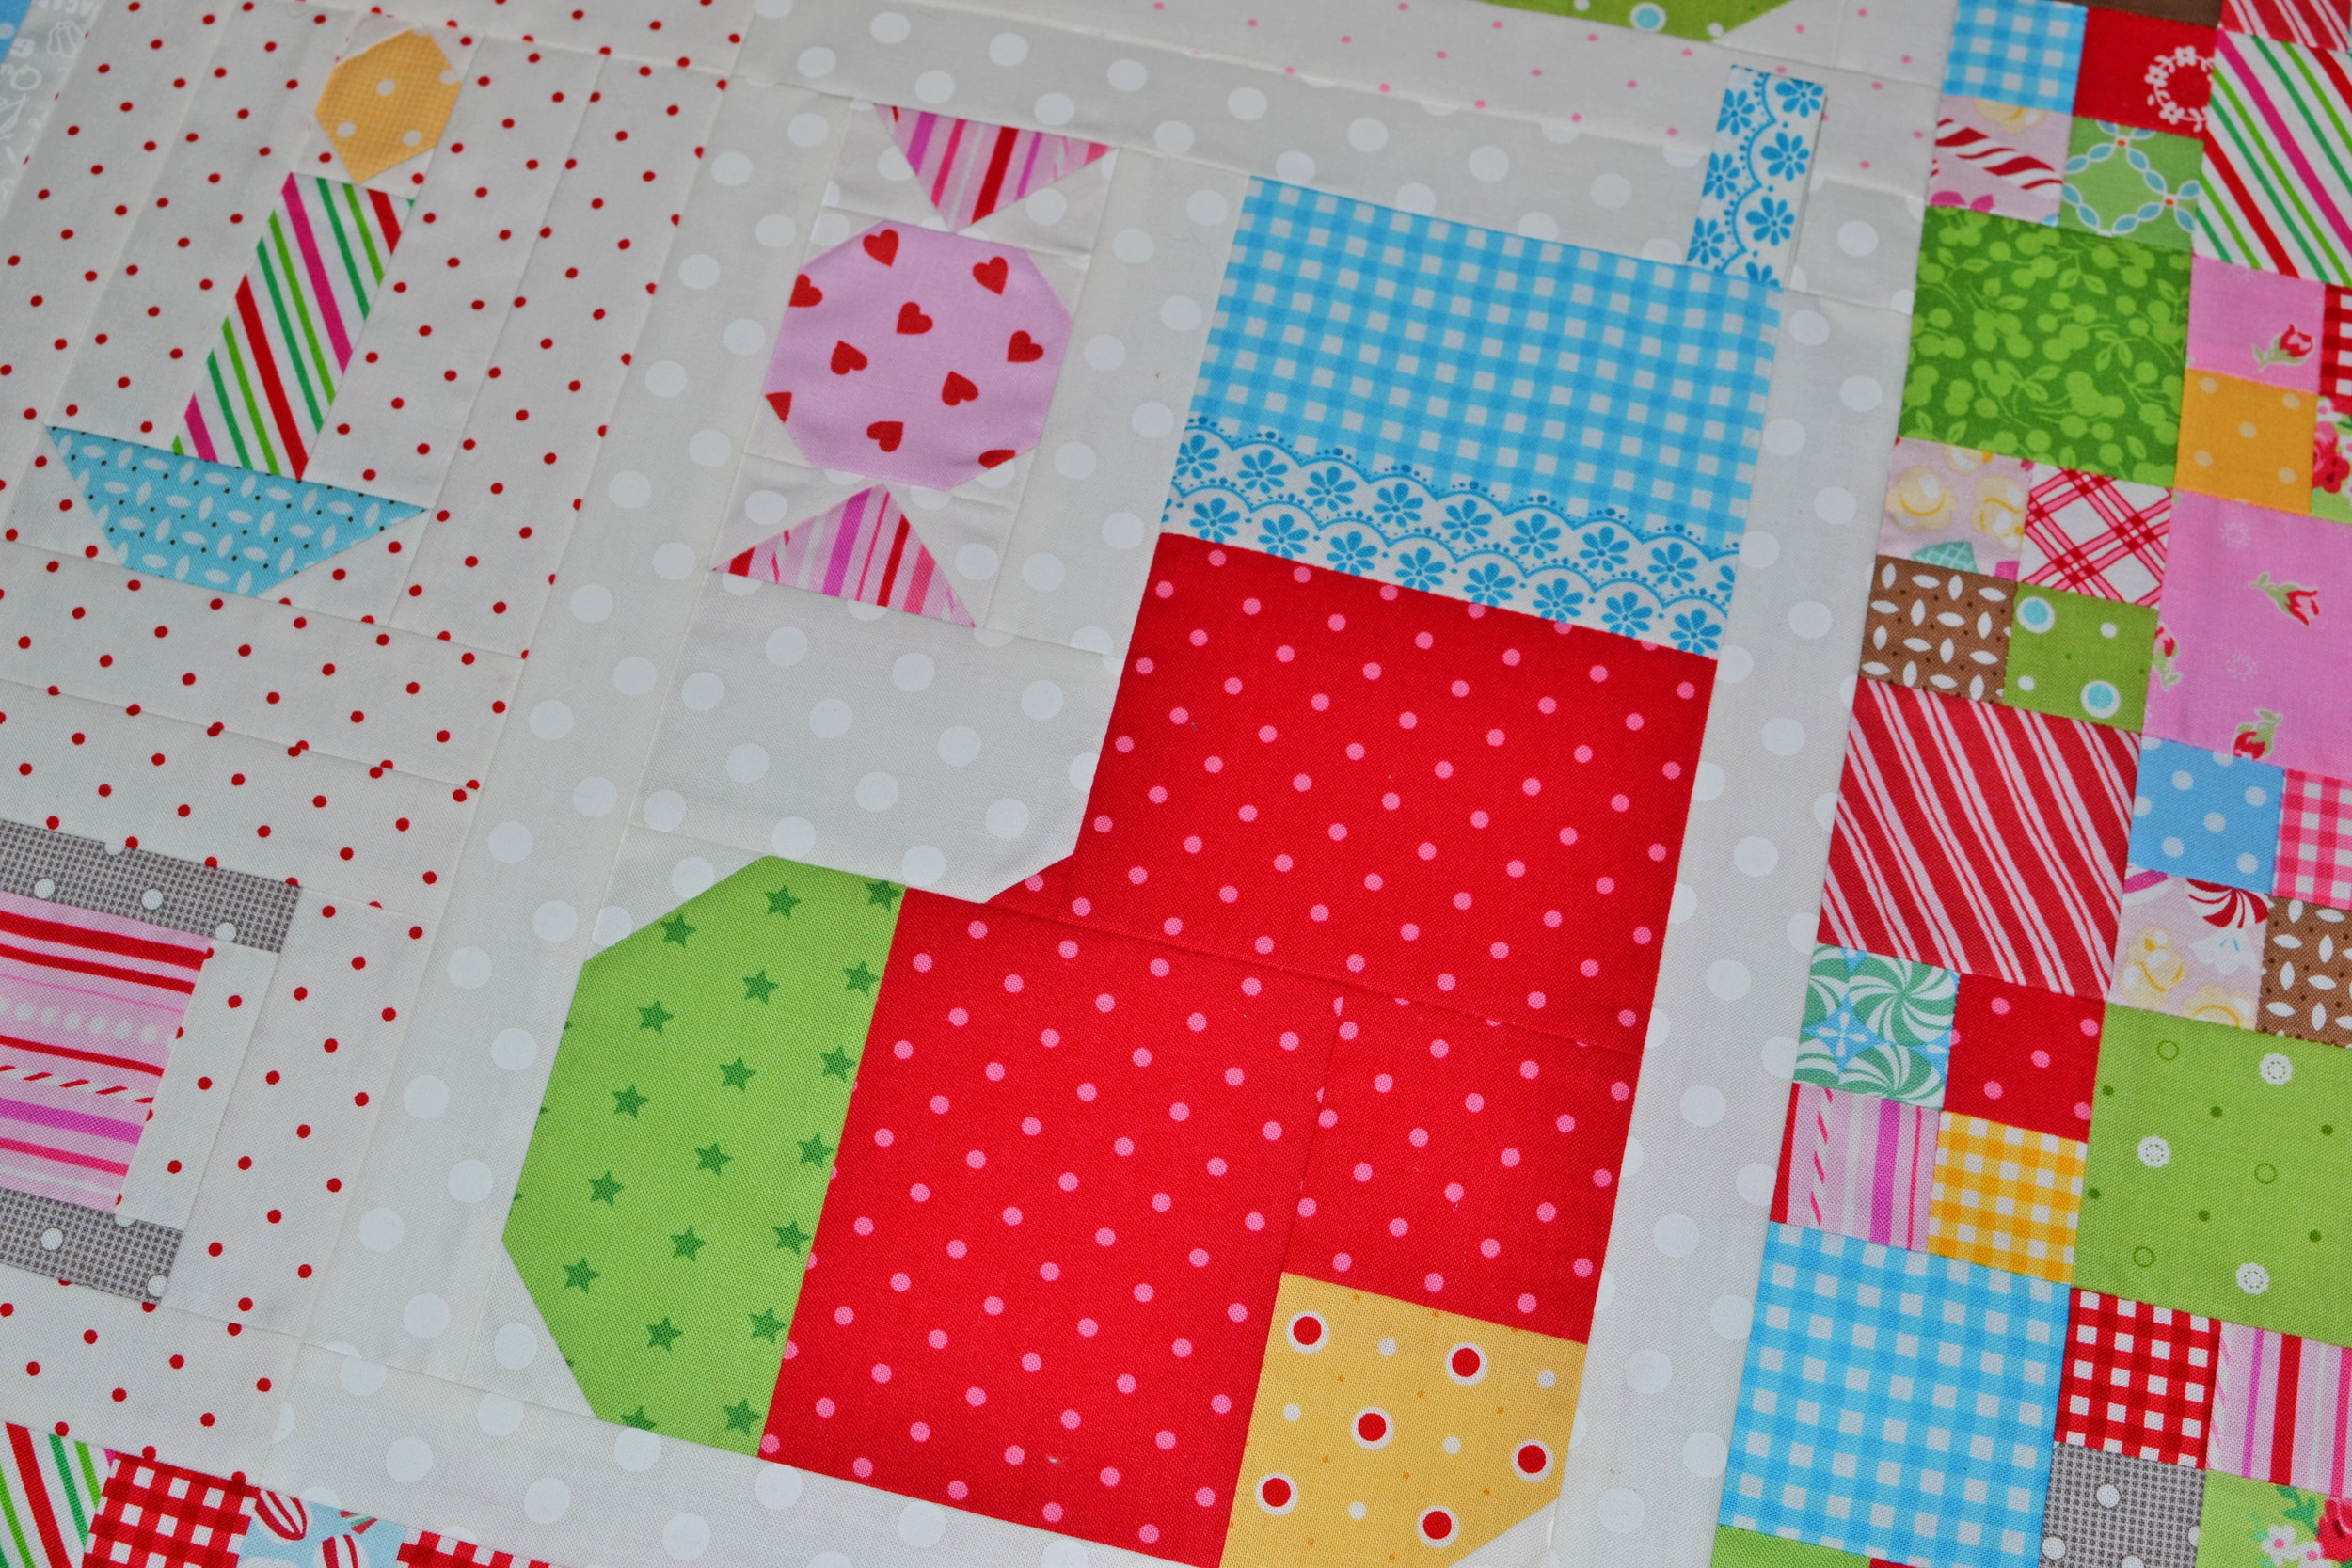
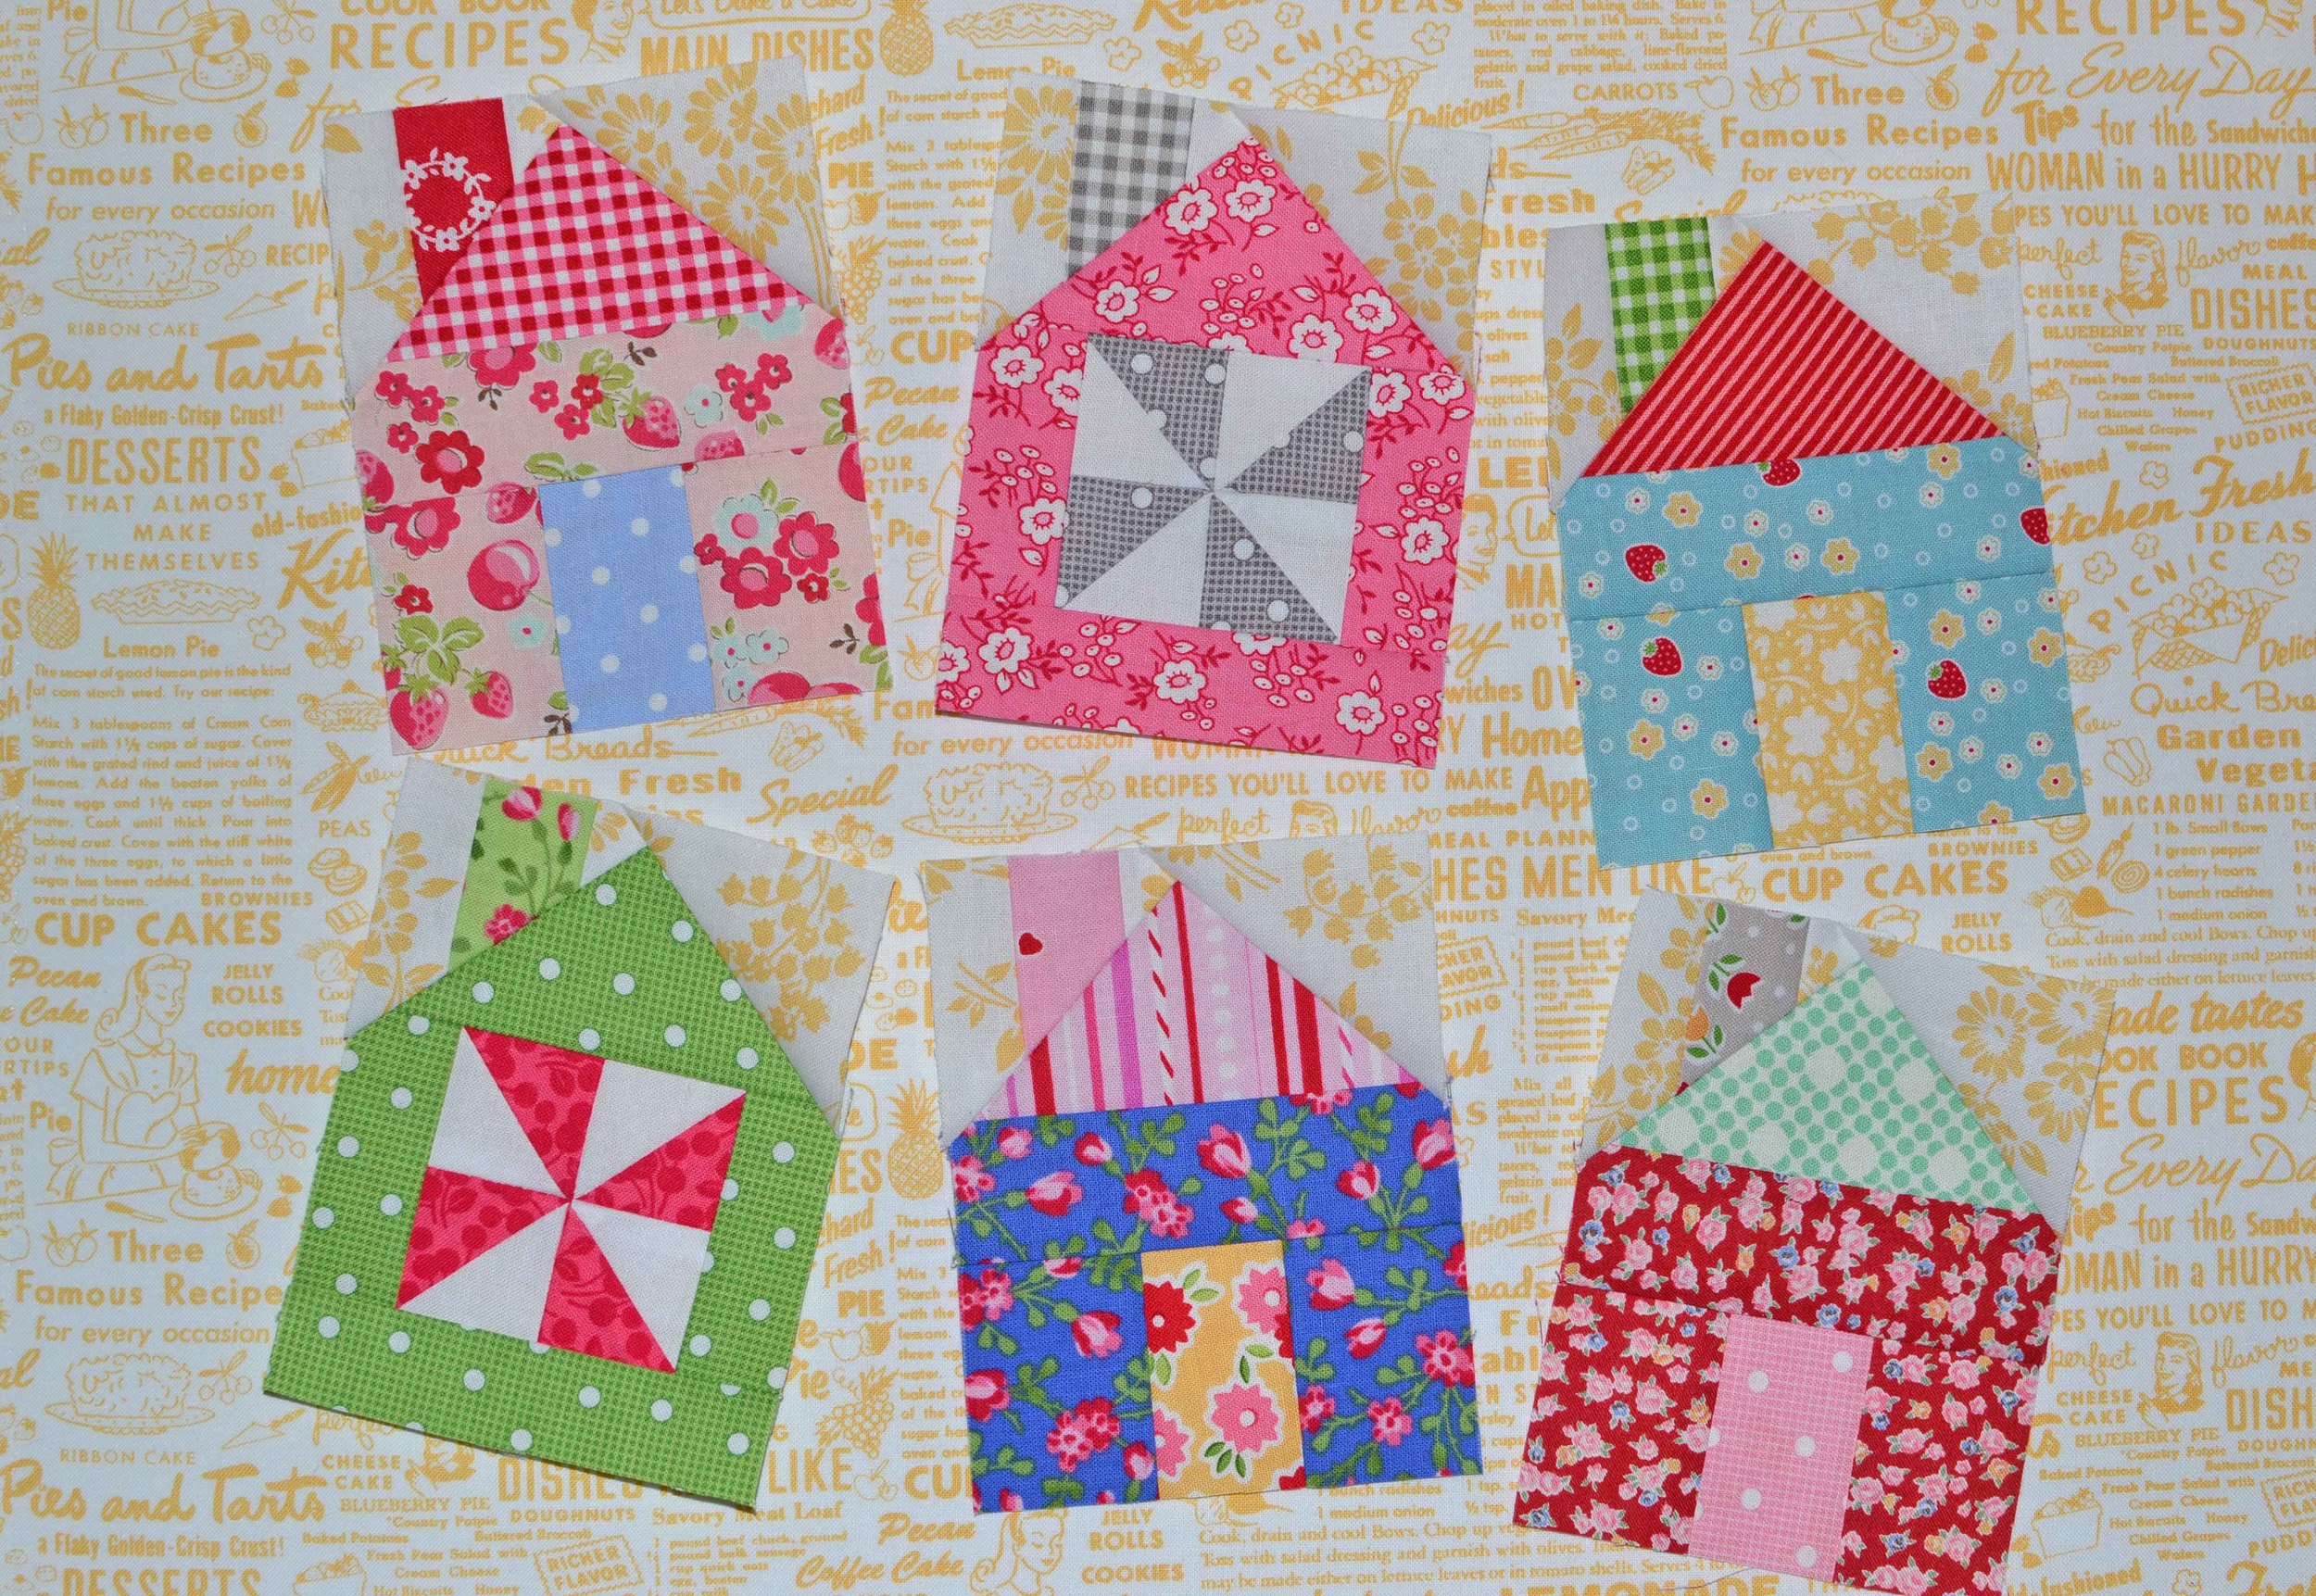
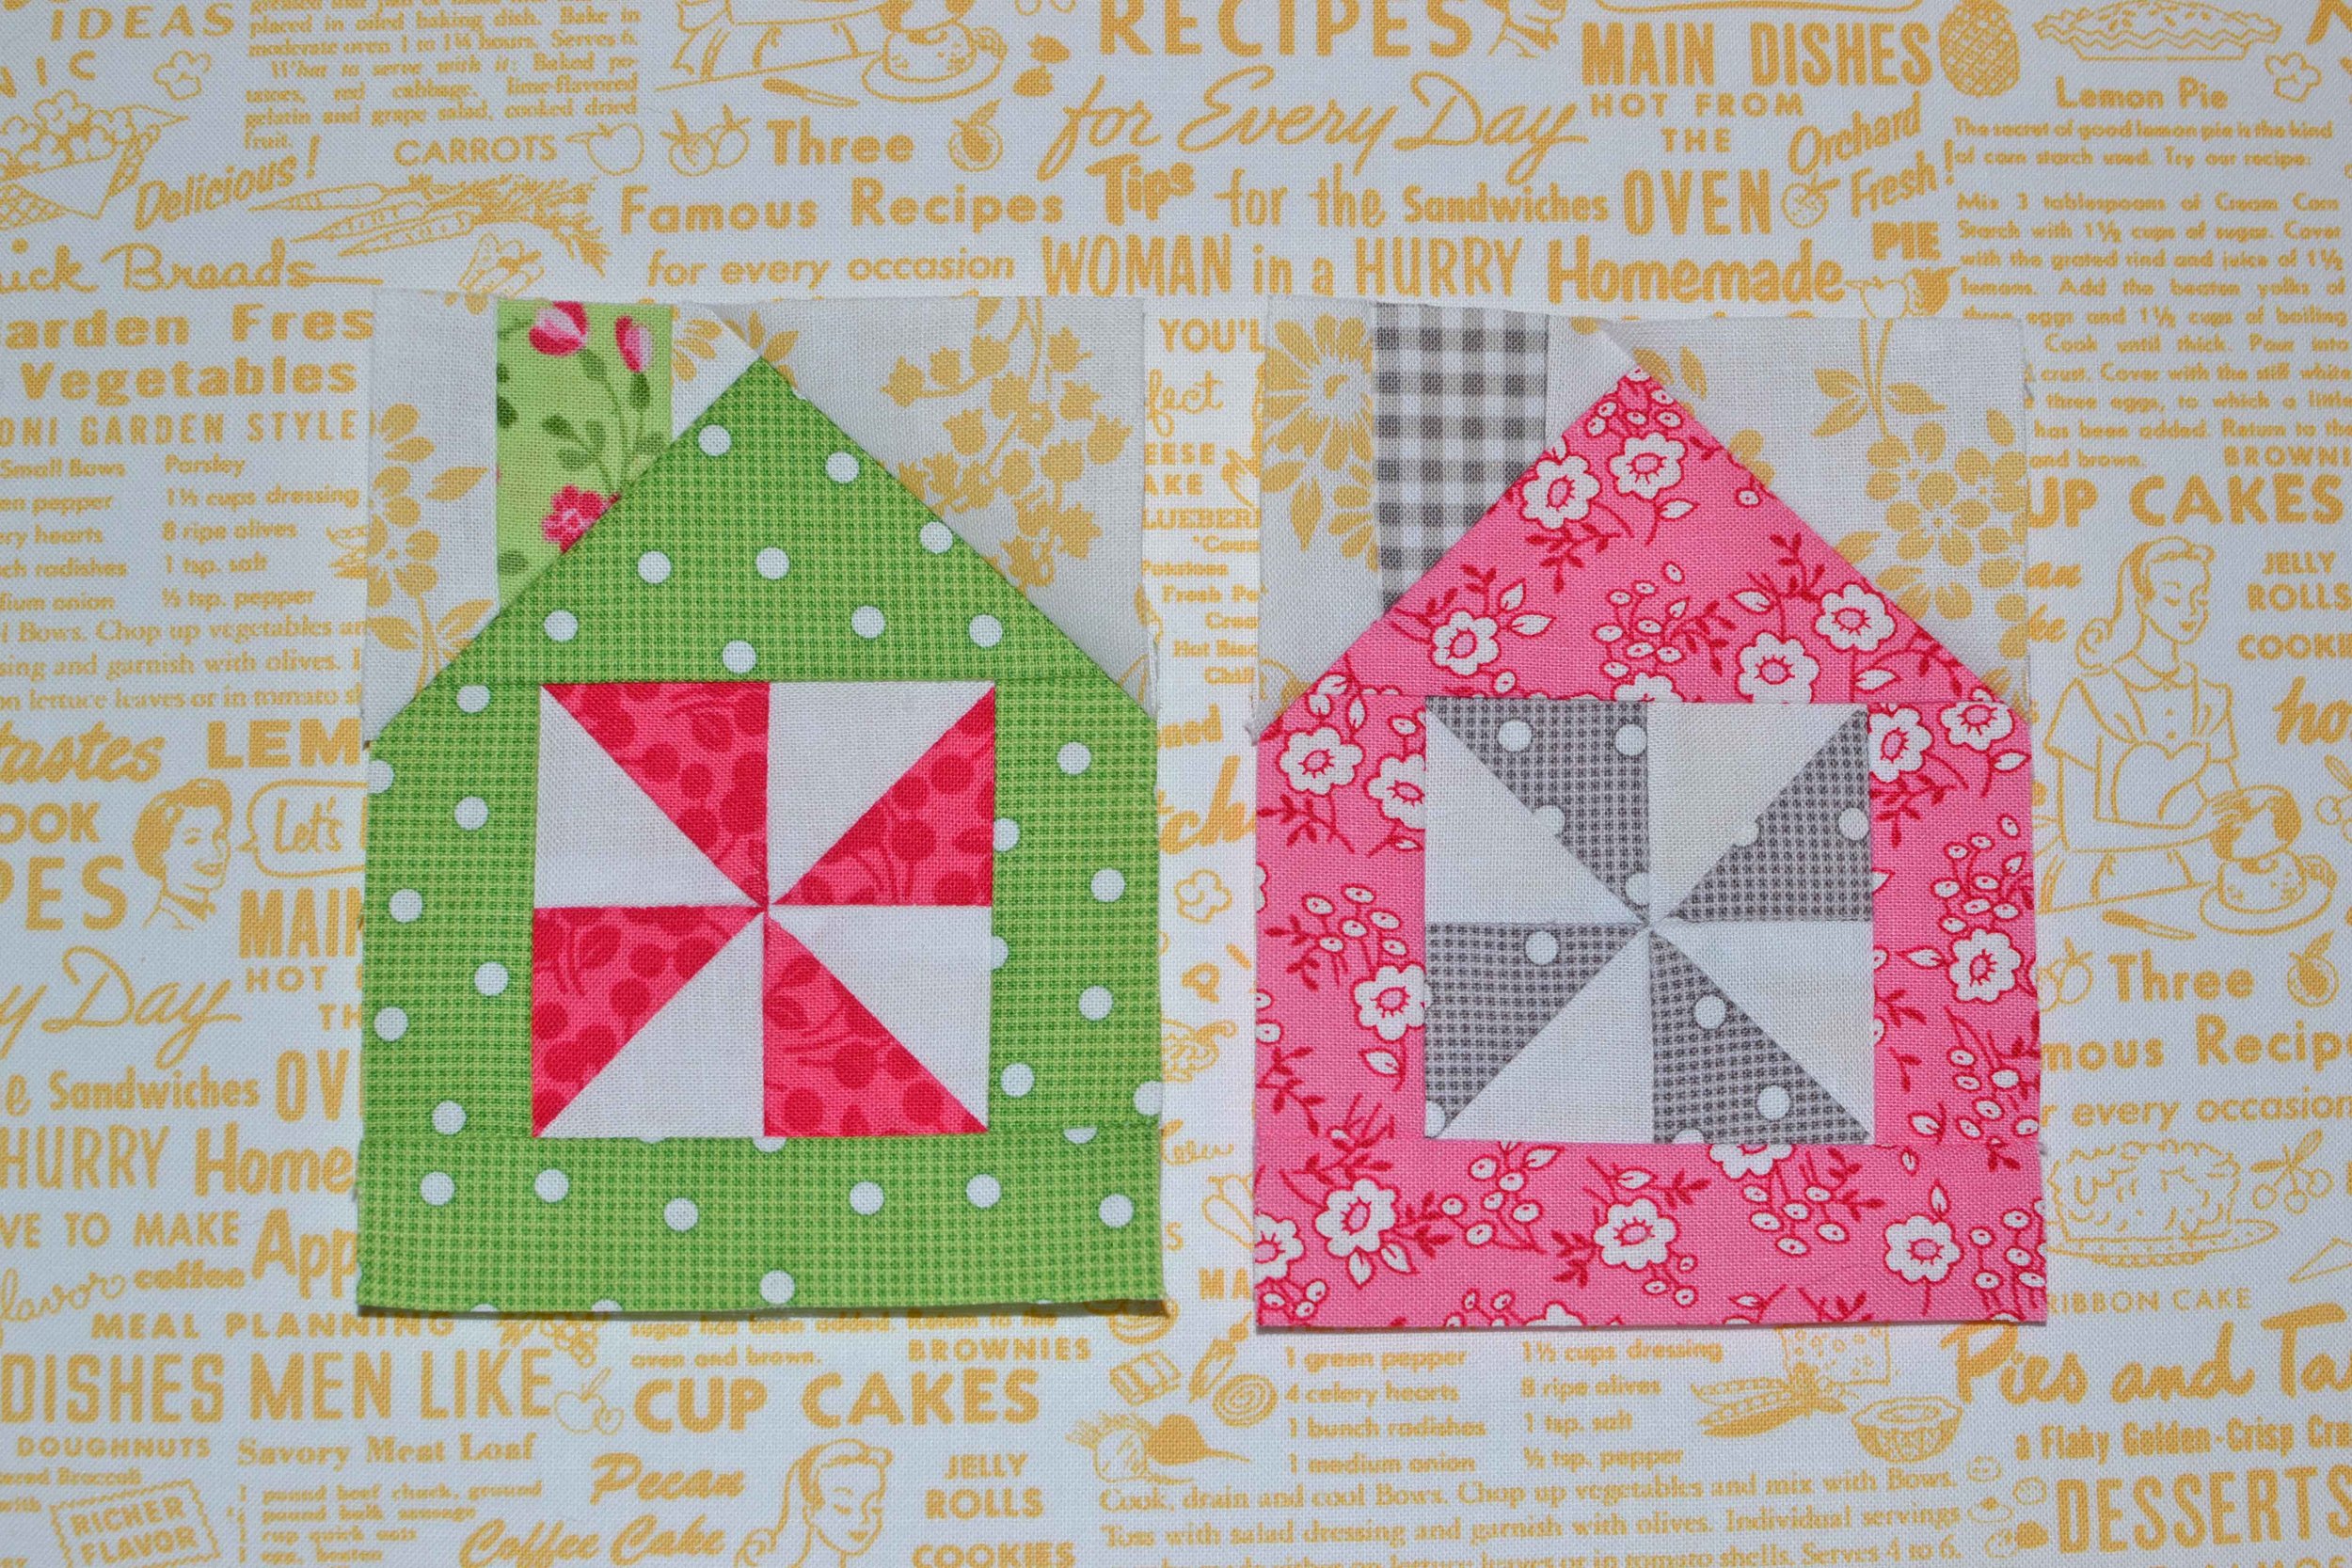
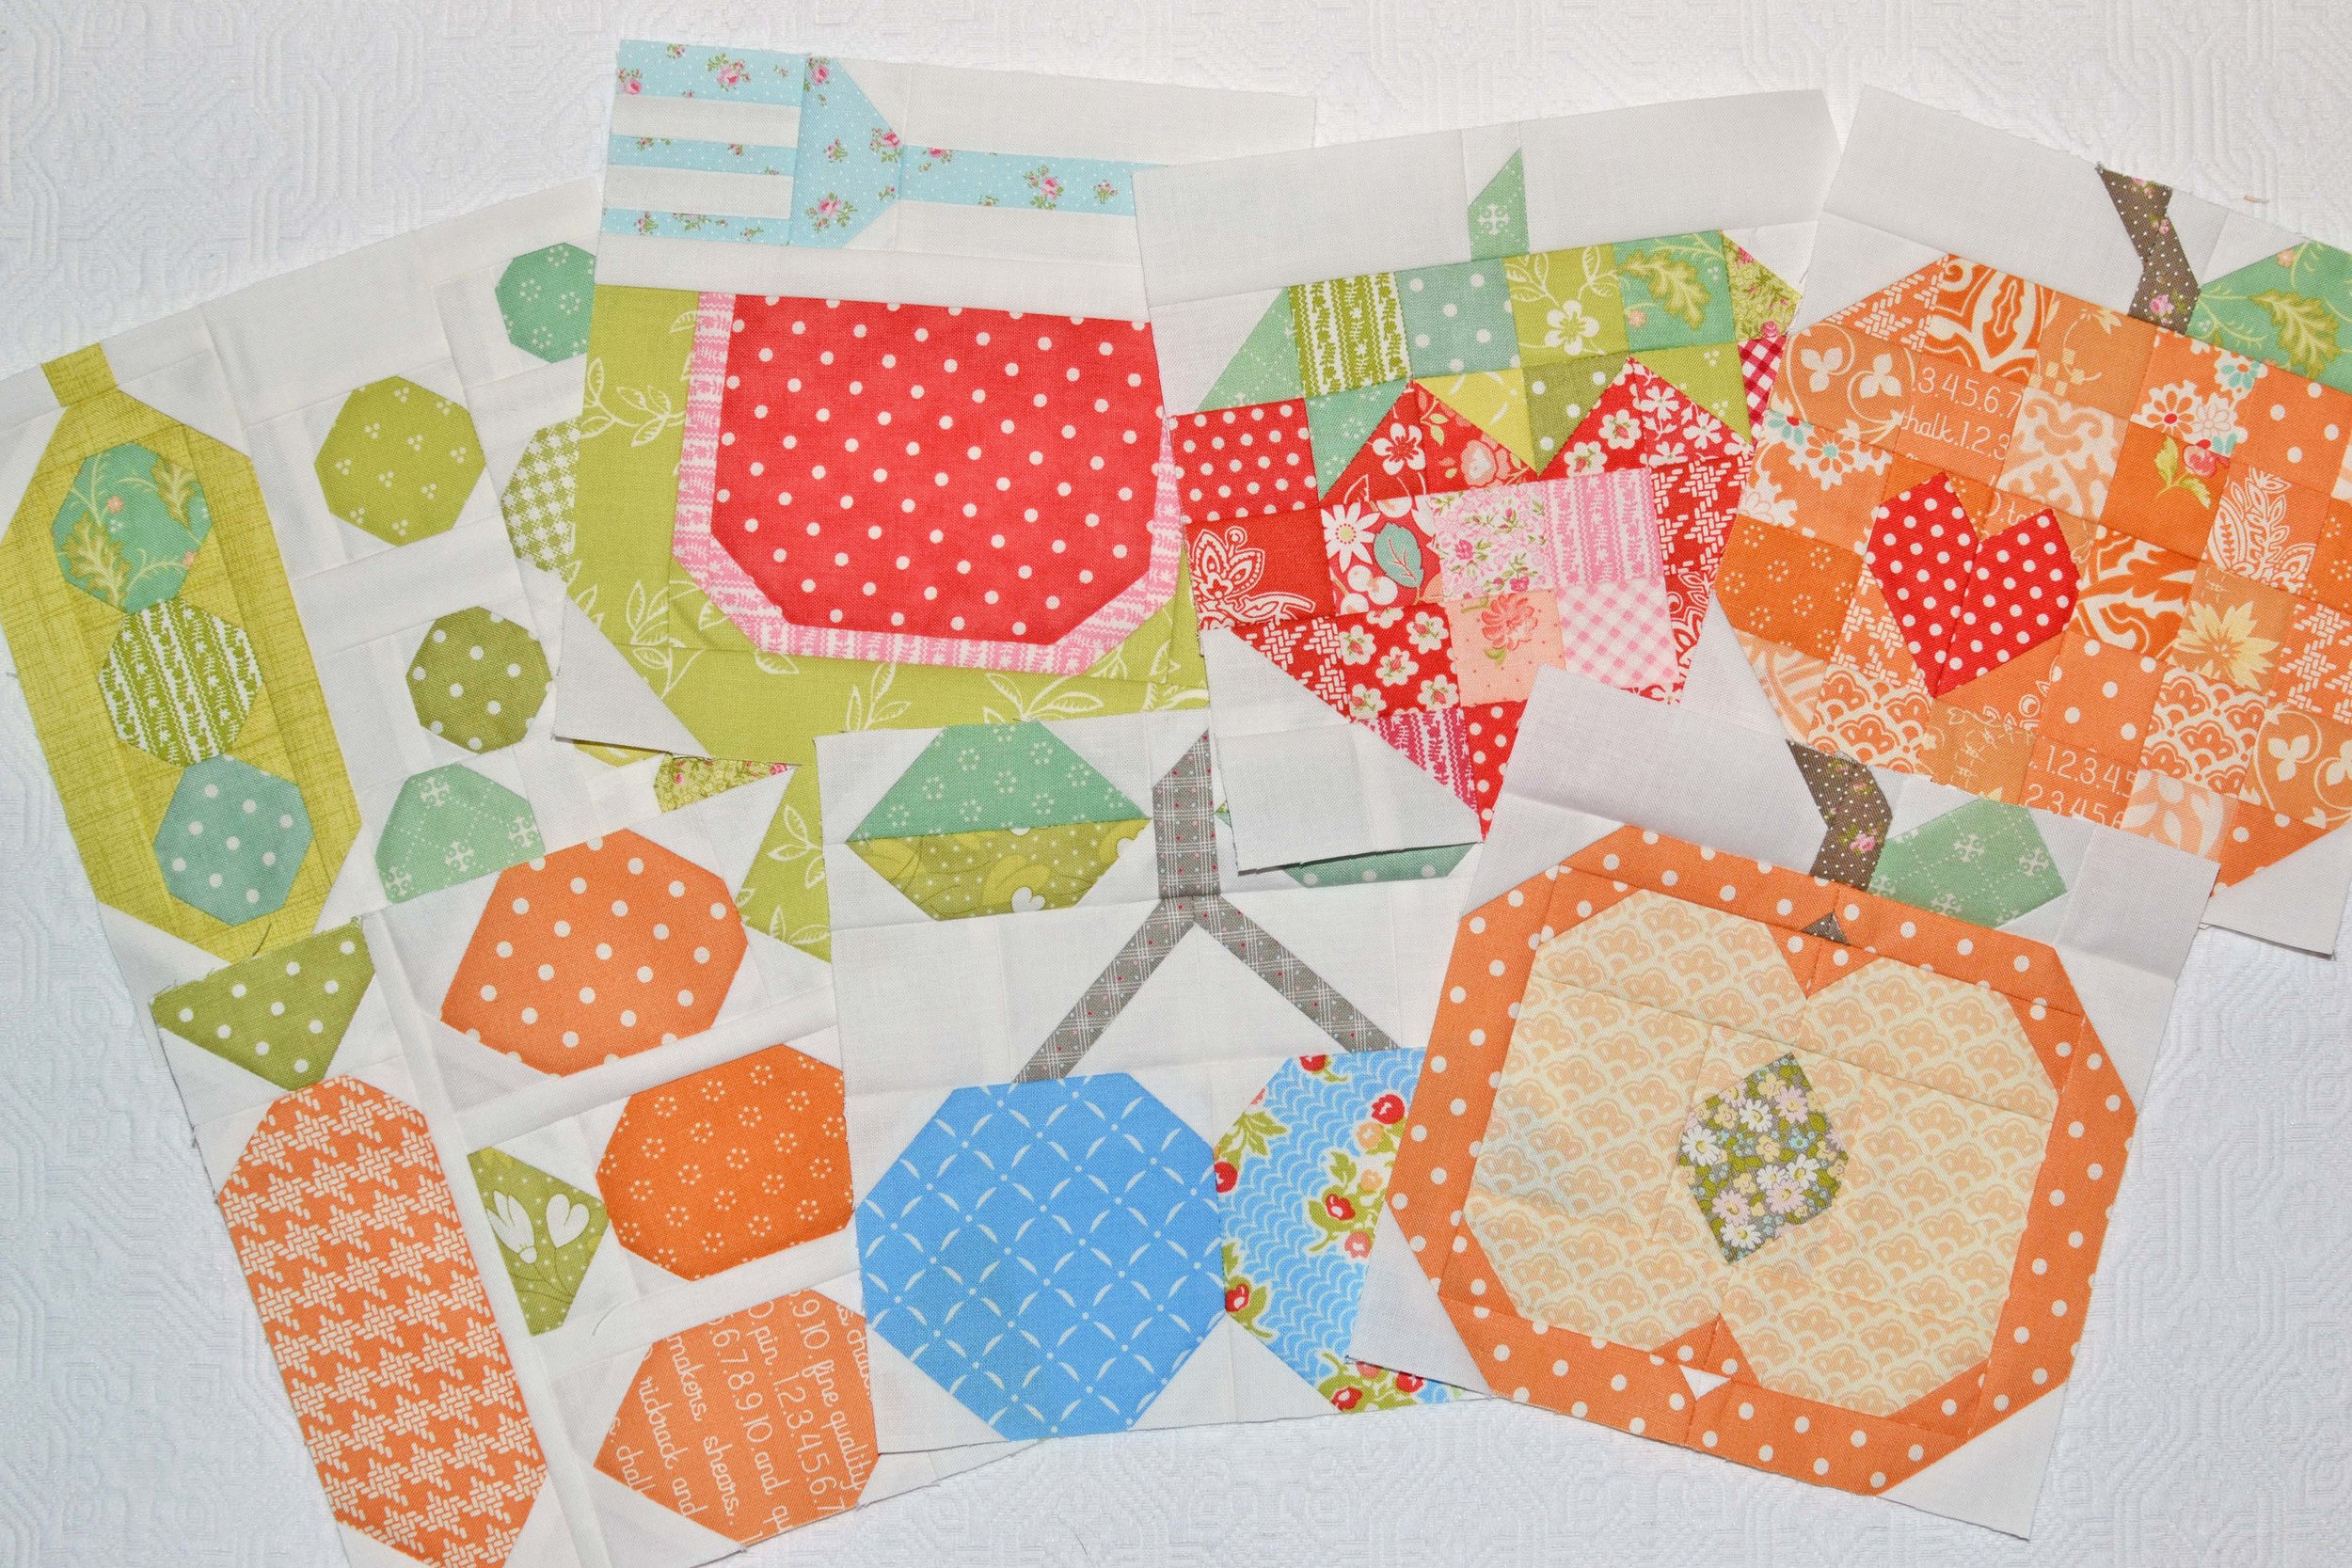
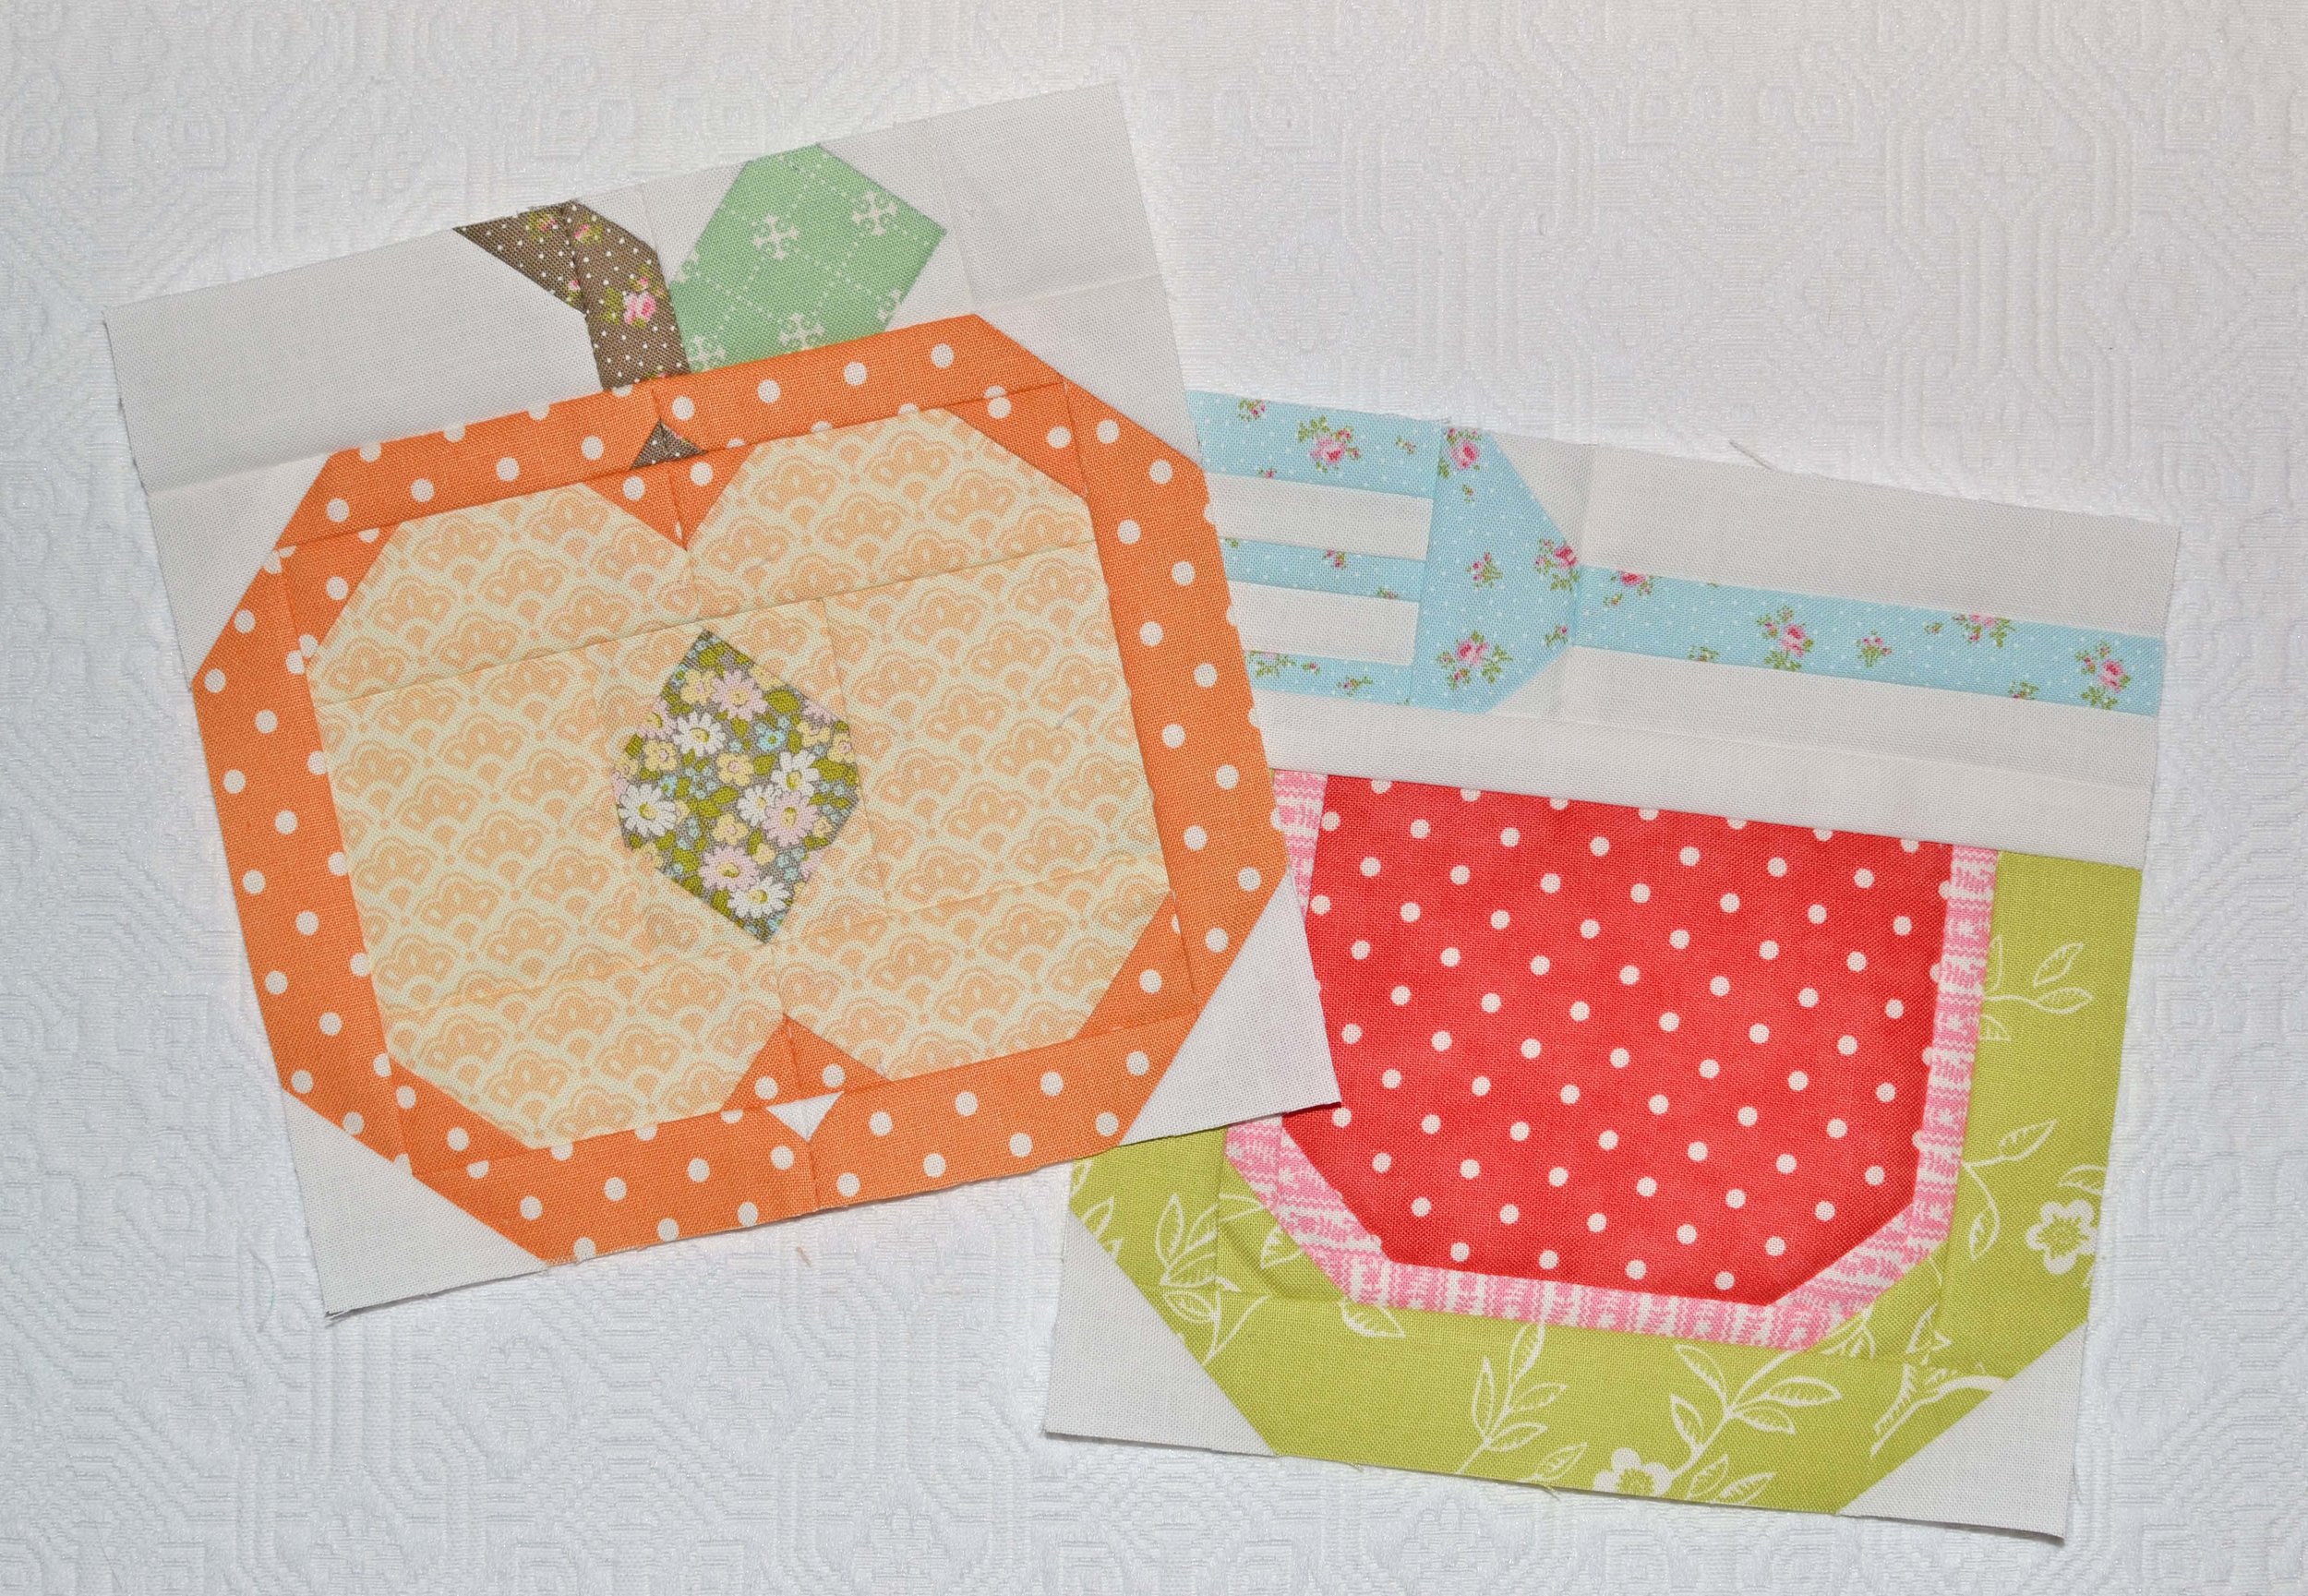
I had plenty of time to sew this past weekend. I've finished some of those blocks-of-the-months and sew-alongs (but I do have a Maggie quilt finish to show you in early November!) and I just wanted something "quick" to sew RIGHT NOW. I thought it was the perfect time to return to those Farm Girl Vintage blocks by Lori Holt. It's been months since I've worked on them, and I really want to get that sampler quilt done! First up, Garden Carrots and Shelling Peas blocks.

These blocks make me laugh. I use carrots in cooking all the time. But peas, not so much. I absolutely hated peas when I was a kid (why, oh why, did my parents insist that I eat them?!) and I still avoid them. But oddly, I love sugar snap peas and I can eat them freshly washed or tossed into pasta with basil pesto. And lately, I've started to add baby frozen peas into risotto, soup and creamy pastas.

Betcha didn't know you'd be getting a cooking lesson here today, right?!

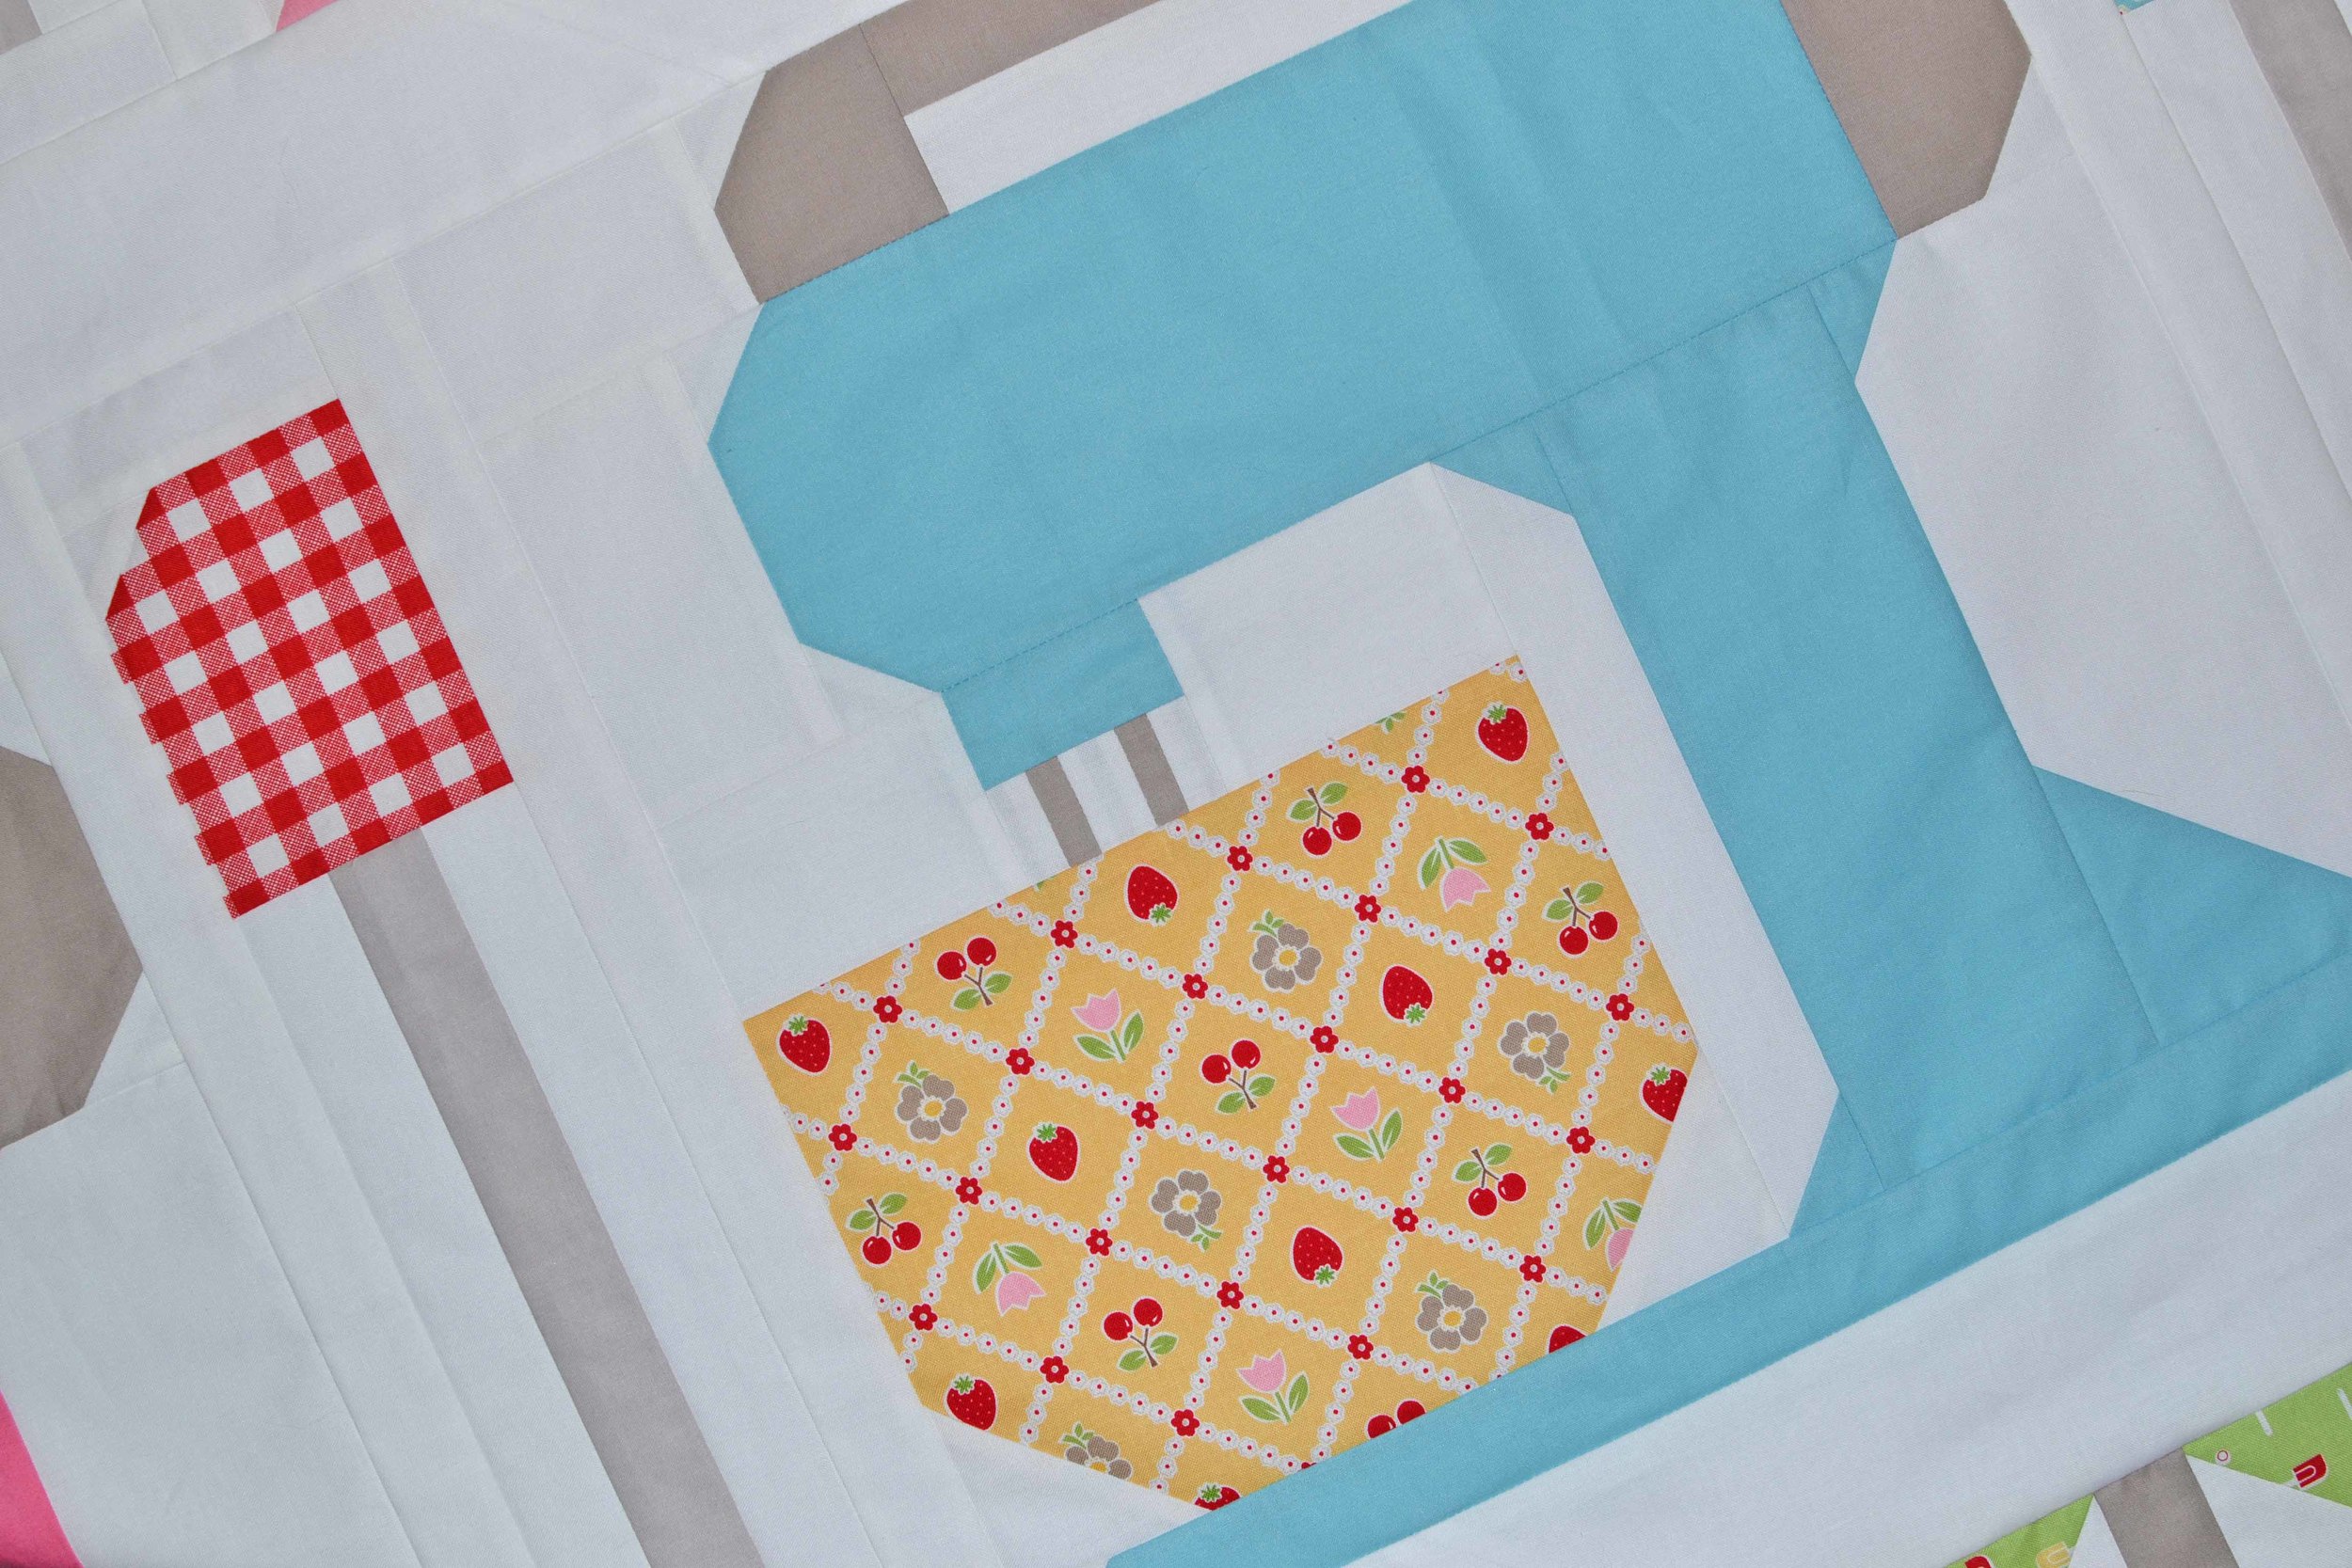
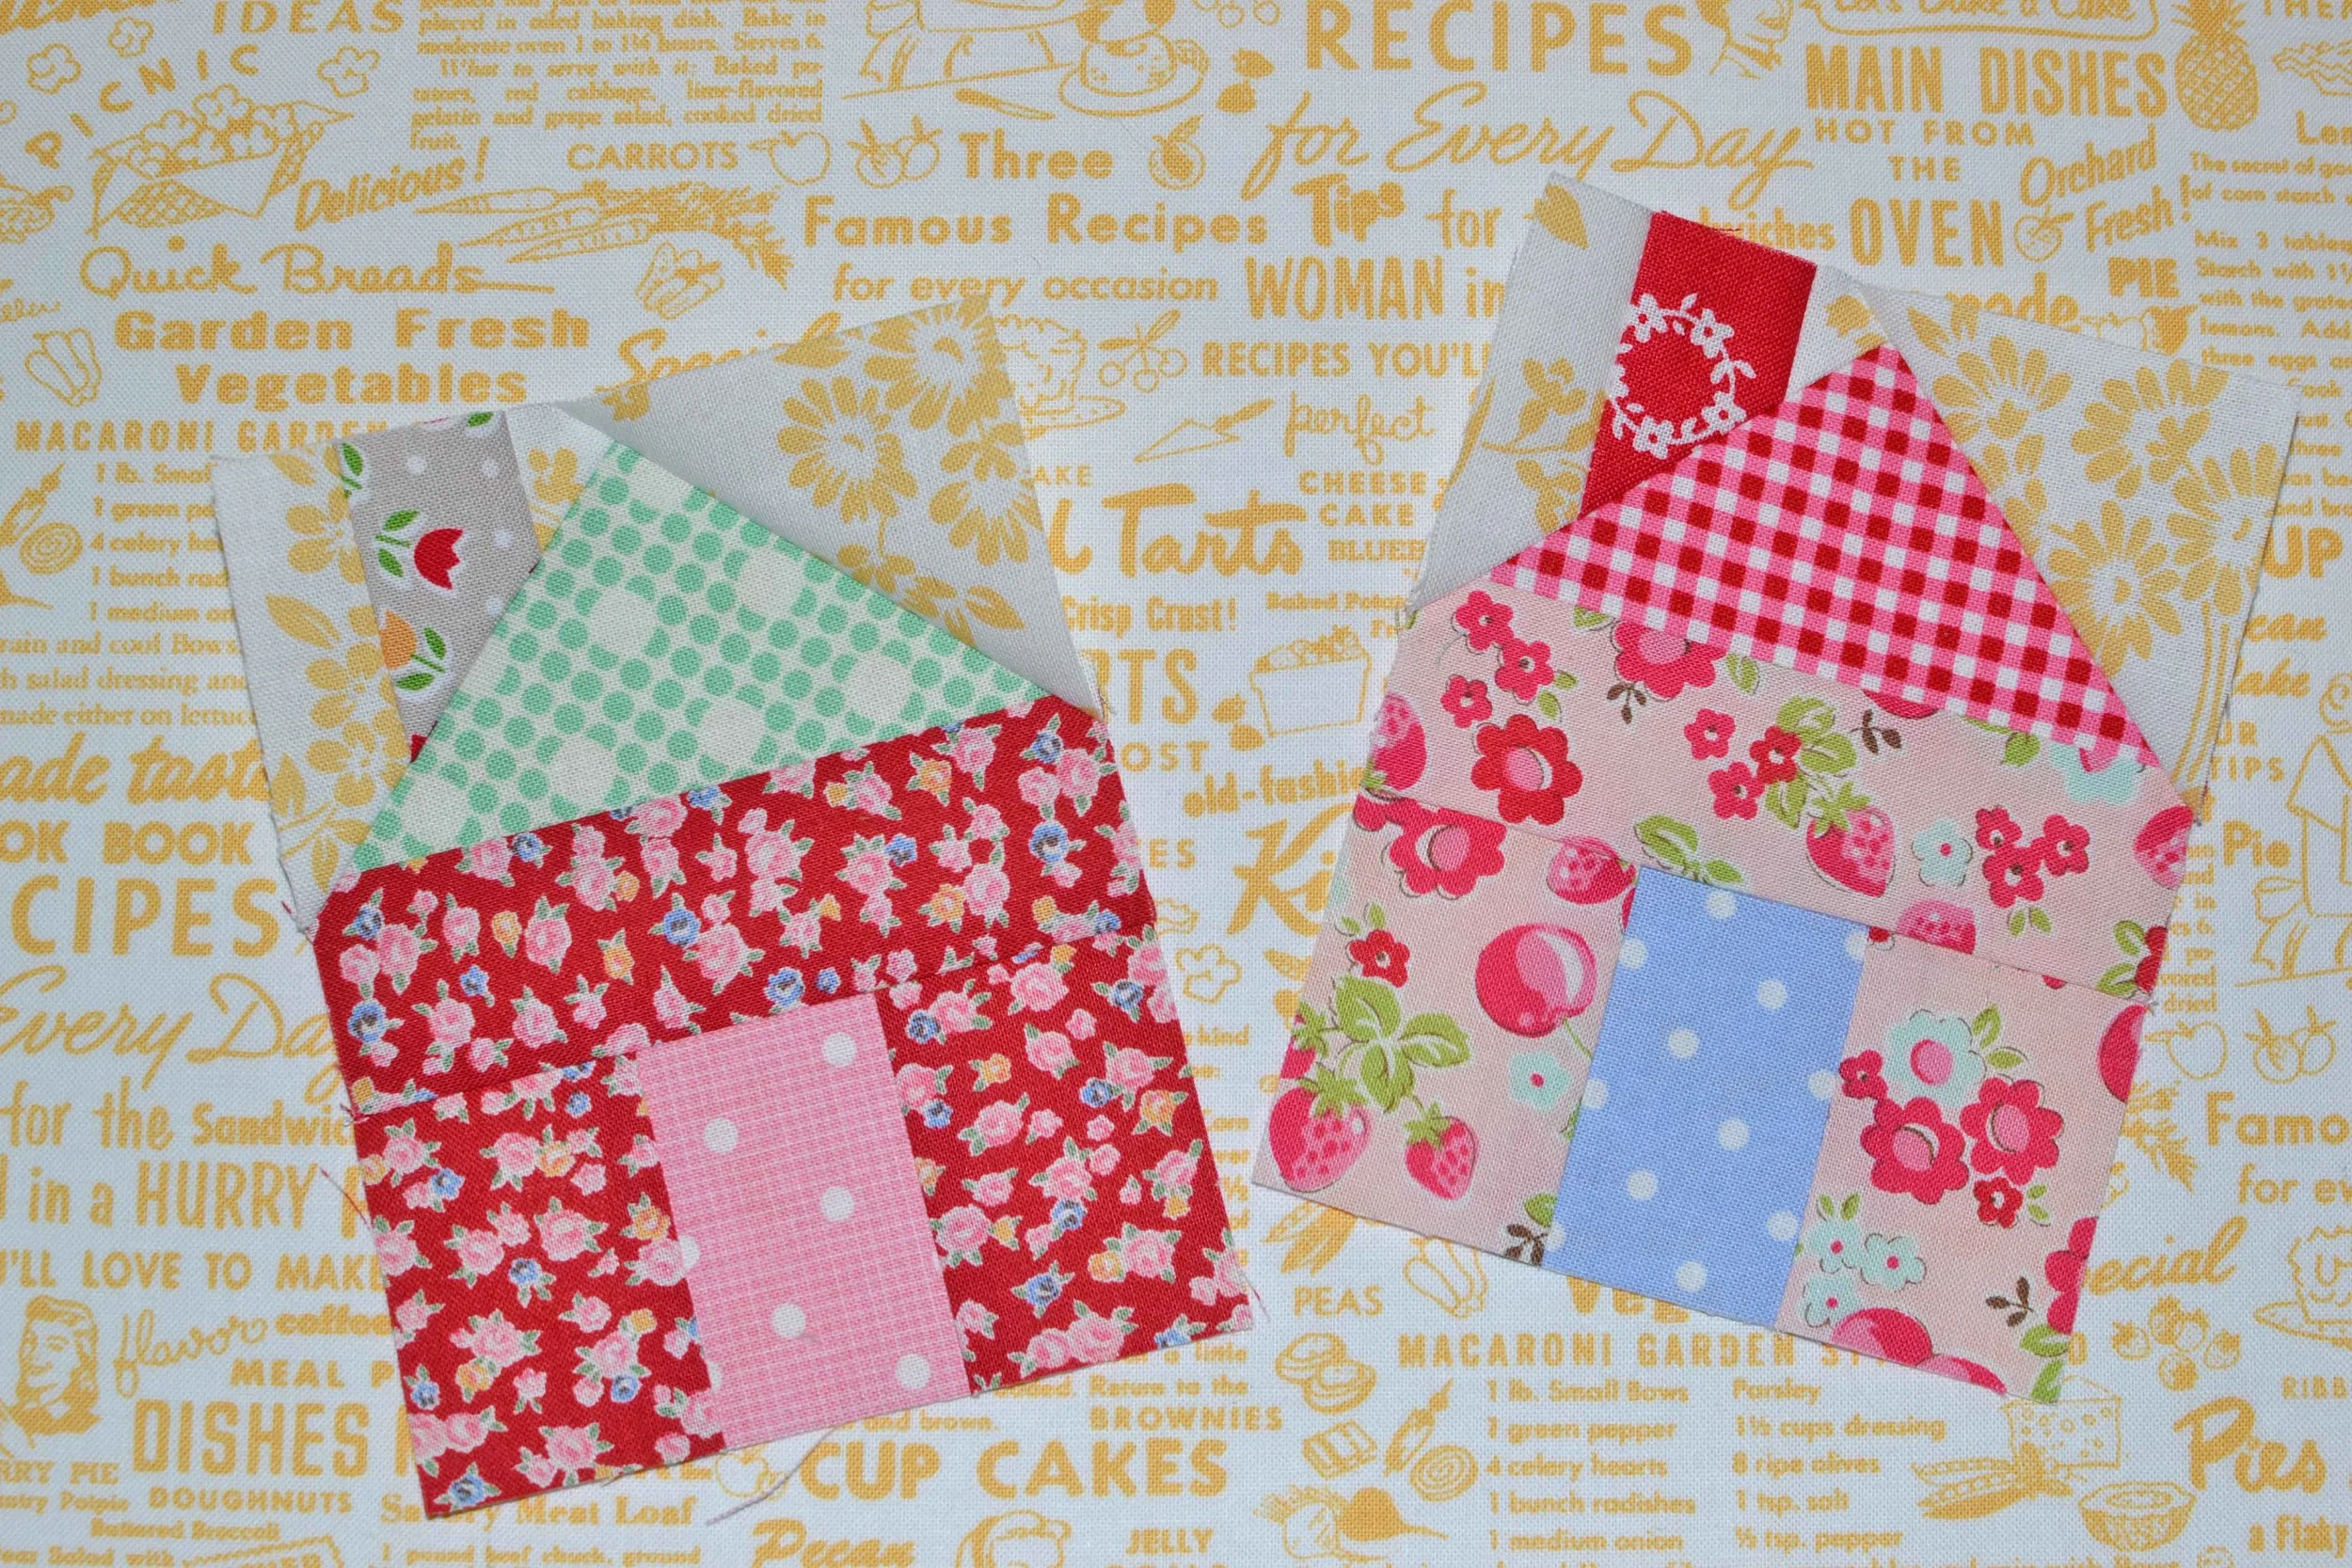
Next, Summer Peach and Cold Watermelon blocks.

I'm using a mix of mostly Fig Tree along with Brenda Riddle fabrics for my blocks. I think that they complement each other really nicely. There are two really tiny mistakes with the peach block that I've decided I can live with, but you wouldn't even know it unless you compared the block to the pattern. It's a deliciously imperfect peach, just like the peaches that resulted in this summer's yummy cobbler (recipe here) and a disastrously icy ice cream (recipe in trash).

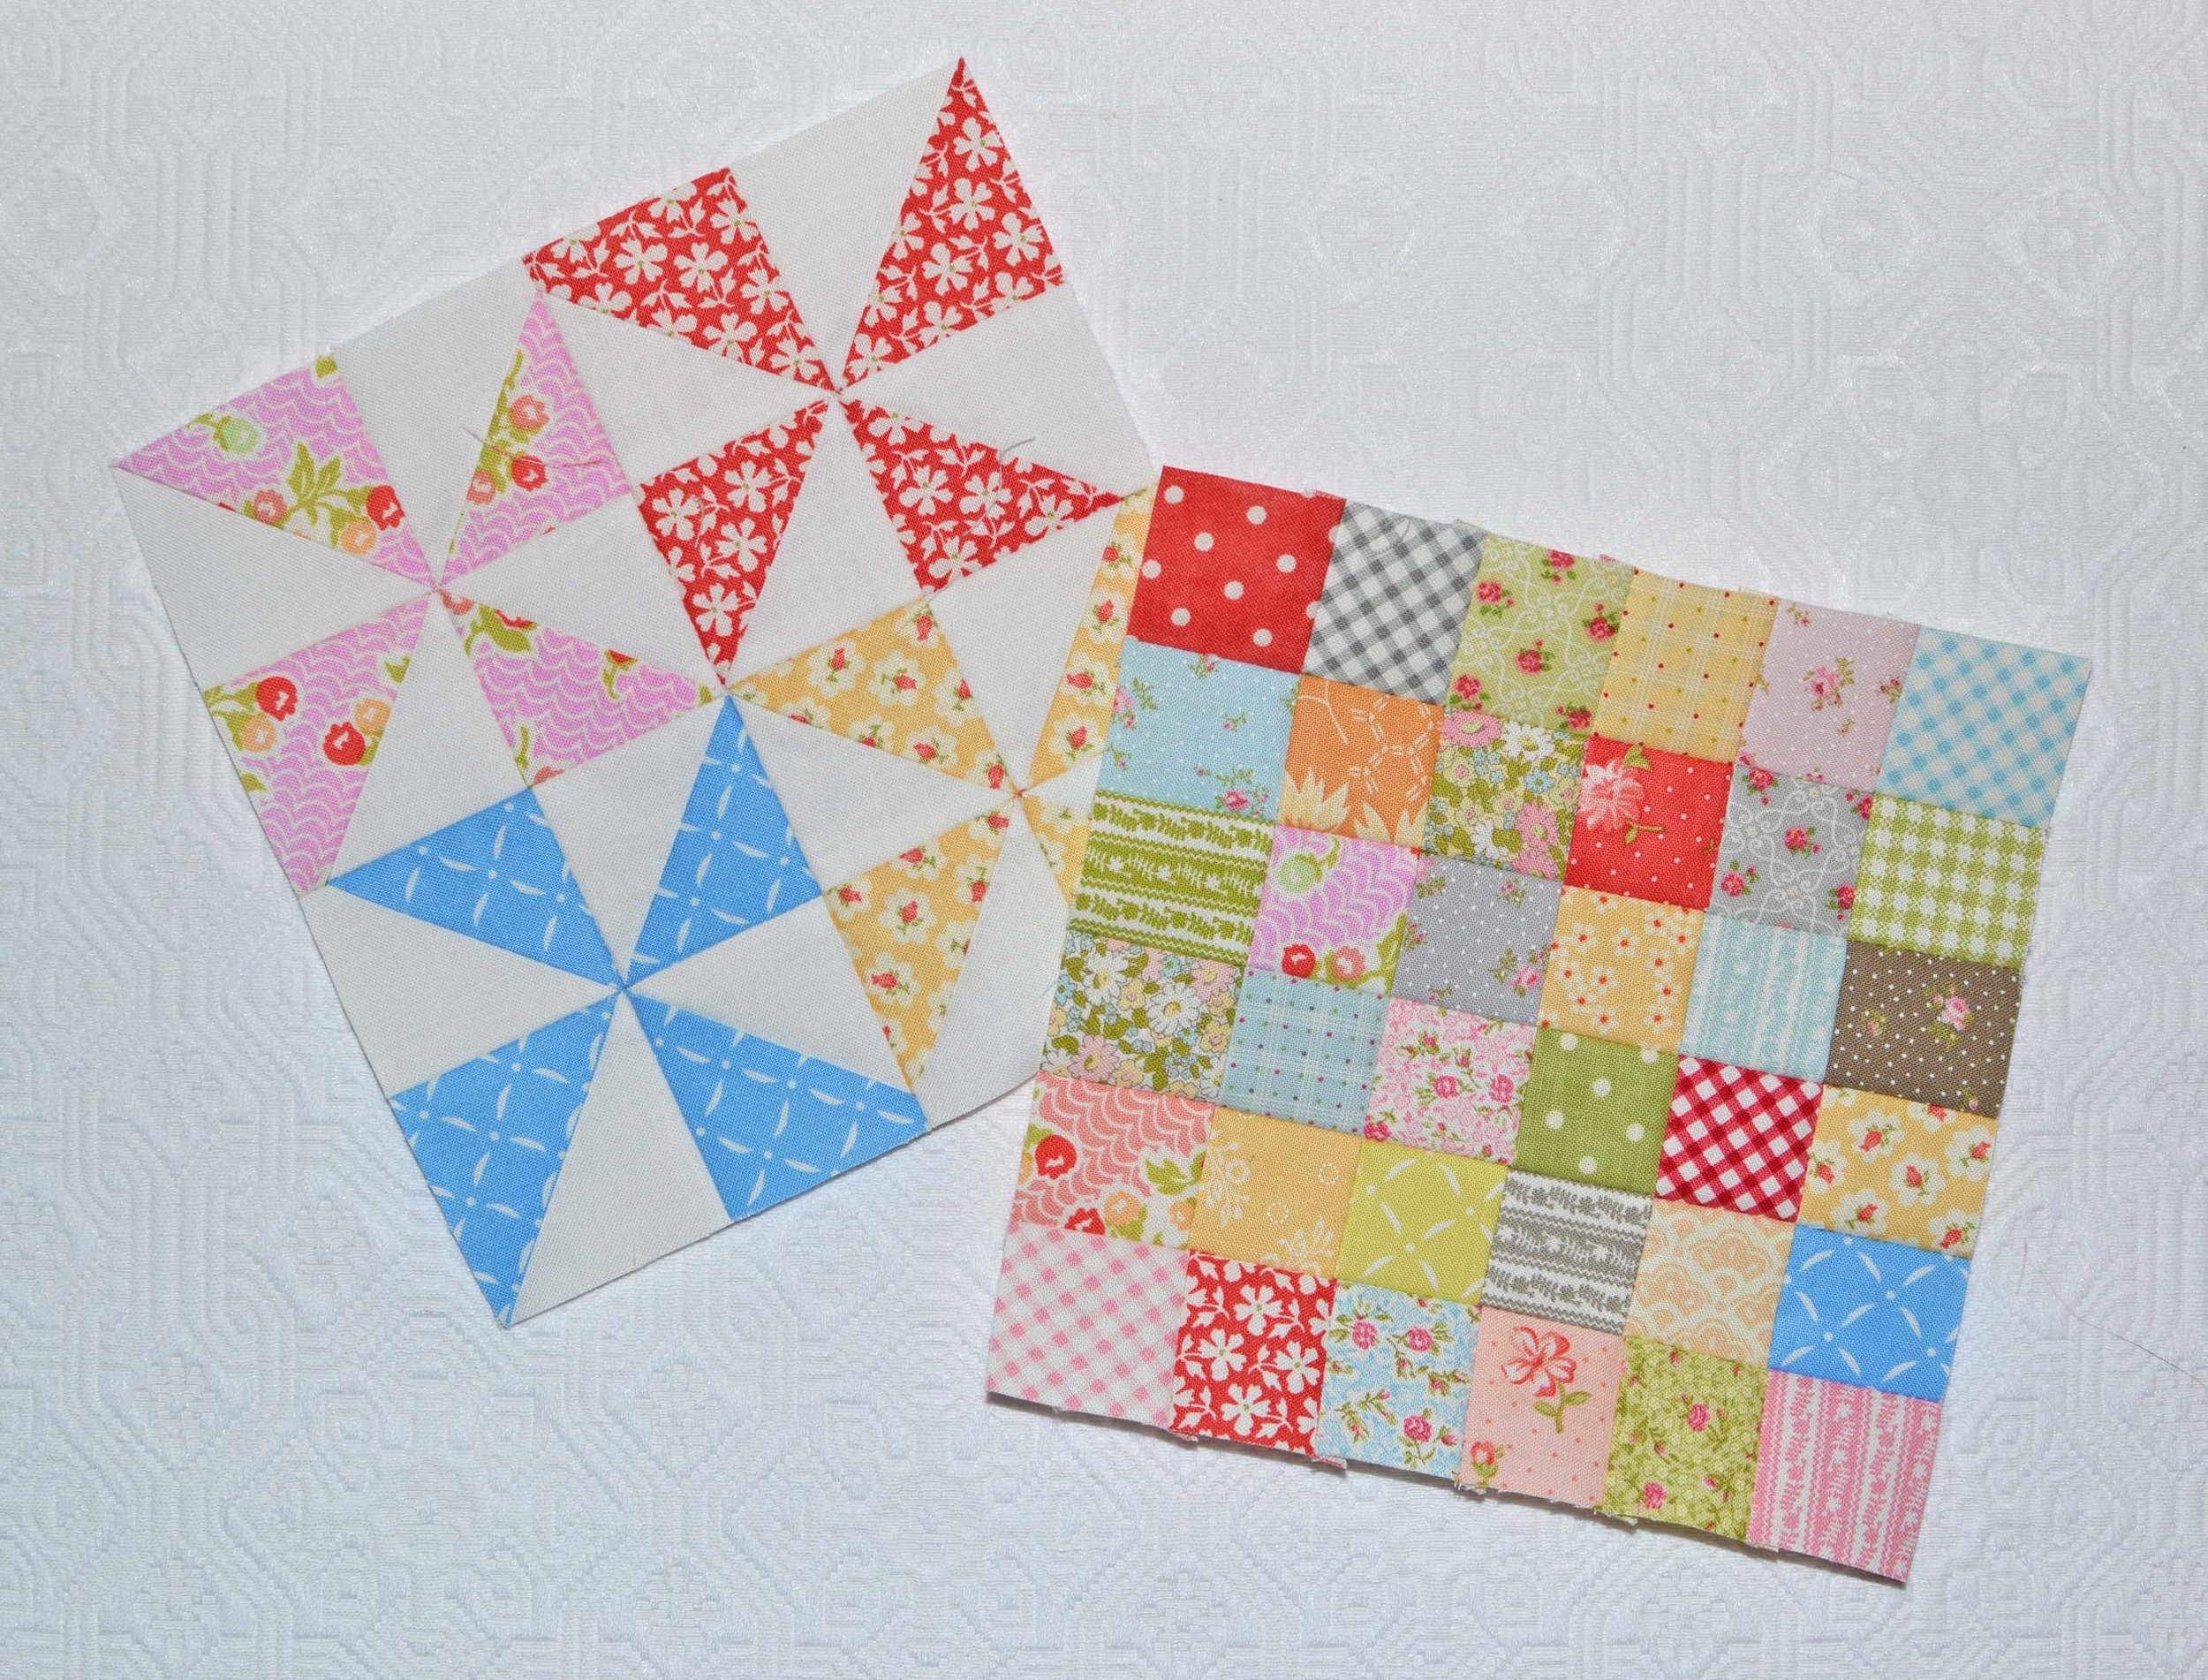
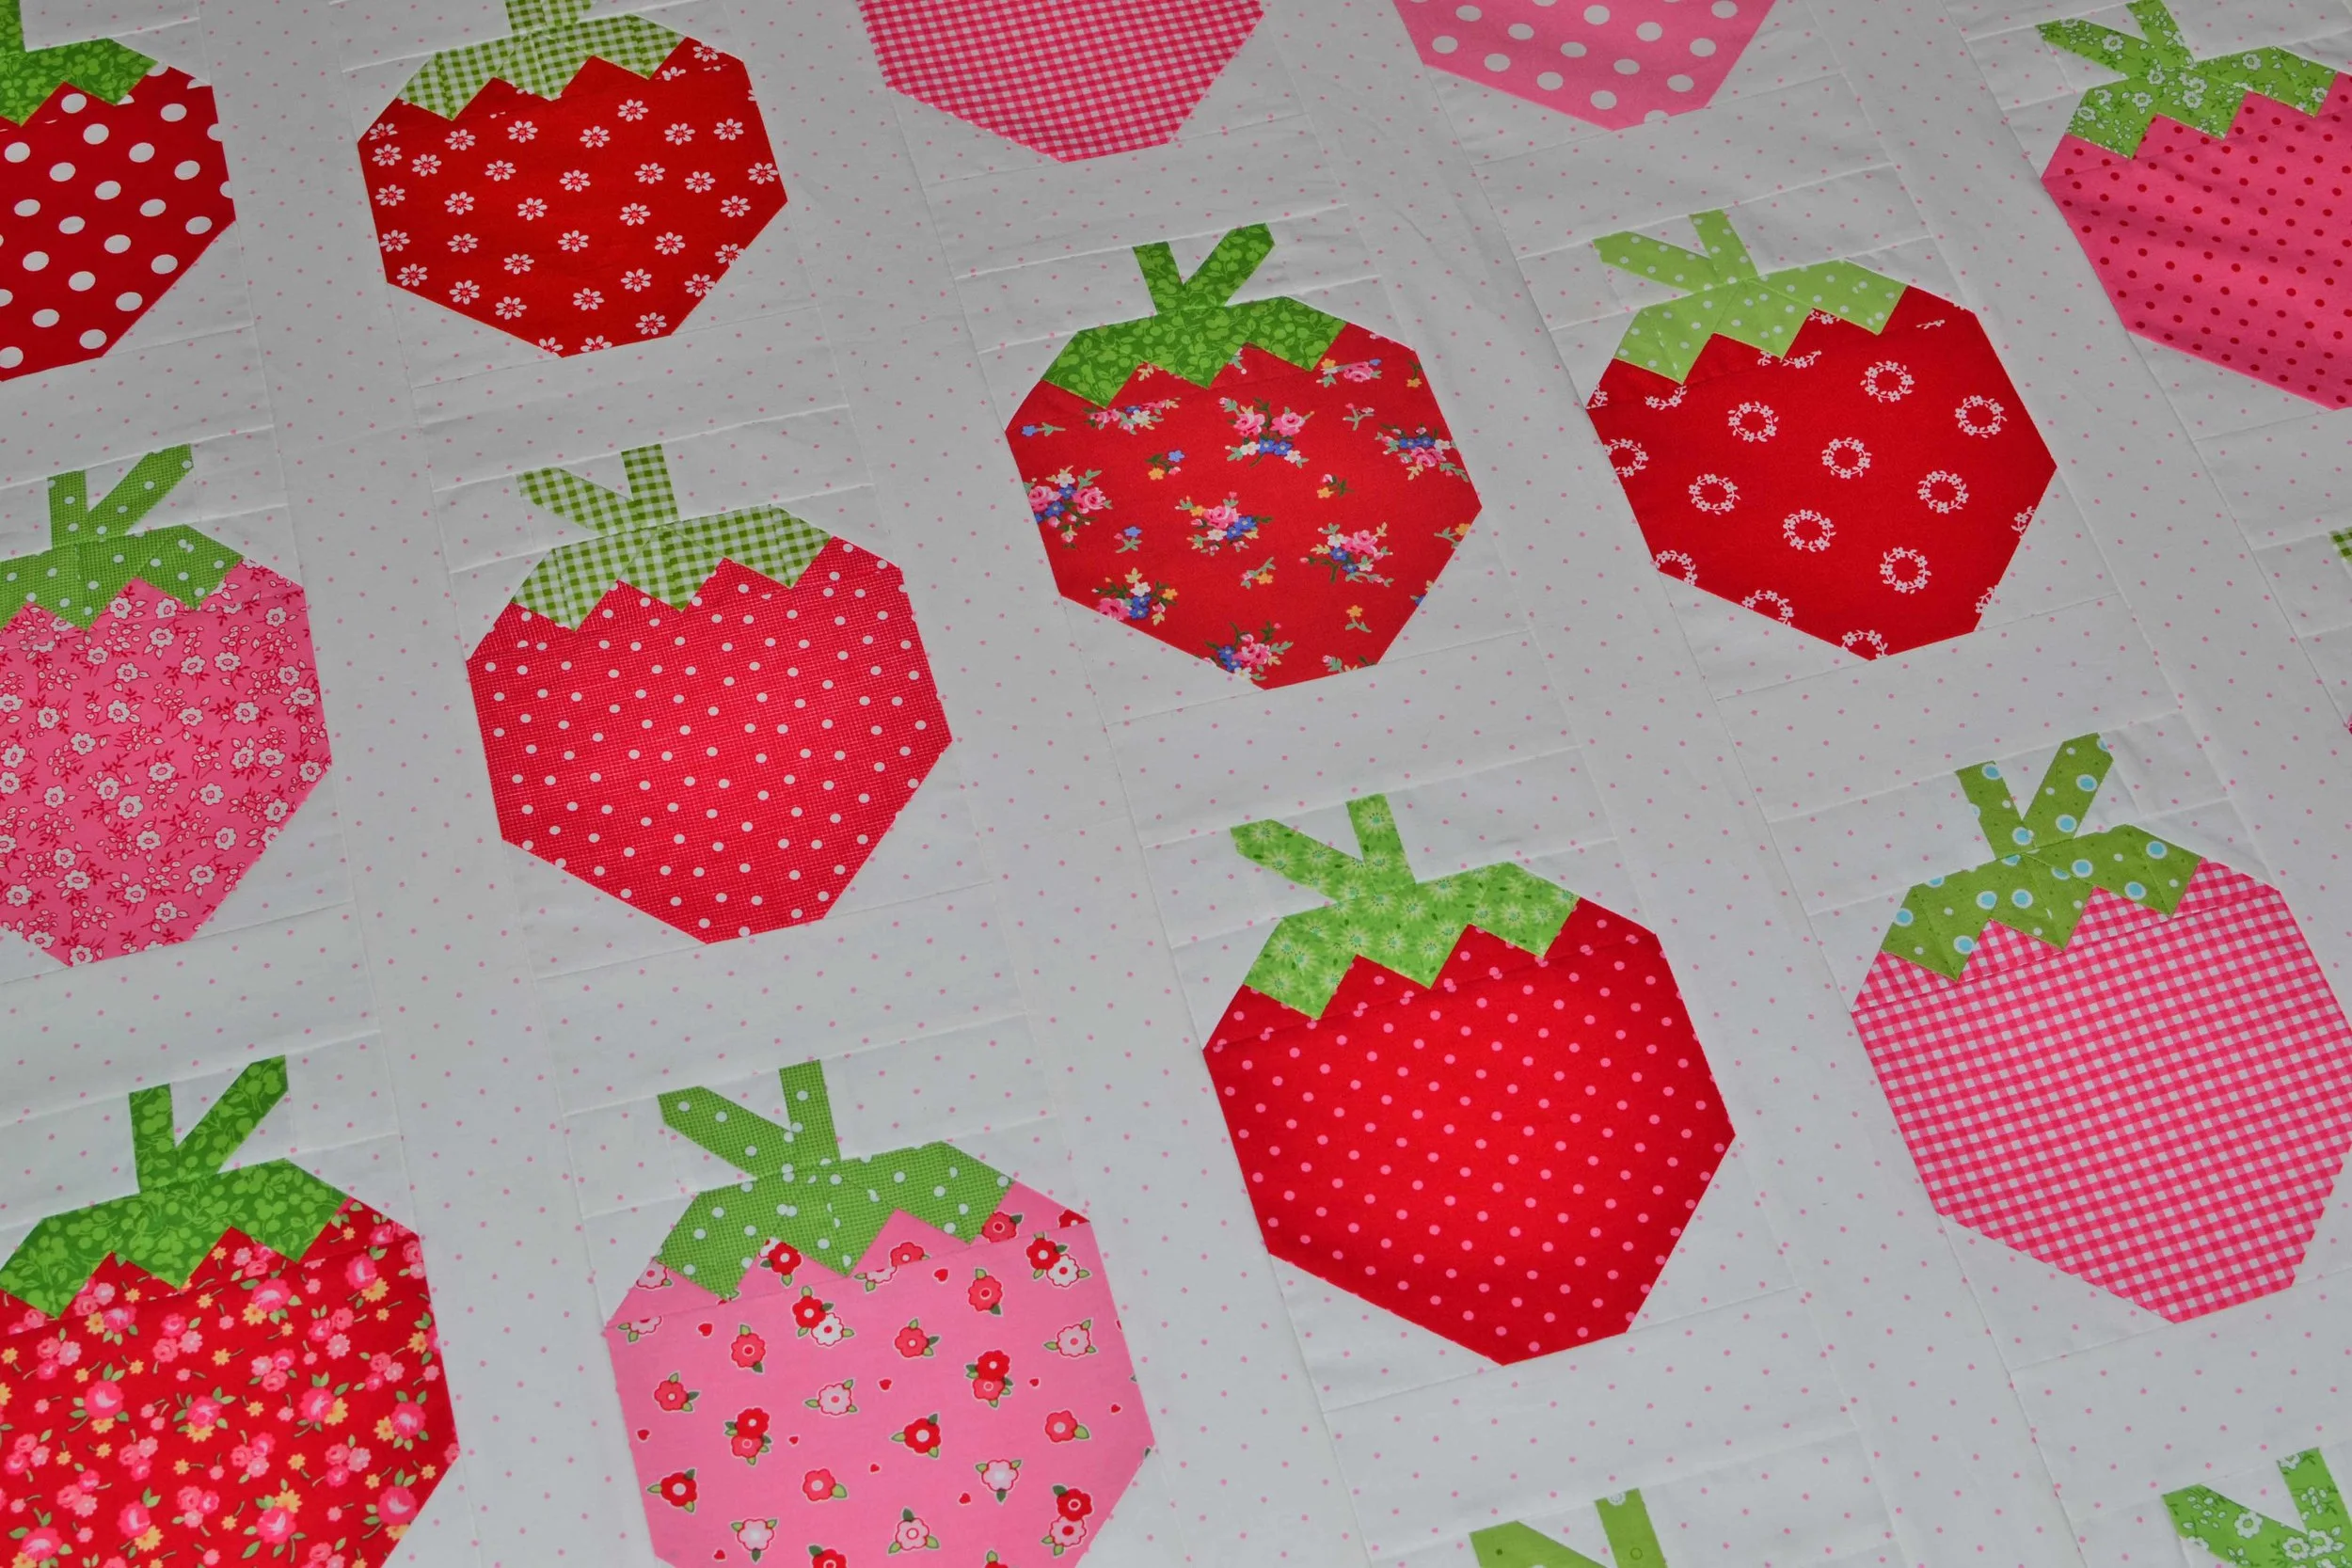
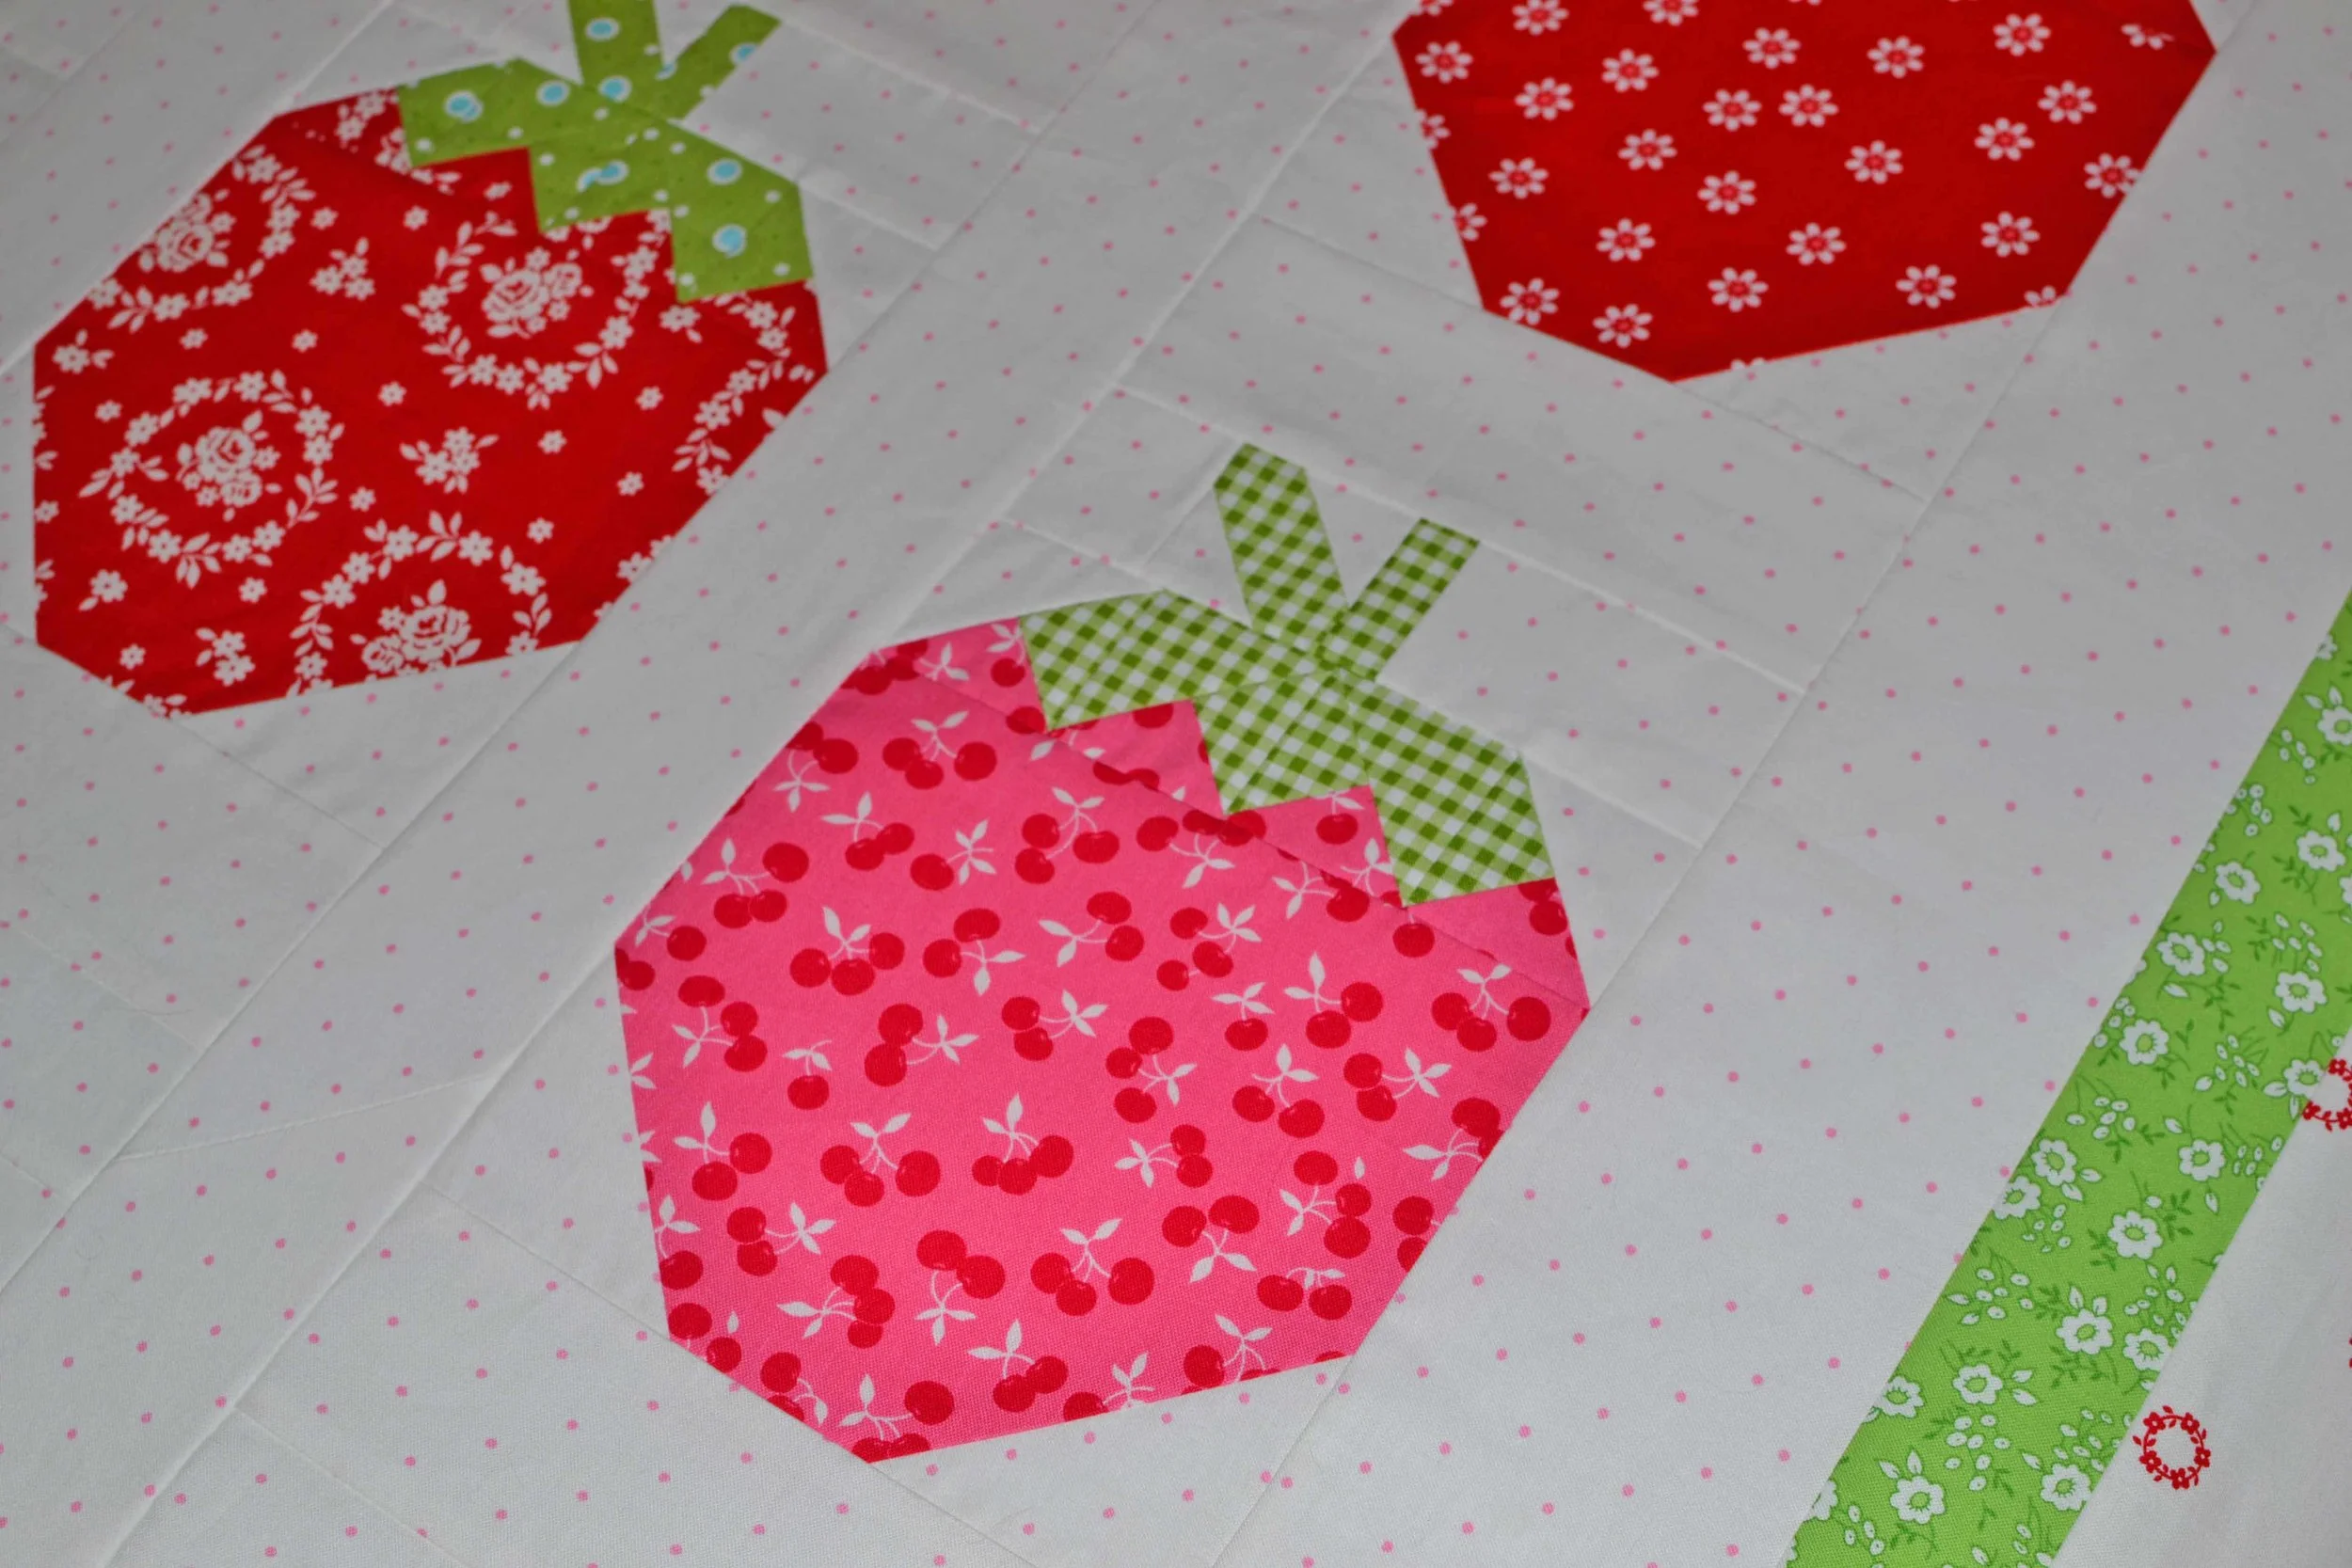
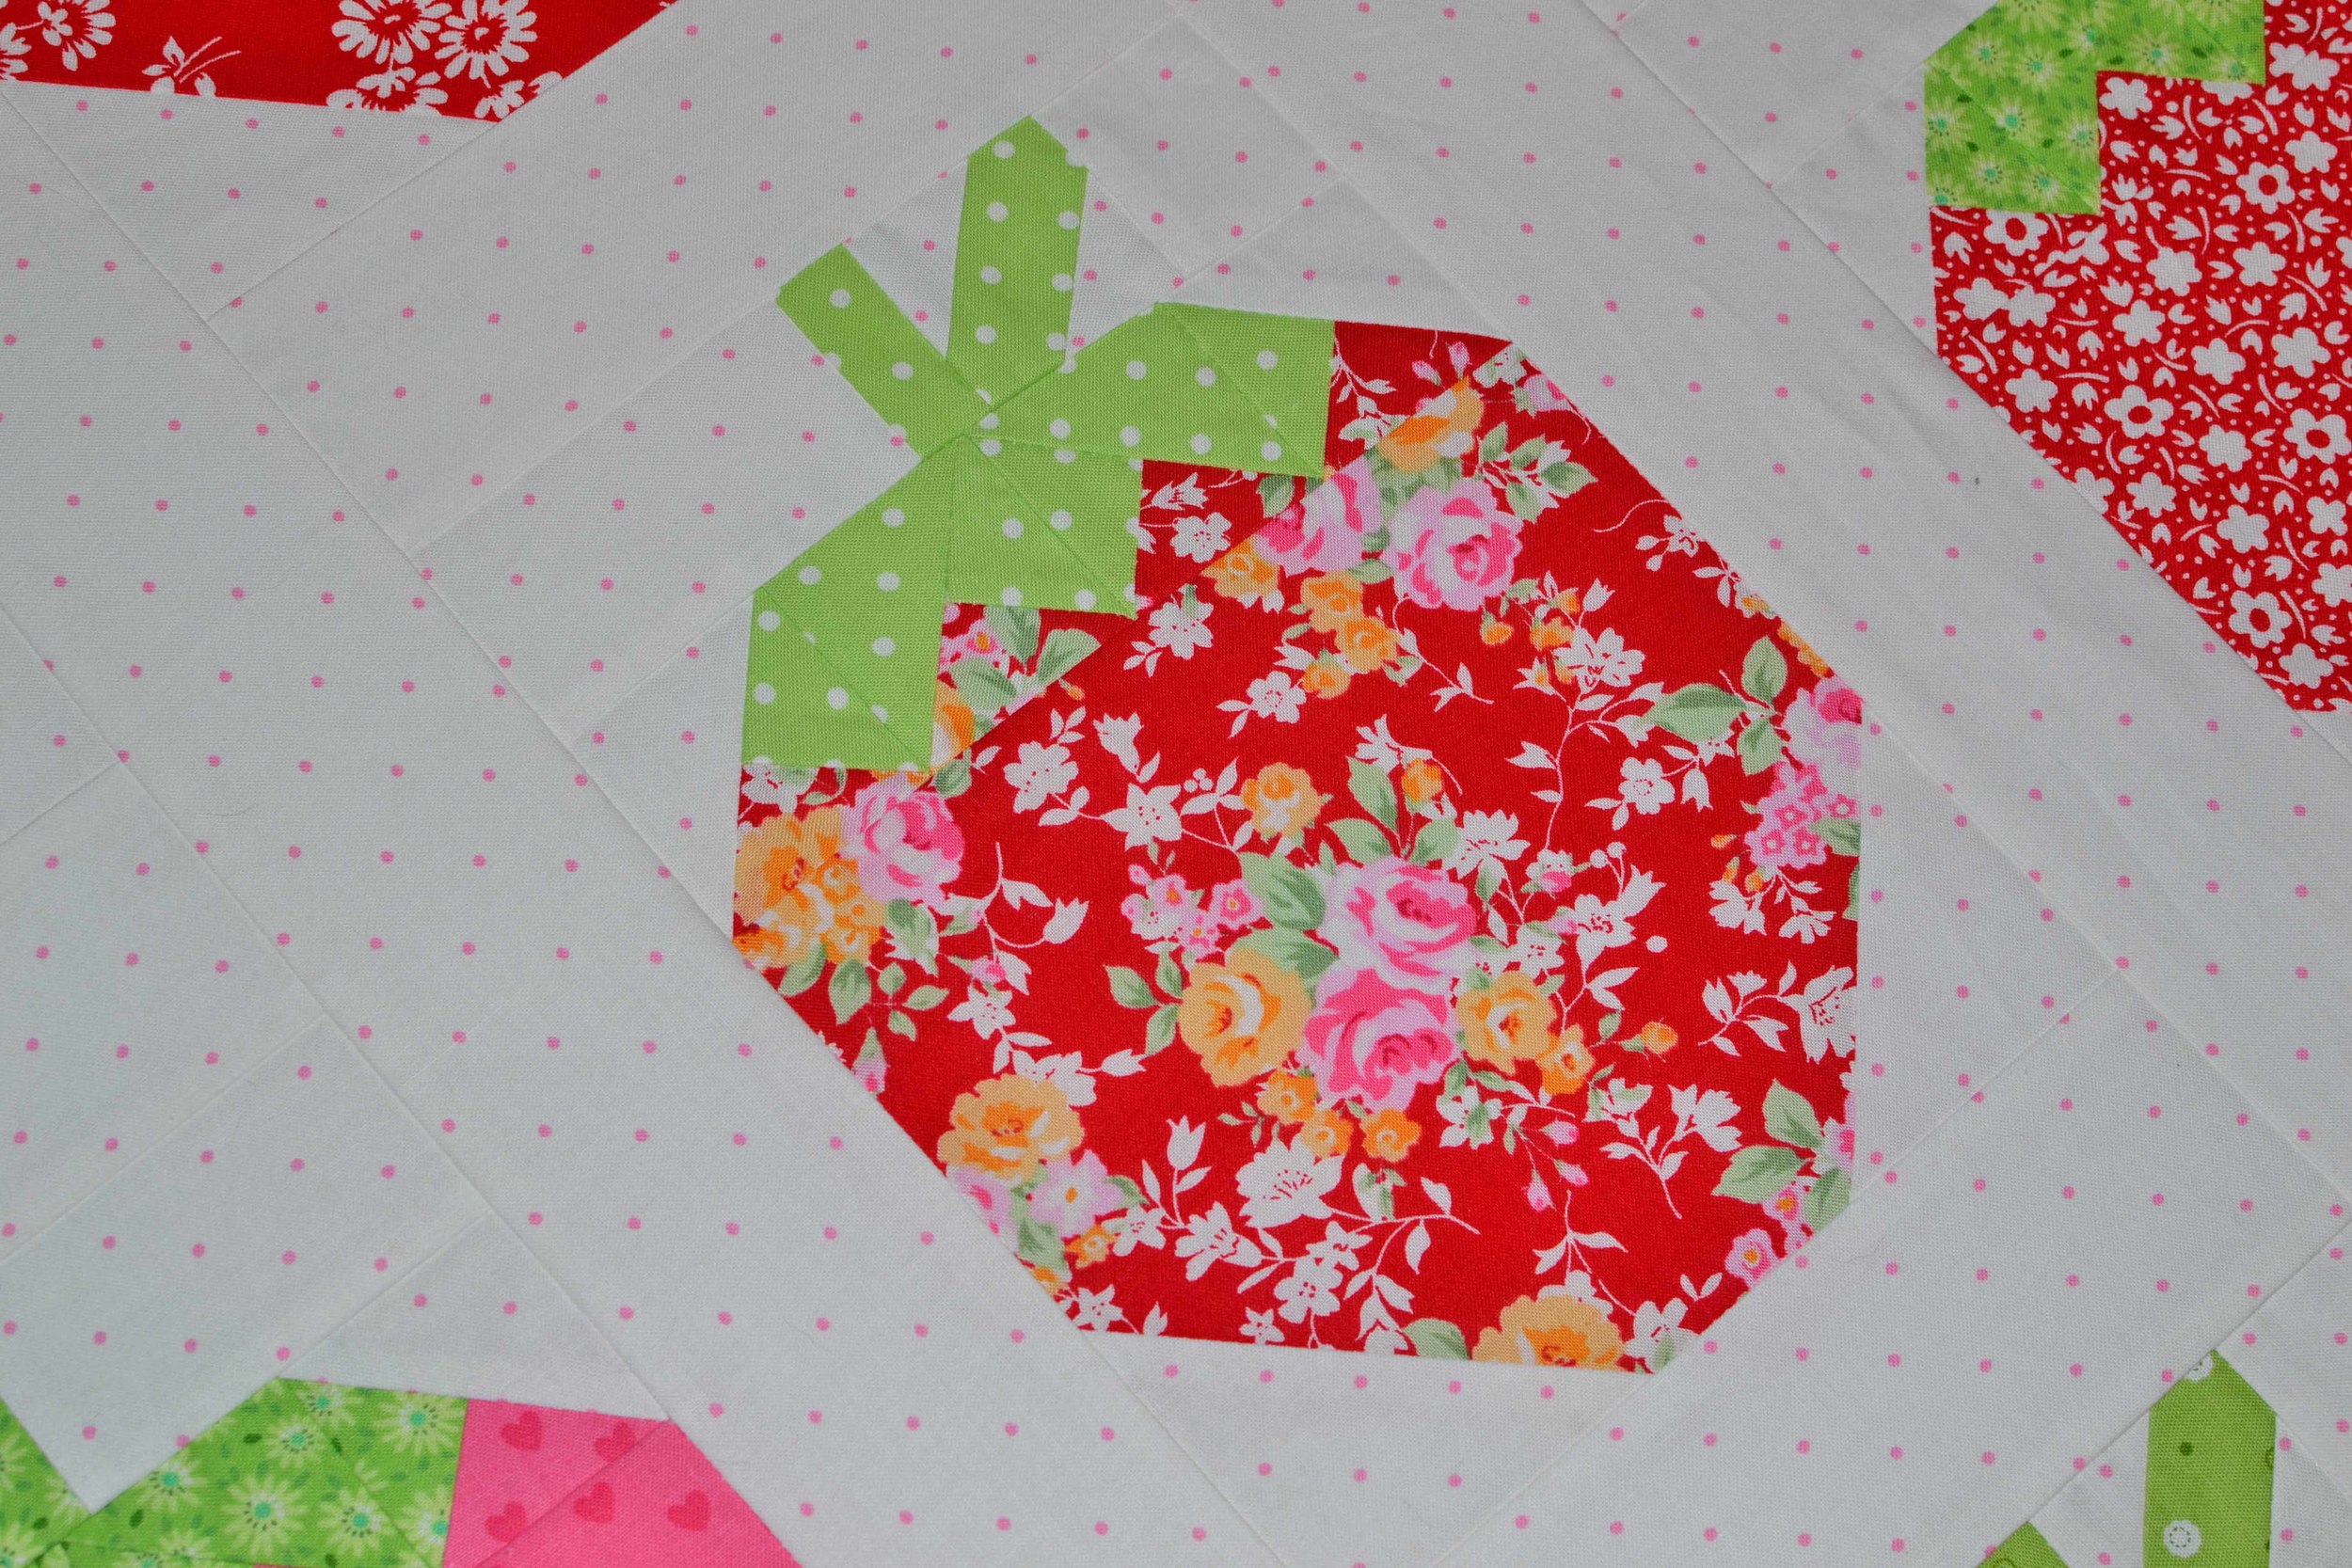
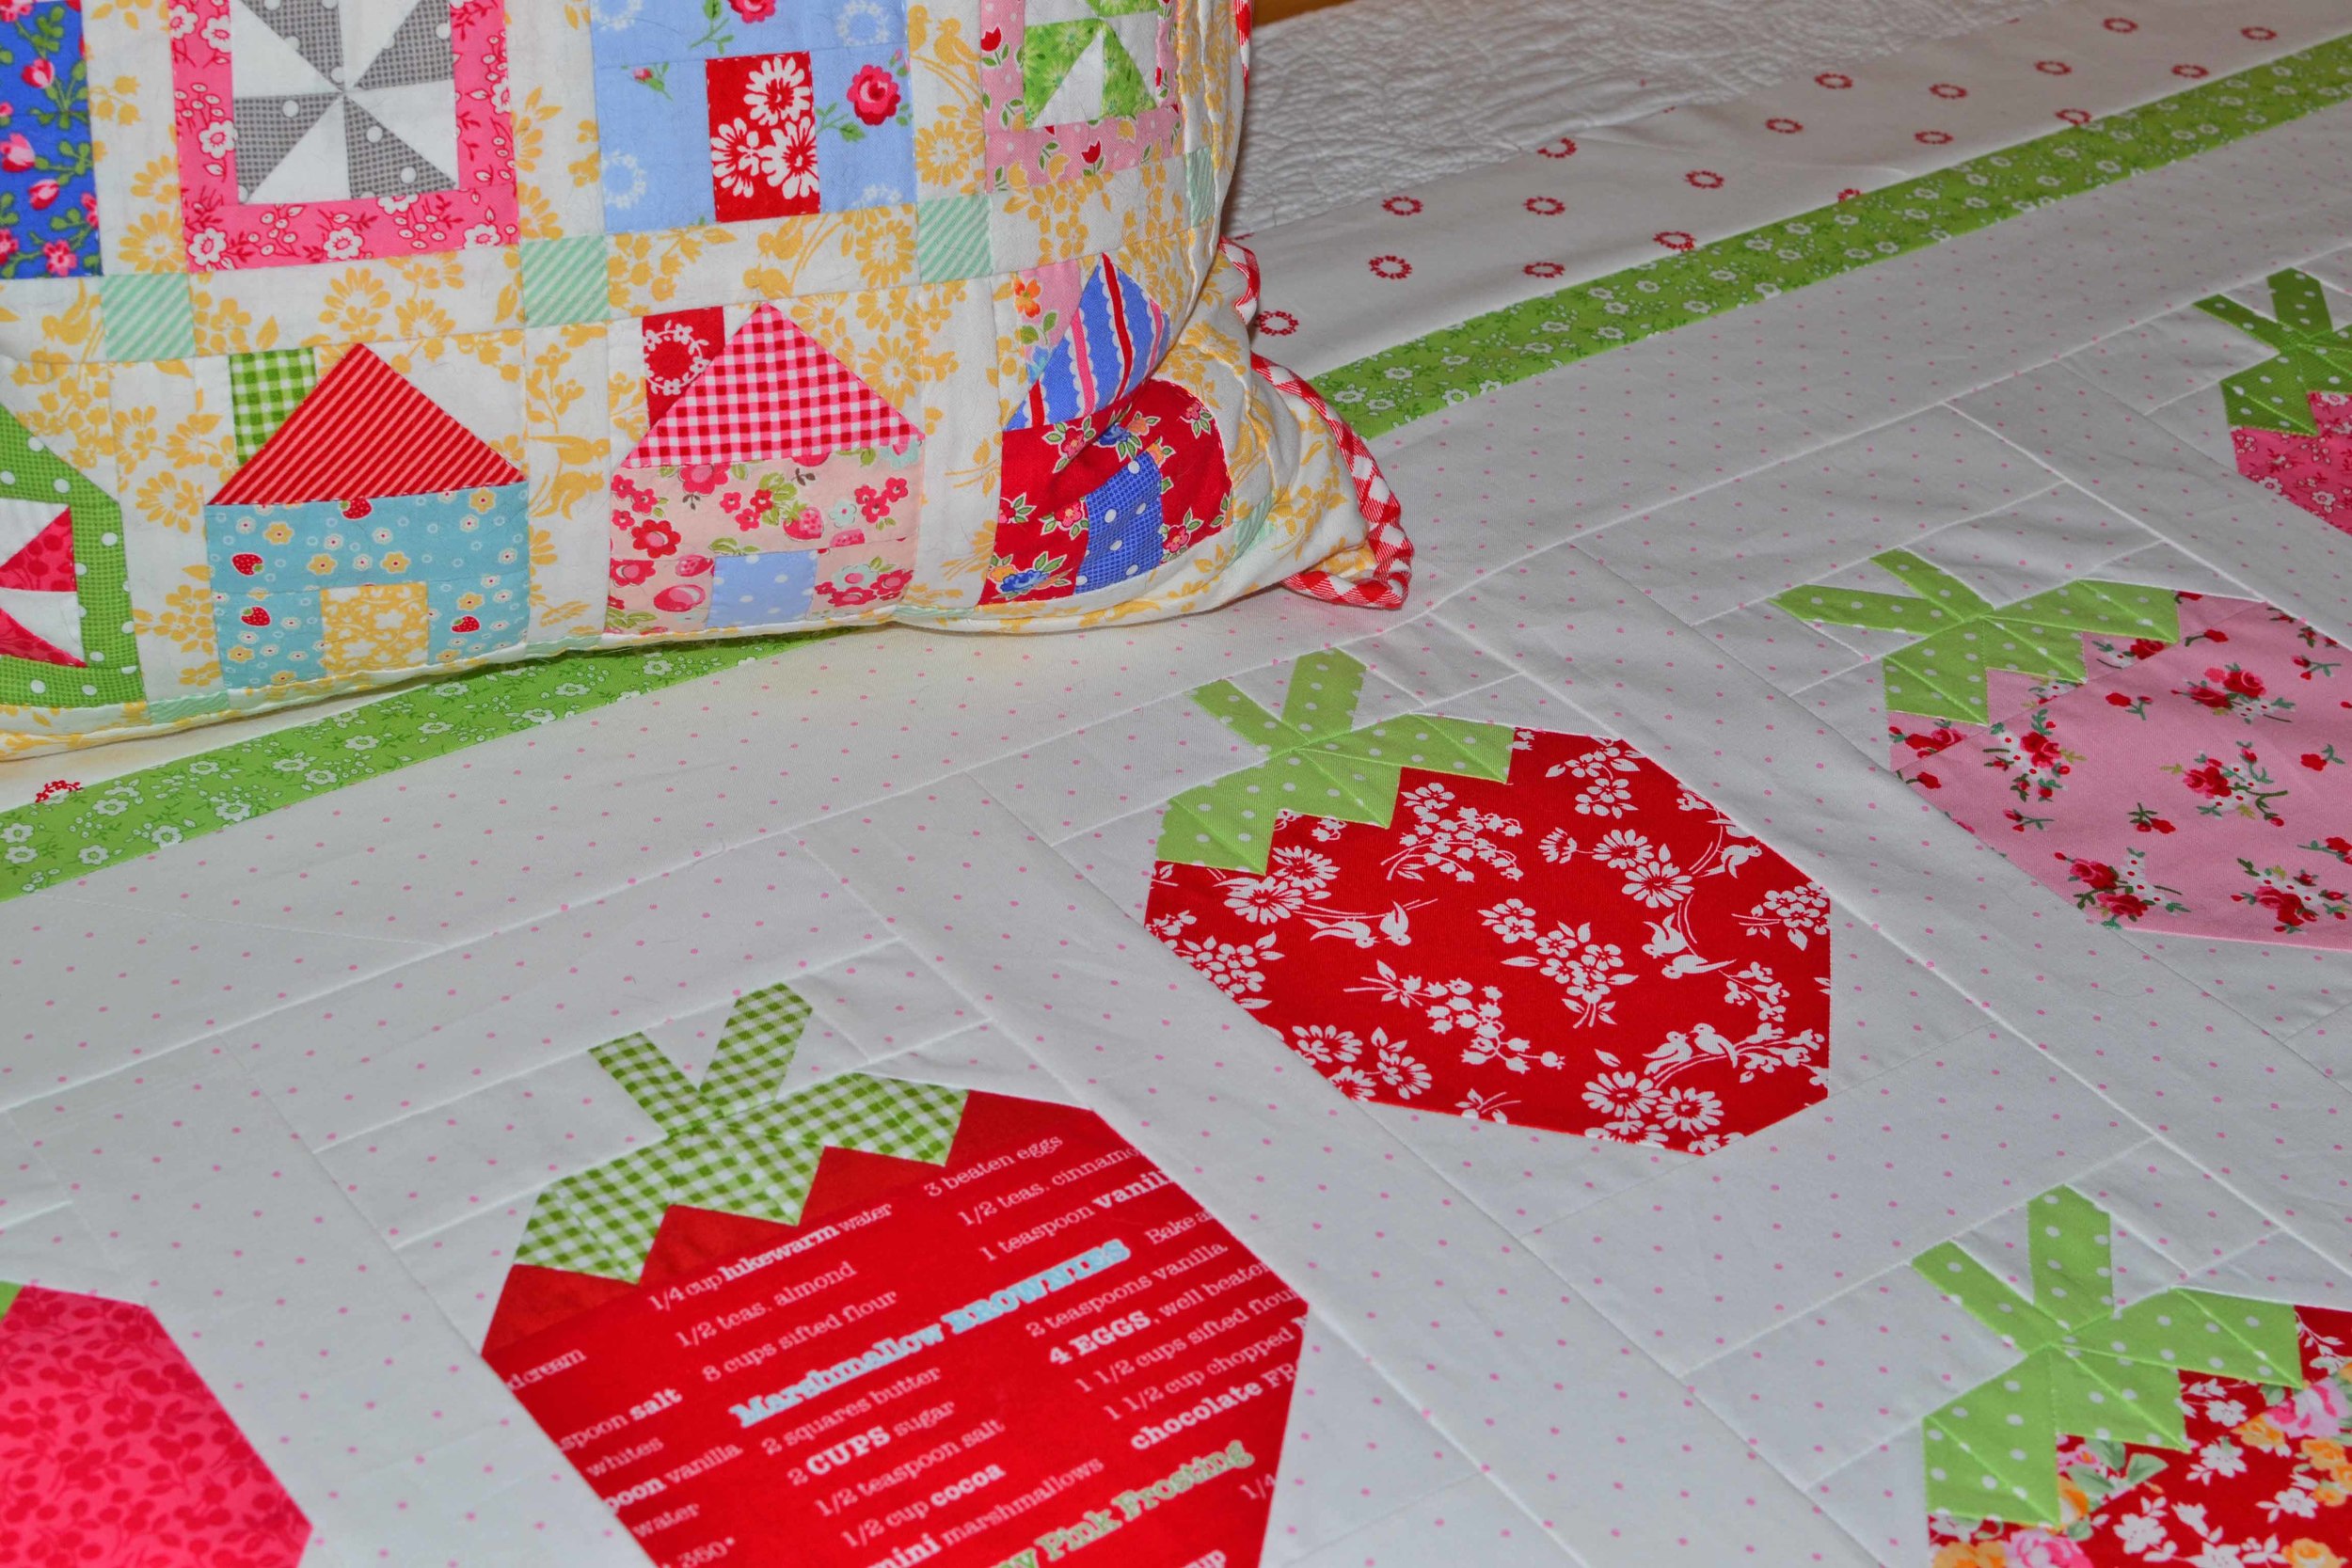
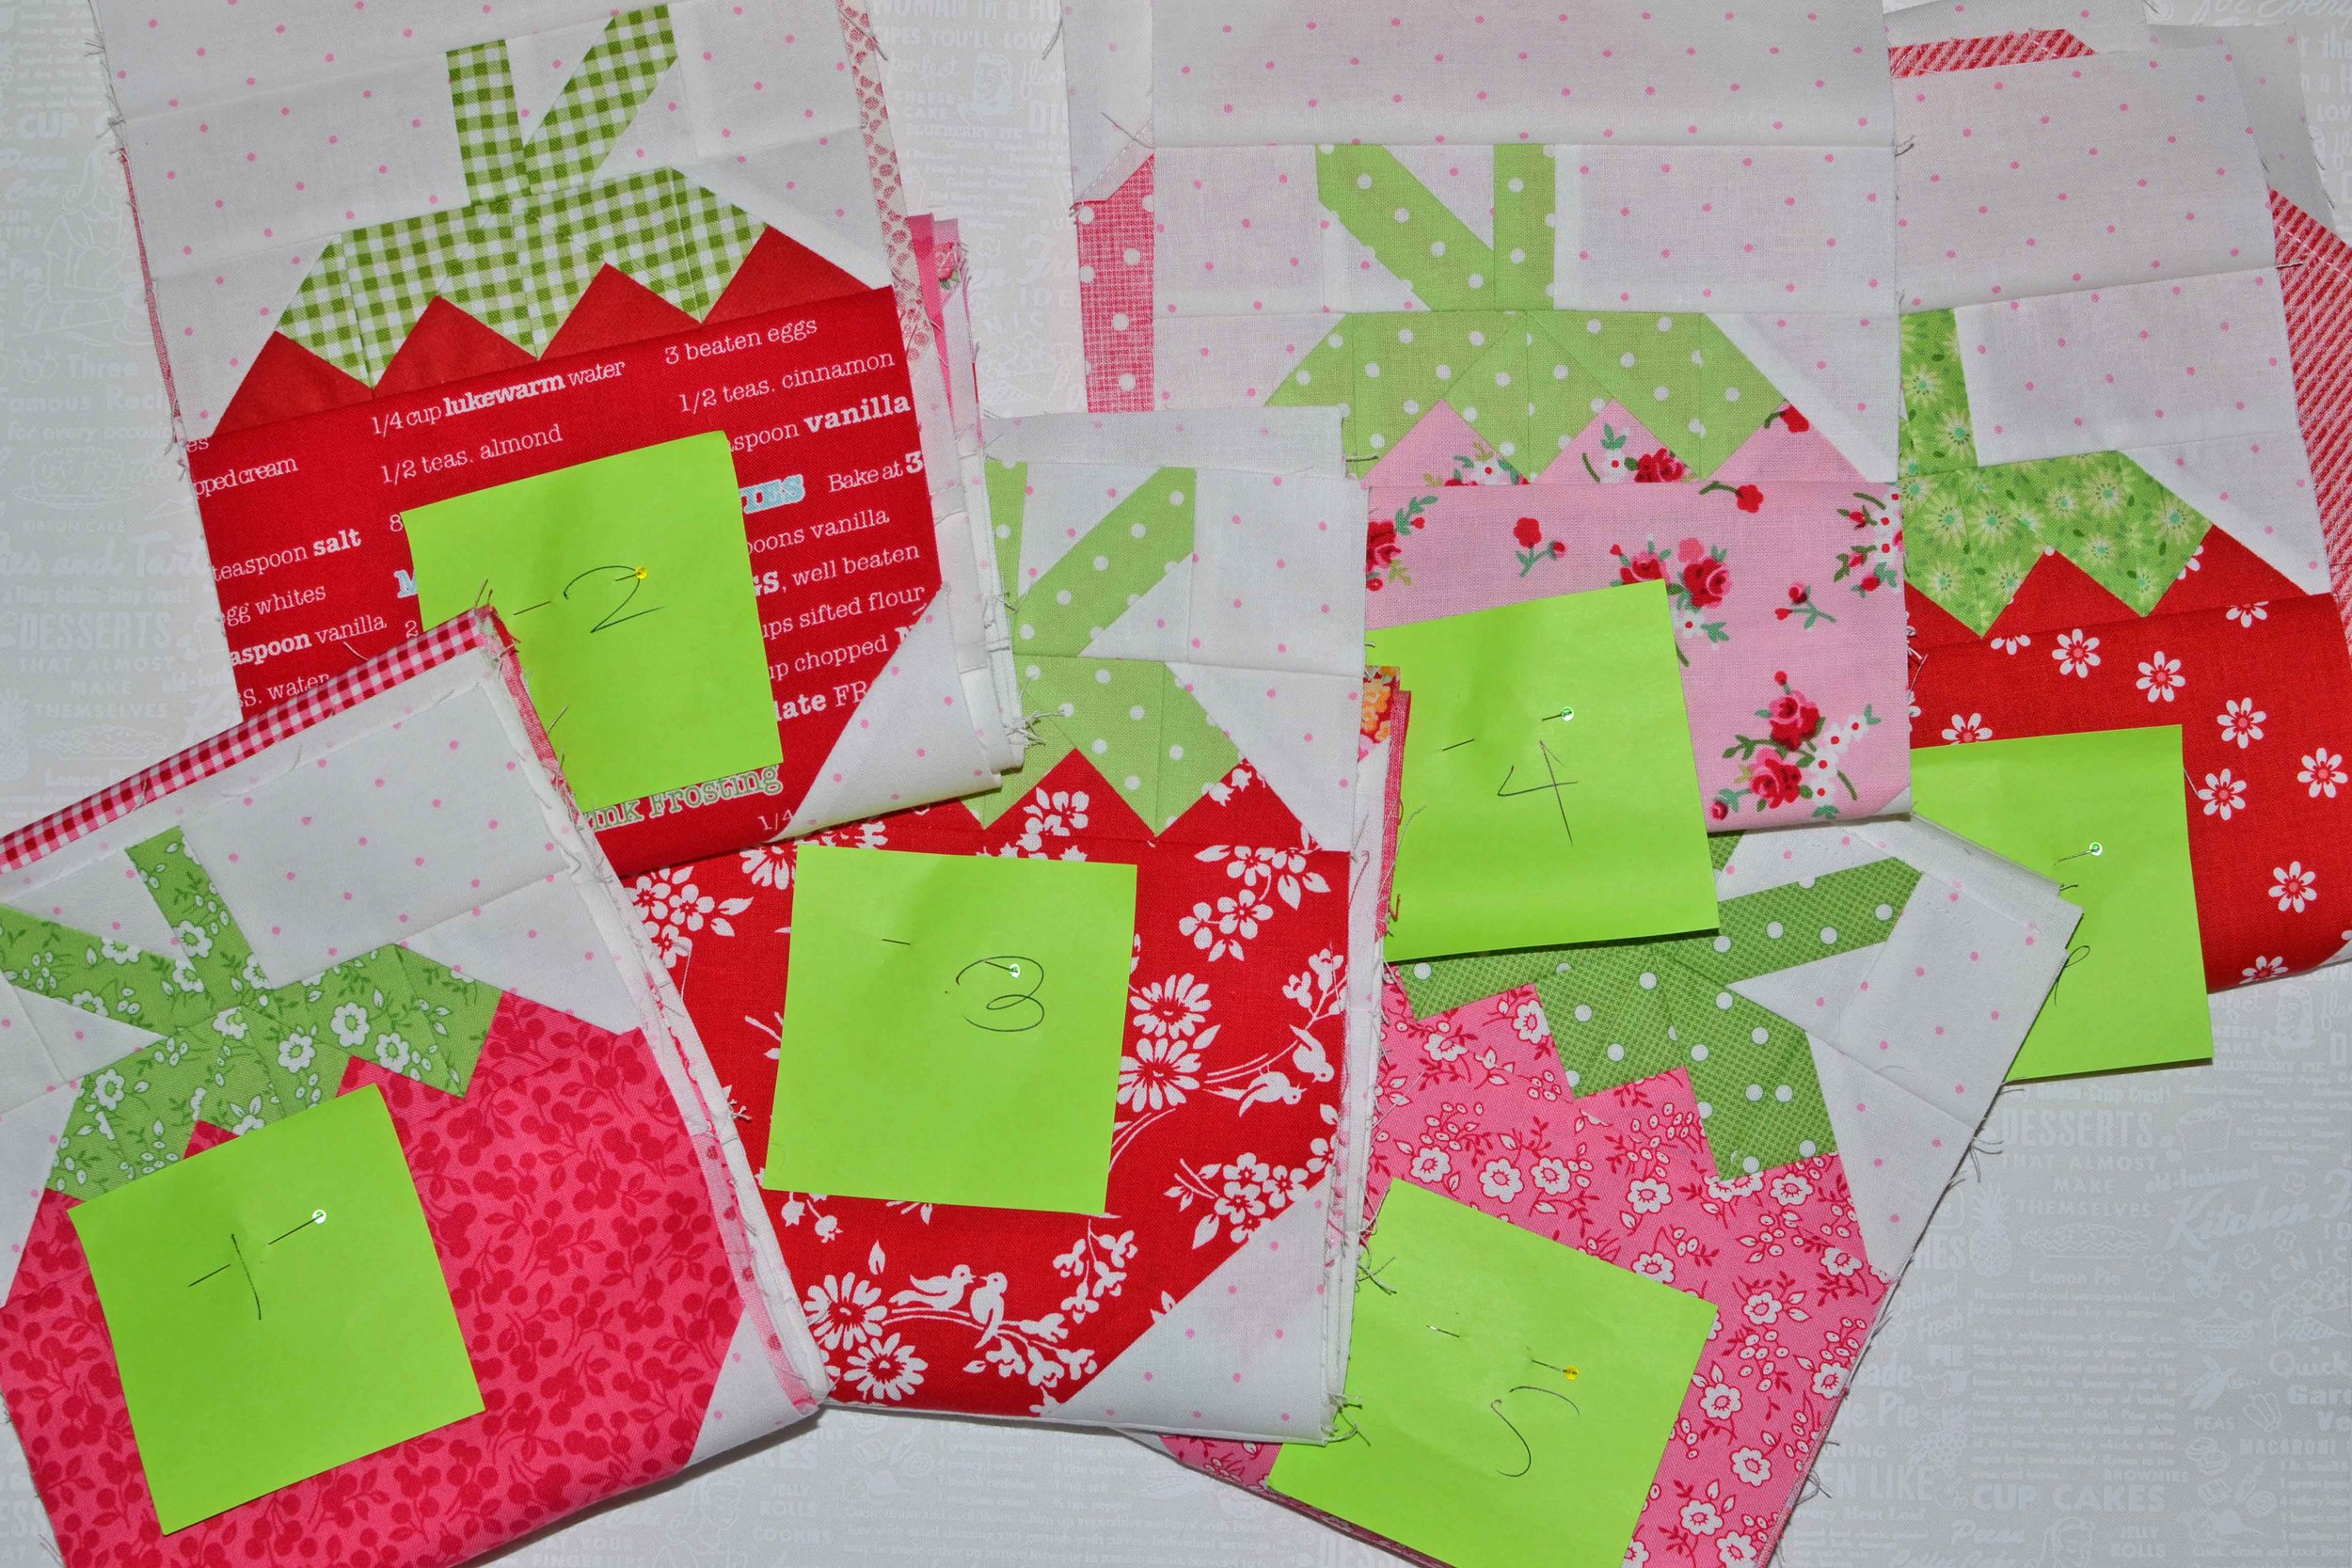
And next, Scrappy Strawberry and Pie Blueberries blocks.

I tried to do an ombre effect with the strawberry, shading the reds into a pink center. I love anything ombre, including the sound of the word :-) And I ate plenty of unripened strawberries this summer - the kind that look great until you bite into them and taste nothing. (I'm using frozen strawberries cooked with a bit of sugar and crème de cassis on tonight's cheesecake.)

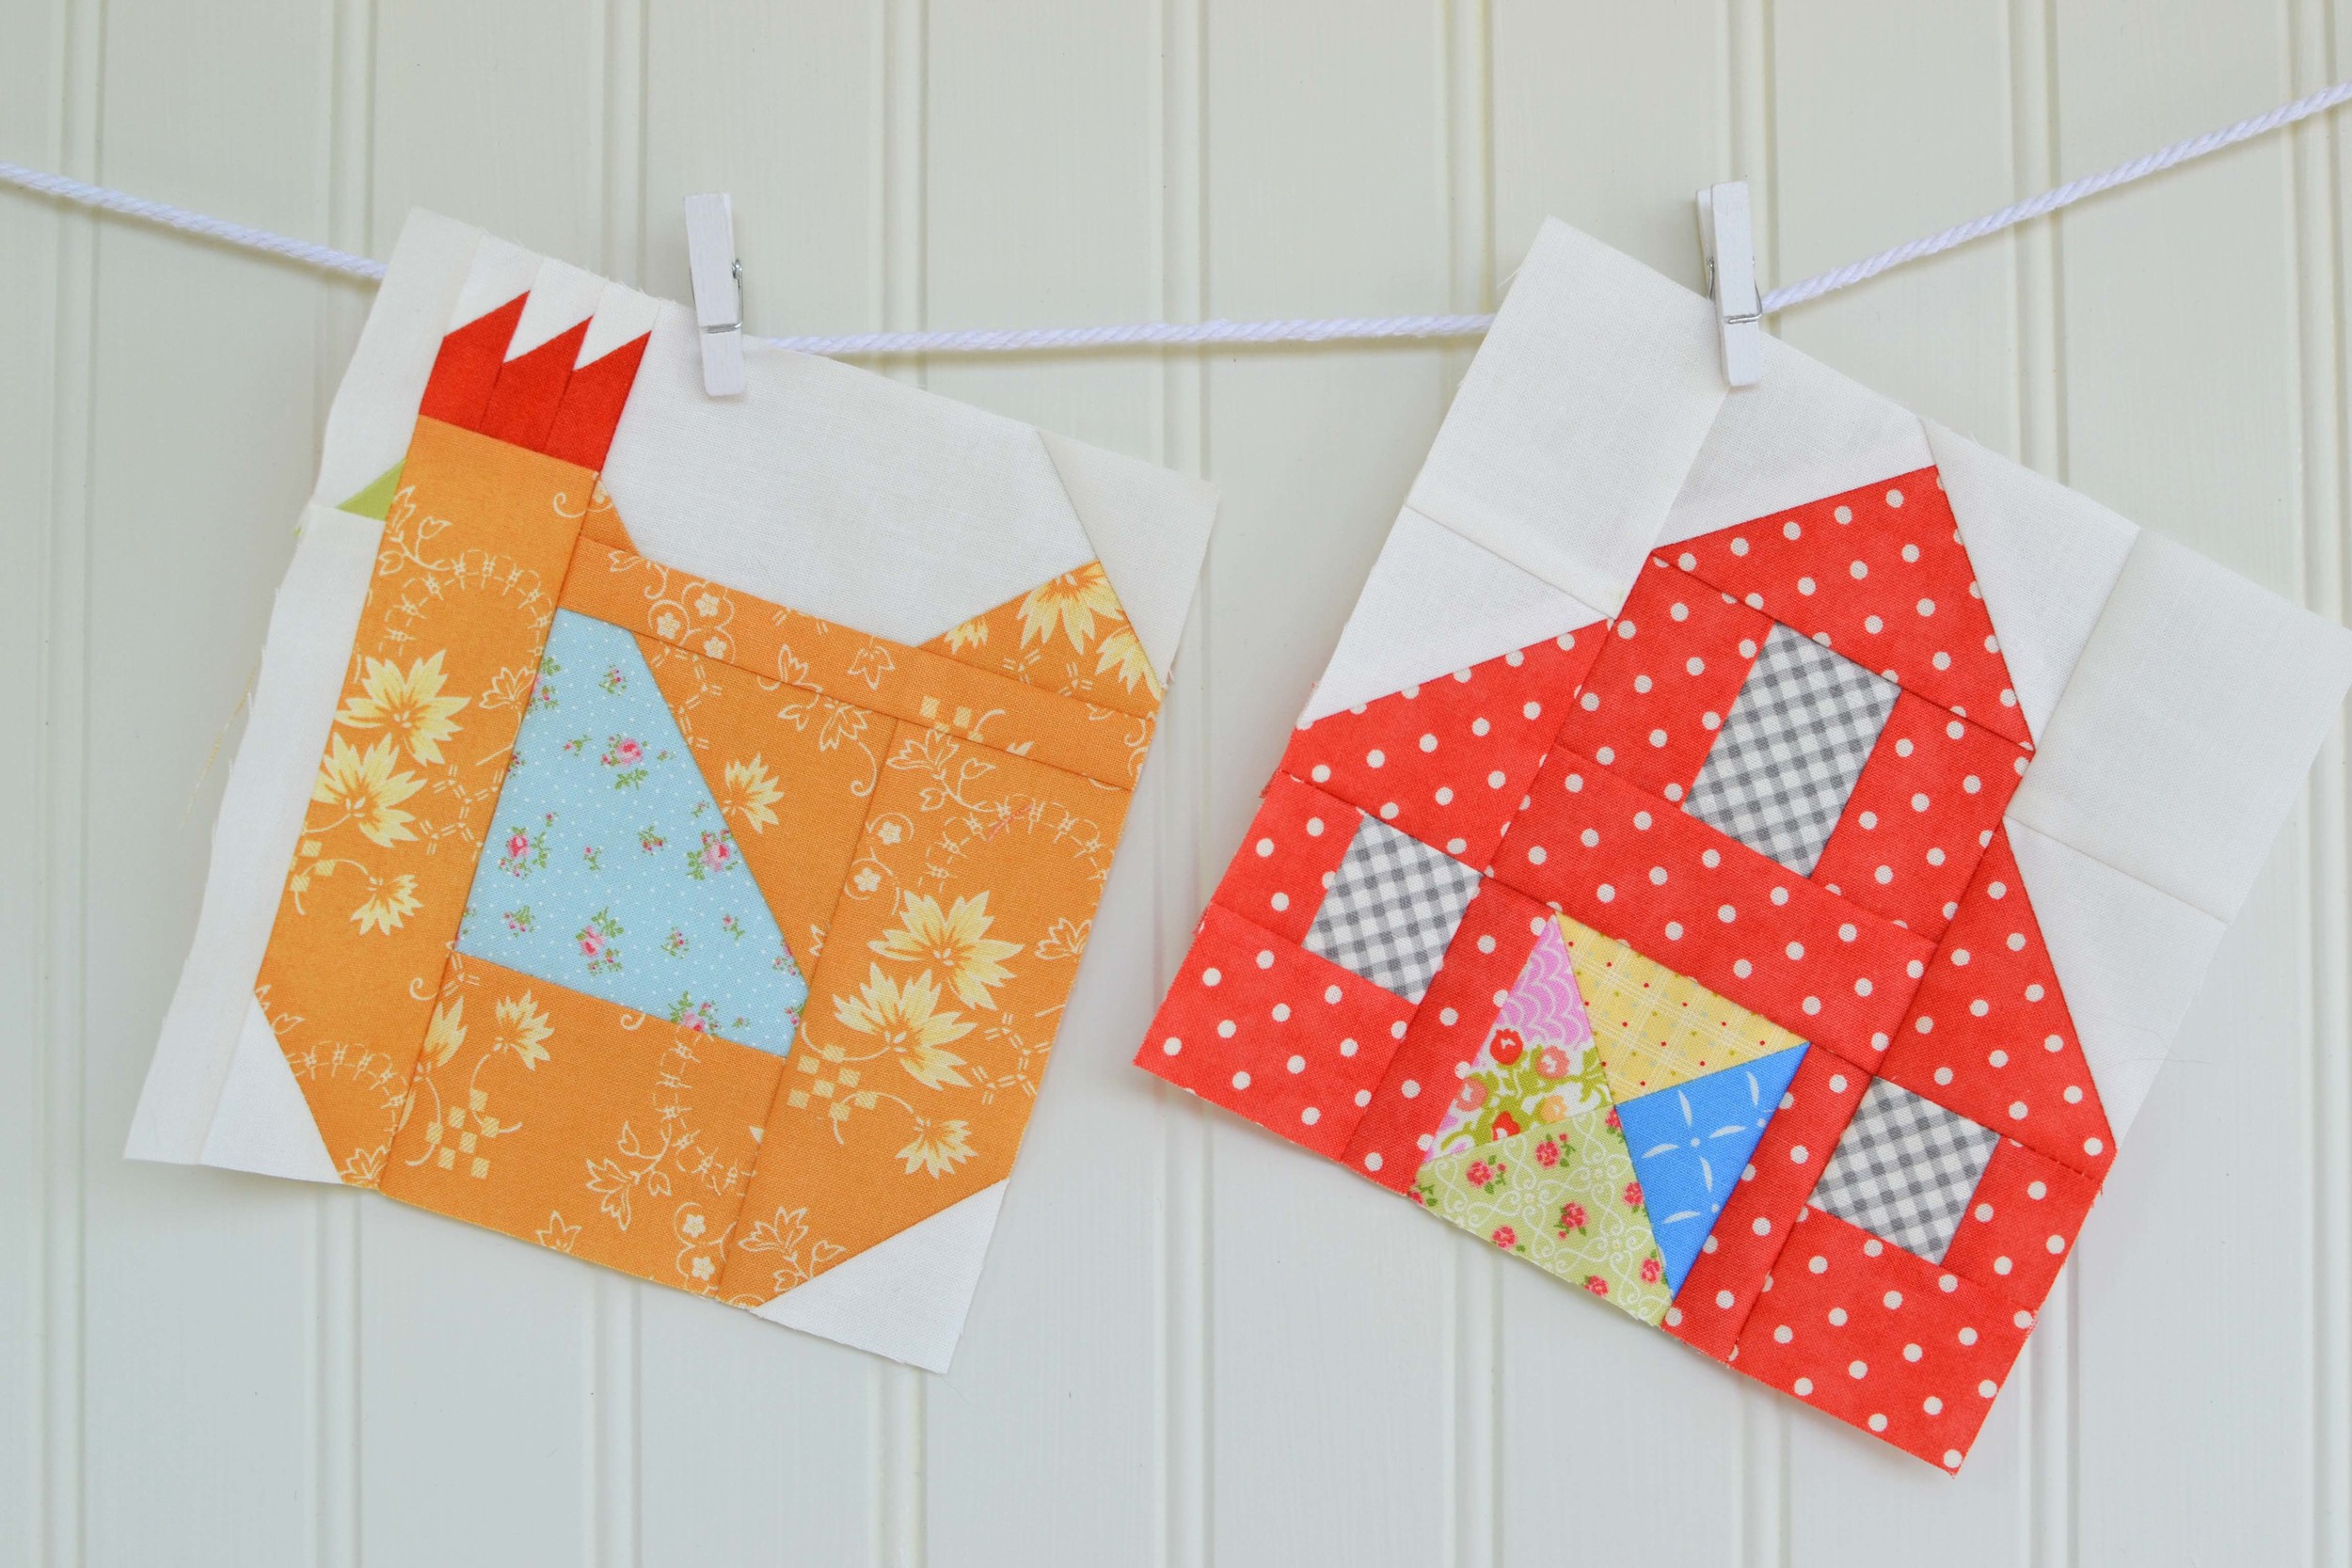
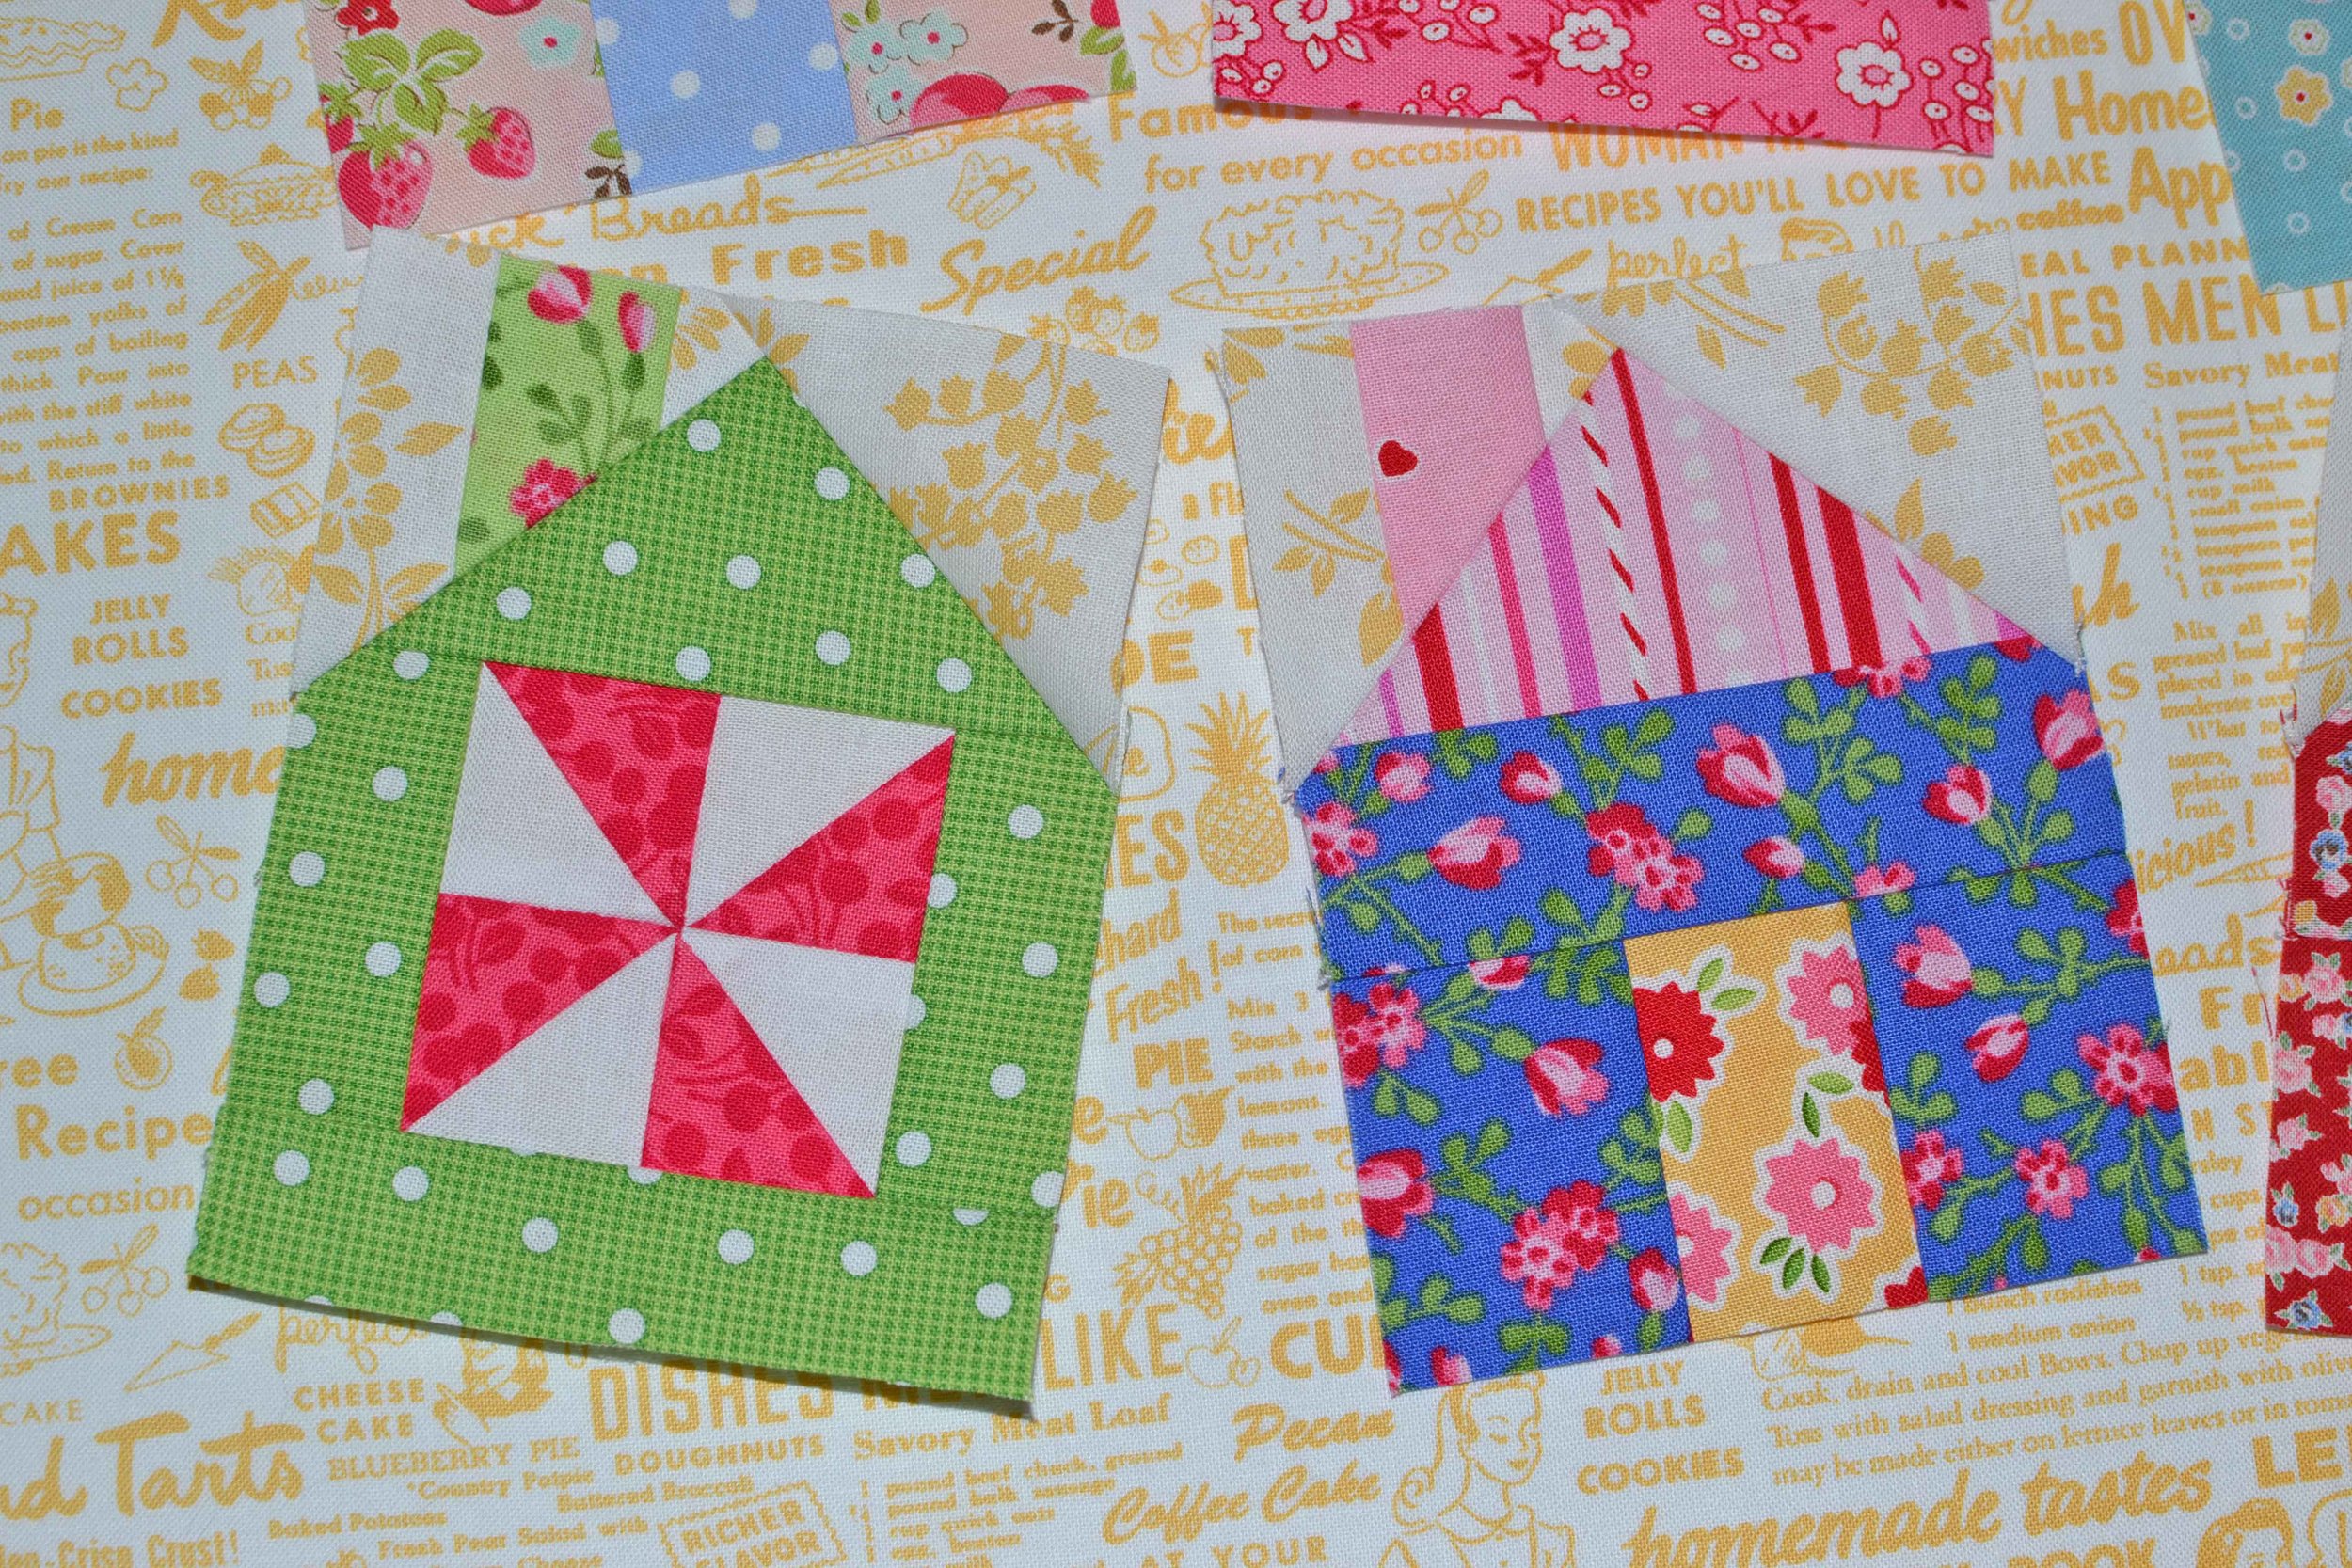
Next... a Patchwork Pumpkin block!

This block sure gave me a chance to use scrappy orange prints! Many of these prints are several years old and had never been used. I unfolded those fat quarters and was really surprised to see that most of them were still intact. Now they're just fat quarters with a tiny 1 1/2" bite taken out of them! I added a small 2" heart to the center of the pumpkin just like Lori showed on her blog awhile ago.

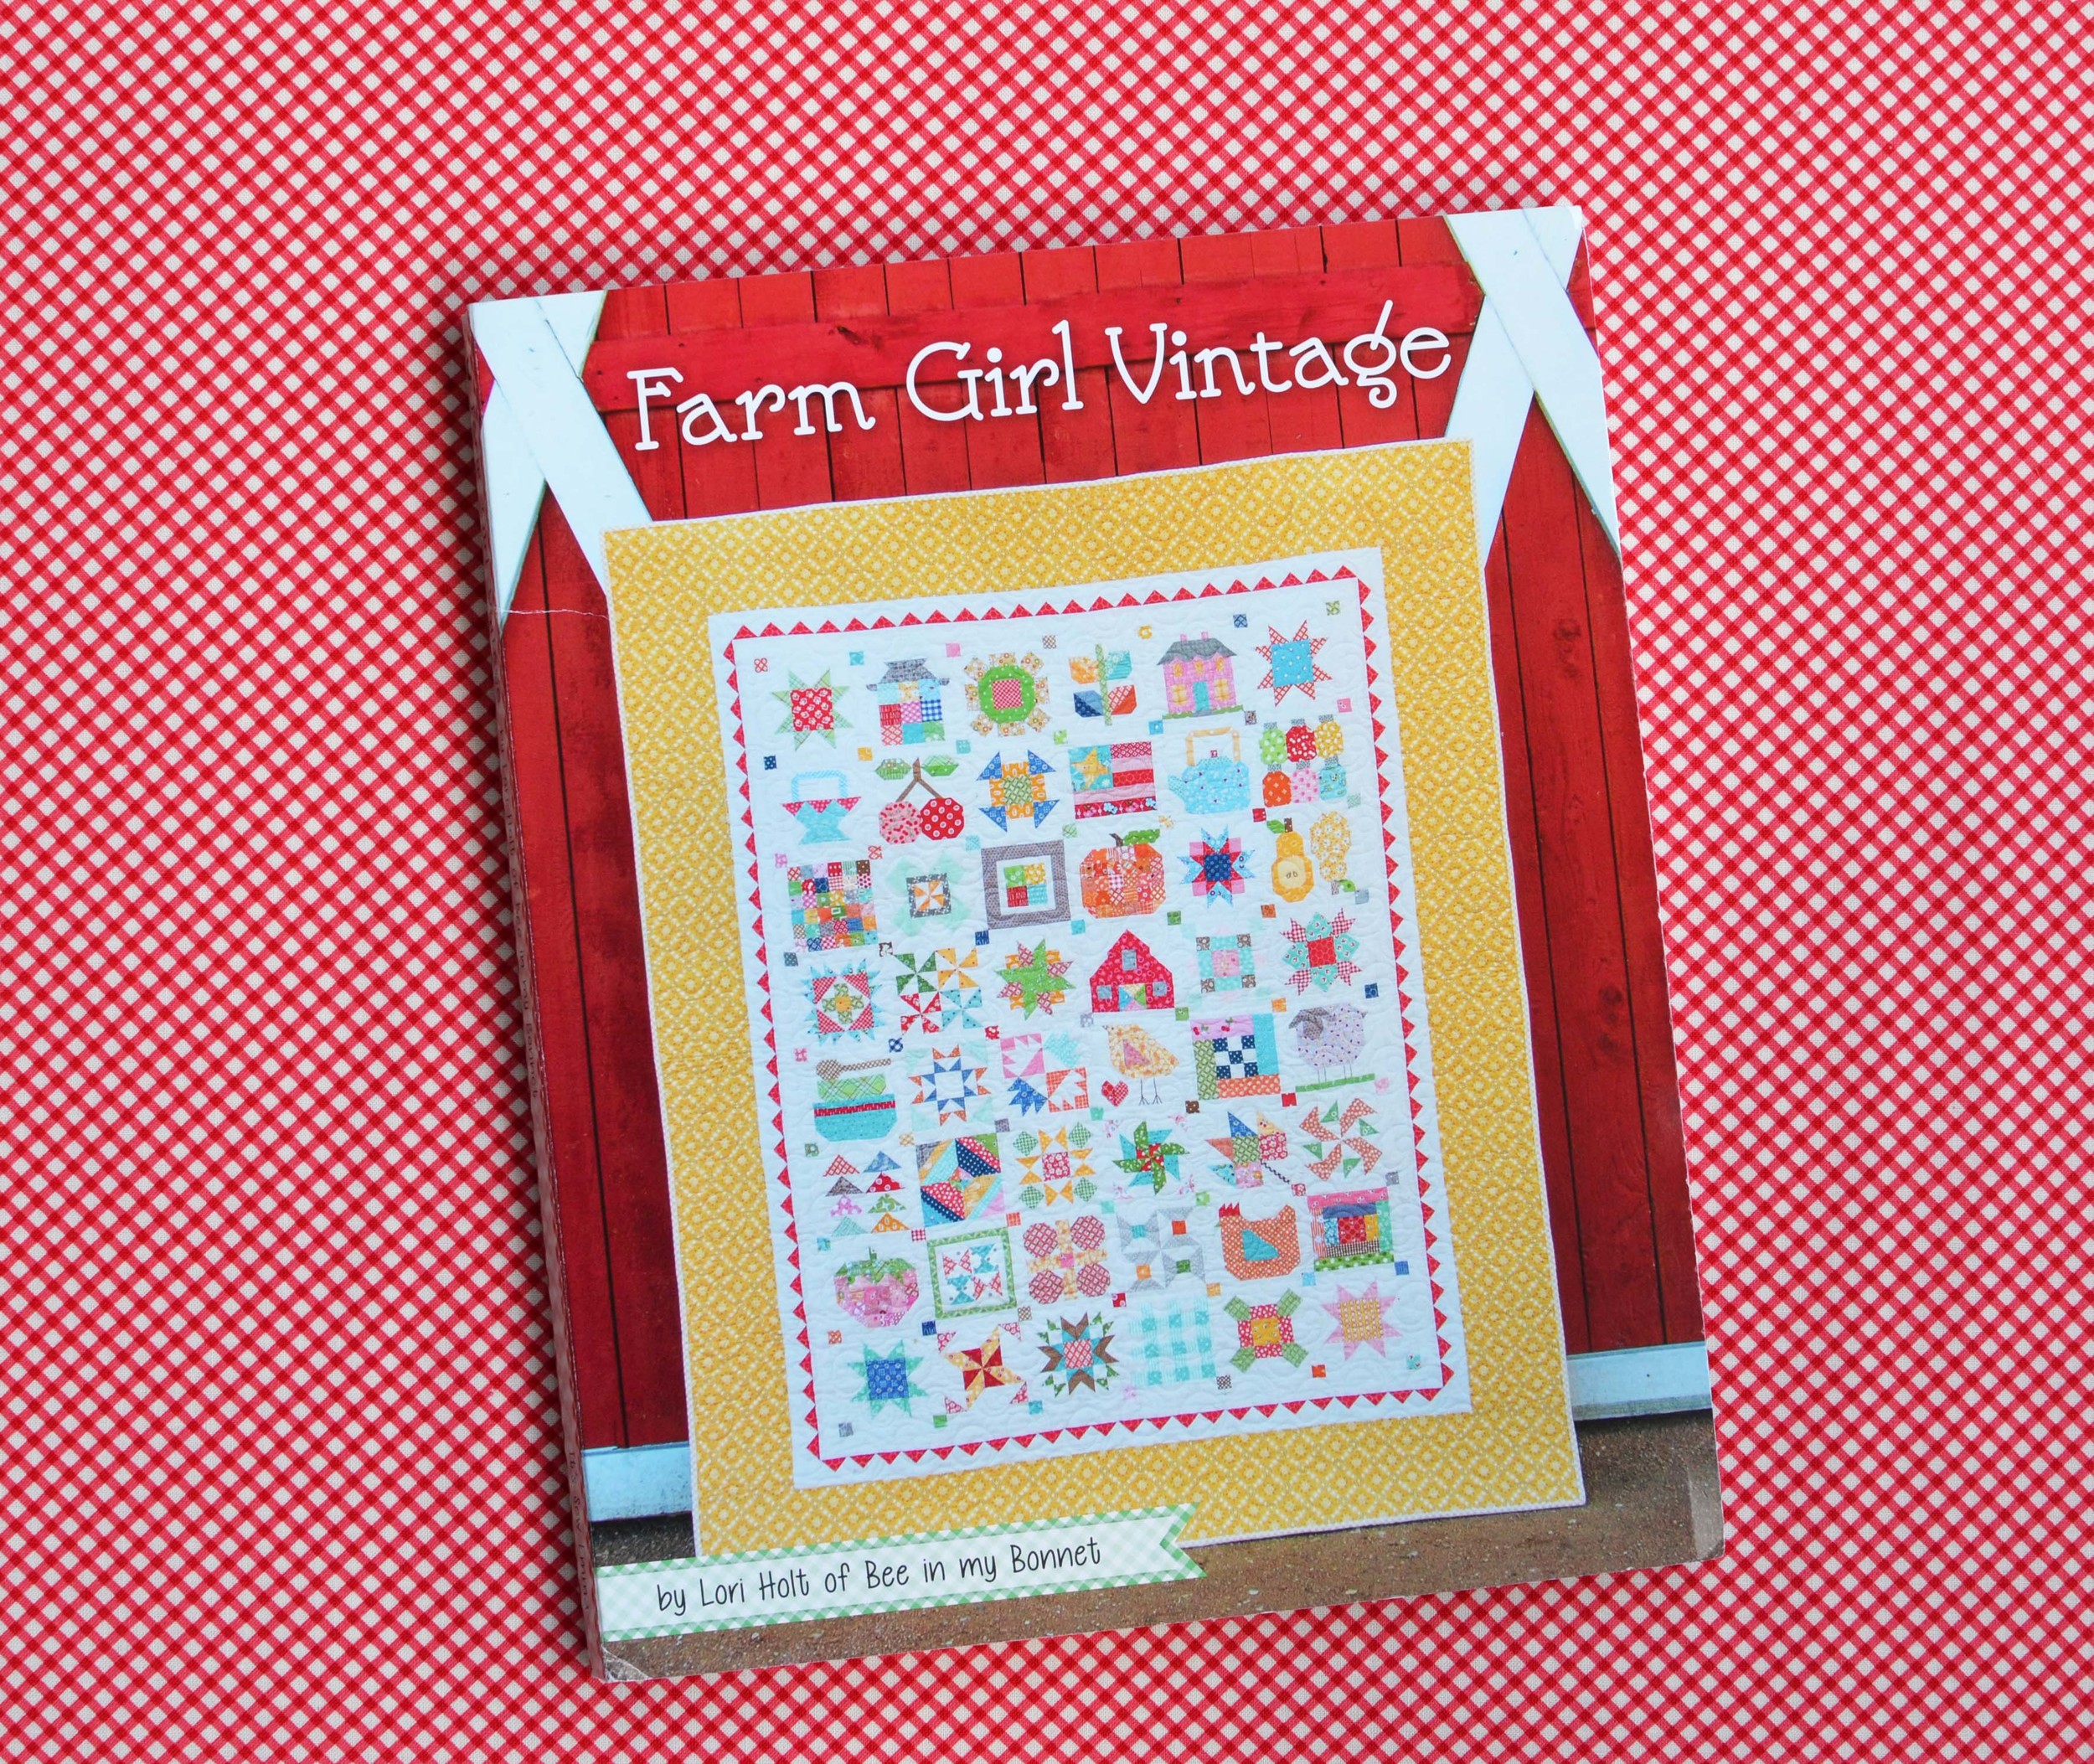
So the fruits and vegetables section is now done. The pumpkin, strawberry and blueberries patterns are in the Farm Girl Vintage book. The other patterns are all add-on blocks and are sold separately. I bought just a few patterns at a time but now I have the whole collection. You can find links to the book as well as the individual patterns in the right hand column of Lori's blog here.

I have just 8 more blocks to make! I think I'll sew up some animals next: cats, cow, turkey, maybe a pig, maybe a sheep.

Finally, I'd like to chat briefly about comments on my blog. I love comments. And I love my readers :-)  I often reply to you by responding to your comments right here on my blog. I hope that you are receiving an email from me with my reply. Unfortunately, my blog host (Squarespace) does not provide your email addresses to me. I've complained about this to them several times... after all, isn't part of having a blog the ability to open up a conversation with my readers? I've been tempted to move to Blogspot, but I now have almost three years of blogging history right here. (I do have the addresses of several of my long-time readers, and I'll reply to them directly by email.) I love my blog because I get to say so much more here than on Instagram... although I do love Instagram too, where I am @greydogwoodstudio. So just please know that I appreciate ALL your comments, and I really hope that you receive my replies.  

happy birthday, farm girl vintage!

Welcome to the birthday party! Look at the cute cake I baked for the birthday girl! Lori Holt's book Farm Girl Vintage is celebrating her first birthday. How much do we all love this book? Lori's patterns are always fun, and they come with very easy to understand directions. I want to make everything that she designs.

I'm still farming my blocks for the cover sampler quilt. I've completed over half of them, and I've added in a few of the bonus blocks that are available for purchase separately. Like the corn and tomatoes block. Oh how I love that corn block!

My blocks are 6" square. Now if only I could find nice juicy corn and tomatoes like this at a local farmstand. And the book also has a perfect flag block that you can make for the Fourth of July - it has a single friendship star.

Meet the mama hen block with her light blue wing. (Yes, she's missing her little embroidered eye. I'll add it later!)

I'm sewing with fabrics from Brenda Riddle and Fig Tree Quilts. I love how Brenda's pale Bespoke Blooms prints mix with my large Fig Tree collection.

I am having so much fun working on the blocks. They're like little gems, and every time I finish one I have to just step back and say "isn't this the cutest block." Luckily only the cats can hear me talking to myself! For the postage stamp below, I cut 36 different squares and hoped that it would be cute instead of a mess.

And while you might know me as the town mouse from NYC who packed up and became the country mouse in Indiana, would you believe that my mother grew up with a chicken coop in the backyard? I remember always seeing that coop behind my grandparent's house in Connecticut, and I was afraid of those clucking sounds. Here's 9 year old Bunny, my own original farm girl, with her baby brother and their pet rooster Whitey.

Just look at those chicken feet!

So I had to ask mom to tell me about Whitey. Well, he was the family pet until he pecked her. And then Whitey became Sunday dinner. Oops! But my grandparents always had fresh eggs from their chickens, and that was where I first saw brown eggs. And with those eggs, of course, my grandmother baked amazing cakes, which always had buttercream frosting, and often raspberry or lemony custard filling. That's what inspired the colors of my layer cake block. (I'm lucky to have several of her frosting recipes.)

Would you like to bake your own cake block? The pattern PDF is a free download at Fat Quarter Shop, and it comes in 6" and 12" sizes! No need to preheat your oven or sift the flour! Just visit the Jolly Jabber blog here for more information. The Farm Girl Vintage book can be purchased here, and the corn and tomatoes block pattern is here. And Lori always has something fun going on at her Bee In My Bonnet blog, too.

Finally, I'd like to invite you to see the cake blocks that many bloggers have "baked" for the birthday celebration. Feel free to visit their parties. And don't forget that you can see my daily sewing updates by following me on Instagram (I'm @greydogwoodstudio).

farm girl vintage again!

Happy Monday! I hope that you all had a great weekend! I finally had a chance to pull a favorite book off the shelf, dust it off, and start sewing. It's Farm Girl Vintage by Lori Holt.

So let me tell you about my experience with this book. I was so excited about it LAST MAY. I picked out my fabrics...

They're a blend of Ambleside by Brenda Riddle and Aloha Girl by Fig Tree. I happily sewed the first 19 blocks...

And then you can probably guess what happened. I found out that we'd be relocating to Indiana, and my focus became all about finding a place to live, buying some new furnishings and then the fun drive here from NYC with the cats in the car (anyone with a cat knows that I'm kidding about that!) I brought my sewing machine with us in the car because I was afraid that something bad might happen to it in the moving truck! But I didn't bring any fabric or projects to work on. So of course, by the time our stuff was delivered and my sewing space was set up, well, I had completely lost interest in the Farm Girl Vintage quilt.

But then something happened. I saw everybody posting their finished quilts on Instagram and I thought WAIT, I NEED TO FINISH MINE! So a few days ago, I pulled out all my blocks and started to sew. First, I made Grandma's Quilt block, and then the Kettle's On block.

I kept going and made the Haystack and Kitchen Window blocks. Would you believe that I spent two hours choosing these fabrics? The blocks took just minutes to sew.

The partial block lineup! I love how they look together so far.

half done!.jpg

But I could see that I was running into an obstacle. There are several blocks that almost need an orangey fabric. Yes, I could substitute... but you need orange prints to make a pumpkin! And I really, really wanted to make the Homemade Pie block. Of course, pie crust isn't grey or pink. So I asked my Instagram friends about if I should add orange prints. The comments came in quickly, and it was unanimous - everybody told me to not be afraid of orange. I'm now adding the more pale Fig Tree oranges - the butterscotches and softer pumpkins. (I'm adding a few prints from other Brenda Riddle and Fig Tree collections, too.) So here is Homemade Pie! And I needed the Pie Cherries block, too.

I actually finished the Homemade Pie block on Saturday at 1am (yes, 1am) and the fork tines looked bent. Ugh. That would never do. So after a few hours of sleep, I unsewed the block and fixed it. It quickly became my very favorite block.

l'm going to keep sewing blocks from the book, and I'll add in some of the extra bonus blocks like the hand mixer and the pig.  I even bought embroidery floss today for the electric cord on the mixer and the tail on the pig. I'm serious about finishing this quilt!

The Farm Girl Vintage book is available from many retailers, but I got mine here, and the pie block pattern here. There are also several other companion blocks, such as the mixer, a cow, a barn cat, a honey bee and more. You can find all of them here.

Thanks so much for stopping by today... see you soon... probably with more Farm Girl Vintage blocks!

great granny twist blog hop with lori holt

Hi everybody! It's my day on the Great Granny Twist blog tour, and I can't wait to show you my project!

We're here celebrating the first birthday of Lori Holt's book Great Granny Squared (has it only been a year?!) It's a fun book with a super easy-to-make block, several quilts and a pillow.

To keep things festive this December, Lori and Fat Quarter Shop asked us to put our own fresh twist on the block patterns shown in the book. So... what could I make that would be honor Lori's great block but also be very me? Well, how about Christmas stockings!

Would you like to make your own Great Granny Squared stockings? Yay! So let's talk about how to make them. I thought that a mini-tutorial would be helpful. You'll need a copy of the Great Granny Squared book. First, pick out some cute fabric! I used two current Moda collections that I'm obsessed with - Fig Tree's Farmhouse and Bunny Hill's Mistletoe Lane. Then make two of the 6" blocks shown on page 26 in the book. Now you'll need to turn them into a larger chunk of "fabric" from which you'll cut the stocking shape.

Sew a 1" x 6 1/2" background strip between the two blocks and press toward the strip.

Add a 2" x 13" strip to the right side and a 6" x 13" strip to the left side. Press towards the solid fabric.

Sew a 4" x 13 1/2" strip to the bottom and a 3" x 13 1/2" strip to the top.

Now you have your chunk of fabric! For the rest of the stocking construction, I used a pattern from Kristyne Czepuryk (of Pretty By Hand fame). The pattern is in the Winter 2015 issue of Quilts and More magazine (you can find a copy here and here or at your local shop). I cut out the stocking template. Yes, I know that I destroyed my magazine, but I was just too lazy to make a photocopy! I layered the stocking template behind the fabric so that I could center the blocks.

You can see that I'm a bit maniacal about pinning! Then cut out your stocking front.

Now layer your stocking top onto rectangles of batting and backing and "quilt as desired." I needed to get it done fast, so I did a simple grid, then trimmed the batting and backing flush with the stocking shape.

Now just follow the rest of Kristyne's instructions and you'll soon have a stocking! Her pattern actually shows several different types of stockings - one with a lace cuff, one with applique, and one with the top ruffle that I made. I'd suggest using a walking foot to sew your stocking together (if you have one) because you'll be sewing through a LOT of layers of fabric and batting.

And here's where I got a little crazy. I decided that our cats, Chloe and Mia, also needed their own stockings. They're tiny, but the perfect size for a felt mouse or two.

(Oops, I forgot to put the felt mice into the stockings! That's Santa's job, anyway.)

For the mini stockings, I used a pattern by Fig Tree Threads called "Mini Stockings." It's from a few years ago, but it's still available on the Fig Tree website here.

Now just bring on the cookies and we are all ready for Santa!

Fat Quarter Shop has created their own fun version of Lori's block. It's called Great Granny Circled, and Kimberly has a tutorial video for the block here. Several bloggers have already showed their own twist on the block earlier this week, and the full lineup is here. Today's bloggers showing their GGST (that's Great Granny Squared Twist!) blocks are:

Thanks for stopping by today! I hope that you enjoy putting your own twist on the Great Granny Squared blocks. If you make the stockings, please provide a link back to my blog - and besides, I'd love to see them!


farm girl friday - farmhouse

I'm so happy to be your cowboy tour guide for Farm Girl Friday, week 8! Or as I prefer to think of it, it's Farm Boy Friday!

We are using the Farm Girl Vintage book by Lori Holt for the sew along. And today we are building a farmhouse block!

The farmhouse is my favorite block in the Farm Girl Vintage book. I've always loved house blocks. They have that classic, vintage look, and they can be playful or sophisticated depending on your fabric selection. I've blended Ambleside by Brenda Riddle with Aloha Girl by Fig Tree & Co, both by Moda Fabrics.

First, turn to page 27, then cut and sew, preferably with country farm girl music. I was super happy when I finished the 6" block for my sampler quilt, and I didn't want the fun to end. So I made another block, this time 12" and using Mistletoe Lane by Bunny Hill.

Humm, I think it looks bare. How about if we add a topiary tree?

But why stop there? Let's make another farmhouse and another topiary!

I LOVE them! The two large houses are the beginning of the Farmhouse Lane quilt. The pattern is in the book on page 128. You'll need nine of the 12" houses, six trees and sixteen 6" blocks.  I think it will be the perfect Christmas quilt full of gingerbread houses, ice skates (never mind that I don't skate, even though I stalk the Rockefeller Center ice skating rink every Christmas) and little Christmas trees. But wouldn't it also be a spooky fun quilt in Halloween colors? Or summery with red, white and blue?

I really wanted to make a striped roof. It took me a few minutes to figure how to get the stripes all oriented in the same direction. So now let's talk about how to use stripes on your roof.

The roof is made in four sections. You will need two half square triangles (HSTs) for the left and right portions of the roof. Lori's pattern shows you how to use my very favorite method for making HSTs. But when you make your HSTs using the method shown, the result will be one HST with vertical stripes and one HST with horizontal stripes. You'll need to make a second set using the exact same method, and this will give you a second HST with vertical stripes. (You'll have two leftover HSTs with horizontal stripes, but I KNOW that you can find a creative use for them!)

Thanks for joining me today! I hope that you share your farmhouse blocks on Instagram. Be sure to use the hashtags #farmgirlvintage, #farmgirlfridays and #farmhouseblock when you post your blocks. And you can see all the fun projects that I'm working on, too. I'm @greydogwoodstudio.

Now hop on over to Lori Holt's blog to see her Farm Girl Vintage blocks, and check out the other guest bloggers, too. The full schedule is on the Jolly Jabber blog here.

Until next time, happy farming!

december finish! have yourself a quilty little christmas

Yay! I've finished piecing Have Yourself A Quilty Little Christmas! Now I really want to take it off of my design wall and have it quilted! 

The stocking and wrapped candy just might be my favorite block. I spent awhile auditioning fabrics. The pink candy fabrics were easy. But the stocking has several seams so I stayed away from large prints. That meant pulling every single red fabric out of my closet. And then putting them all away. I love the dimensional hanging loop.

Now can we talk about the border? It took days to piece! It's made of four-patches mixed with alternating squares. The four patches measure 2" finished. It's constructed in a really interesting way - I didn't actually sew 1 1/2" squares. It started with a large pile of small squares...

And a few days later, four borders were finished and attached! I love this border with scrappy, controlled fabrics and 360 pieces. 

Now for the specifics. Have Yourself A Quilty Little Christmas was an online quilt along designed by Lori Holt of Bee In My Bonnet. It measures 34" x 46". Many of the block patterns are in her book Quilty Fun. The specific Christmas-themed blocks were designed just for this quilt along, and the instructions for those blocks were posted by Lori on Instagram. They do not appear in a print version. You can find the free instructions for the tree, present, gingerbread cookie, stocking and ornament by checking Lori's feed on Instagram (it's @beelori1) or by scrolling through #haveyourselfaquiltylittlechristmas. It was fun sewing along with many, many other quilters. We all encouraged each other, and I think that it became competitive, but in a fun way. There are lots of different interpretations of this quilt, and they all look fabulous.

My fabrics are a big mishmash of everything in my stash! The only new fabric that I bought was a fat quarter bundle of Sugar Rush by Josephine Kimberling for Blend Fabrics. I used just six of those prints, but they established the mood. So there's plenty of everything else from my stash. I added anything that matched! 

Ok, I'm ready for my next project!

quilt finish - mixing it up

It feels great to finish the Mixing It Up quilt top!  Once the weather cools off (it was 91 degrees in NYC today!) I'll think about baking again. Did you see the recipe for browned butter M&Ms chocolate chip cookies on Pioneer Woman's blog today? Yummy. I can't wait to try them!

Ok, back to the quilt. Cookie time will be later. 

Just looking at this quilt top makes me happy! There are all those colorful mixers, ready to whip up some amazing desserts. I had lots of fun just selecting the fabrics for each mixer. And do you remember how I bought the pale pink KitchenAid the same night that I sewed the pink block? 

The Mixing It Up pattern is by Lori Holt, and it's super-easy to understand, with lots of those easy-corner-triangles. The mixers are 15" square so you just need a few of them to make a big impact. I used mostly Bake Sale fabric with a little bit of Polka Dot Stitches mixed in, and solids from Riley Blake. I almost didn't make the mustard yellow mixer (come to think of it, Mom probably had a hand-held mustard mixer in the 70's). And yet, I found that I really needed the mustard just for the right color balance so that it wouldn't become too pink/red or too blue/green. 

I love the pieced "beater" border blocks. But I hate sewing borders. Let's just blame it on the extreme lack of space in my apartment. That's why these blocks sat around since February! I really, really wanted to just slap some fabric borders on this and call it done, but a quilting friend reminded me about how cute it would be if I followed the instructions. She was right. It's infinitely cuter with the pieced border. Borders are better!

Now I think that I've earned a special dessert tonite! Hummm maybe a cupcake instead of the cookie... 

friday finish - strawberry social!

It's done! The Strawberry Social top is completely assembled!

strawberry social 023.JPG
One of my all time favorite Flower Sugar prints. 

One of my all time favorite Flower Sugar prints. 

It's always an extra-good Friday when I finish a quilt top, and this is my second finish this month! I know that I say I love all my quilt tops, but I really, really love this one. I had fun sewing every single berry. I used all my favorite reds and pinks from Pam Kitty Morning, Lori Holt, Flower Sugar and Bonnie & Camille. The pink-on-white dotted background is from the Pam Kitty Picnic collection. 

The pattern is Strawberry Social by Margot Languedoc's The Pattern Basket. Her instructions are very clear and easy to understand, although the leaf portion takes a bit of concentration.

I also made my quilt larger than the pattern. I think that it's the perfect sofa size. My top contains 36 berries and measures 62" x 75" - the pattern measures 53" x 66" and has 25 berries. 

Remember the two experimental blocks? I decided that they weren't ripe enough for this quilt, and so I turned them into jam. Ha ha! I'm glad that I tried something quirky, but, um, no... just too weird. 

I love this recipe print from Lori Holt's Bake Sale collection.

I love this recipe print from Lori Holt's Bake Sale collection.

Yes, that's a strawberry covered in cherries!

Yes, that's a strawberry covered in cherries!

Thanks for taking the time to visit with me today! I'm linking up with Finish It Up Fridays at Crazy Mom Quilts. I'll check out what everybody else finished this week after lunch. And maybe dessert. A strawberry sundae? A strawberry shake? I saw strawberry cream filled Twinkies at my grocery store last night, but they scare me.

socializing with strawberry social

I spent some time socializing with the Strawberry Social quilt blocks last night. I'm aiming for two quilt finishes this month! 

Here they are on my "design floor." I almost started to sew them randomly (it's hot and humid and I'm lazy) but I knew that the only way to evenly distribute the pinks and reds was to do the layout. Then the berries were sewn into vertical strips with more of that cute pink dot from Pam Kitty Picnic. 

And of course, the rows are marked with color coordinating Post-it notes. Actually, that was just a happy coincidence! Six rows of fresh berries! I'm making my quilt larger than the pattern, so I have 36 berries set 6 across and 6 down. 

Soon I'll need to choose border fabrics! Here are the leading candidates. I'm thinking of a narrow inner border of the green print and a wider outer border of the white wreath print. The two plaids are the binding options. I'm sure that the quilt will tell me what it needs once it's fully sashed. Your quilts talk to you, too, right?!

Can I have a second Friday finish for July? Stay tuned! And see what other quilters are working on this week at Design Wall Monday at Patchwork Times.

Finally, thanks so much for all the Butterscotch Tart quilt love! I really appreciate the nice comments and emails. Making that quilt was a fun challenge, and I'm glad that you enjoyed watching my progress.

friday finish - butterscotch tart!

Guess what? It's D-O-N-E! The Butterscotch Tart quilt is finished! It's time for some fireworks!

I hope that you'll allow me to gush about my own quilt. I love everything about this! The goal was to do a patriotic quilt, but without any patriotic fabrics. There are no stars or fireworks here, but there are plenty of dots, flowers, cherries and strawberries. And then I dared myself to add light blue and pink. 

I feel a little bittersweet now that this is completed. I was in a big rush to complete it (yeah, I missed my July 4 goal), and yet, I felt a bit of sadness when I sewed that last border strip. Sadness as in, oh no, it's done and I won't get to sew any more of these cute blocks!

The quilt pattern is Butterscotch Tart by Fig Tree and Co and measures 66" square. I used a happy fabric mix from Pam Kitty Morning and Lori Holt. Special thanks to my Instagram buddies who cheered me on throughout the whole process. You can follow me there at @greydogwoodstudio to see daily updates of my projects. 

And, just for fun, I put the quilt onto my bed. It blends in perfectly with my collection of new and vintage Ralph Lauren bedding. The red and white faux drunkard's path was the second quilt that I ever made, and it's hand quilted with Baptist fans and dated November 98 - November 99. I'll never tire of red, white and blue quilts!

I'm linking up today with Finish It Up Fridays at Crazy Mom Quilts. Hop over there to see what other quilters have finished this week. And happy weekend, everybody!

pinwheels!

I'm nearing the end of the Butterscotch Tart quilt! I needed a break from the tart blocks so I worked on the pinwheel sashing posts. 

There are 24 of these guys. They measure 3" now, and will be 2.5" when finished.

I've completed 11 of the tart blocks and have just two more to make before I can start the big quilt assembly!  The blocks will be sashed with a pale blue print from Pam Kitty Picnic that I used very sparingly in my blocks. I used no light blue or pink in the pinwheels because I want darker colors to "pop" against the sashing. Can you believe that the sashing print is actually current and in stock? No midnight Ebay and Etsy searches this time! It's due to arrive in the mail tomorrow, so you'll see it very soon. 

butterscotch tart pinwheels 1.jpg

I actually like making half-square triangles. I know that I'm in the minority here. I make them too big, and then trim them down to size using my 6" square ruler. This ensures that I always have exactly the correct size. (I take the pattern measurement and add 1/2" regardless of what the directions specify.) Yes, there's waste involved. But I don't need to squish and mash and stretch the blocks to get them the right size. I did that for years and was always unhappy with the results. And really, what's a little waste? It reduces my stash faster and frees up space for more new fabric!

Butterscotch Tart is a pattern by Fig Tree Quilts, and my fabric is mostly by Pam Kitty Morning. The tart blocks also have several red and pink prints by Lori Holt, plus a few random pieces of Lakehouse, Riley Blake and Bonnie & Camille. 

butterscotch tart's new colors

The experimental blocks are done for my Butterscotch Tart quilt. I've completed the blue-on-blue star, and the red-on-pink star. And here they are!

And you know what? I'm loving the addition of the pink! I was positive that the light blue would work, but the pink was iffy. But I didn't just stop there. Oh no. How about some blue strawberries?

And maybe some pink and red polka dots?

I'm having so much fun putting fabric combos together that this is the only quilt that I want to work on! I'm not the slightest bit bored. And I am sooo excited that I'm more than halfway through. 7 blocks done and 6 to go. Woo hoo. I can finish these blocks by the end of July. Yes, I can! Now I just gotta come up with a few more fabric combos. Hummm, maybe some stripes will be next...

The Butterscotch Tart pattern is by Fig Tree Quilts, and I have used an assortment of fabric by Pam Kitty Morning and Lori Holt.

Thank you for stopping by. I'll be back in a few days with an update, and I promise to not add any green or yellow!

butterscotch tart

I've made it official. I have now pledged allegiance to my latest quilt blocks. 

butterscotch tart red white blue 7.jpg

It's so much fun to see these blocks come together. The first block was easy (but time consuming) to sew and I hoped that the next one would go together as easily. I reversed a few of the pressing directions so now the seams all nest perfectly. Just for fun I checked to see how many pieces are in each block. Sixty five pieces! These are definitely a make-one-at-a-time blocks. But once I've turned on iTunes radio I'm good to go!

(Have you checked out iTunes radio? You choose an artist that you like and then you get an endless stream of similar music. So for anybody curious, tonight's block was courtesy of Kylie Minogue radio - all dance. Last night's block was accompanied by Martina McBride's country radio.)

And coming soon are some experimental blocks! I'm curious to see light and dark blue together, and red with pink. Yes, pink in my patriotic quilt. It's just light red, right?! I think that light blue and pink will add a bit of whimsy and help to reduce the sameness of the blocks. The Butterscotch Tart quilt pattern is by Fig Tree Quilts and you can pick up a copy here. I've had a few requests about my background. It's Pam Kitty Love and is now out of print, but there is a similar white with pink dots currently available in the Pam Kitty Picnic collection. Here's a sneak peek of some upcoming star fabrics - the reds are Lori Holt's out-of-print Polka Dot Stitches, and the light blues are Pam Kitty Picnic and Pam Kitty Morning. I'm making strawberry print stars. Imagine that, it's my never-ending strawberry addiction. And look at how different and soft the pattern can look when made from Fig Tree fabrics. I think that this pattern would be perfect for a Christmas quilt, too. 

I'm off to slice up this new fabric stack. Be back soon with more stars!

a great granny squared finish!

It's done! The mini Great Granny Squared quilt is finished!

Wow, didn't I just start this a few weeks ago? I made Lori Holt's quilt pattern at half size, and my finished quilt top measures 20x26. It is the perfect size for a standard bed pillow sham!   

I managed to follow all of my own "rules" - I used a colored background instead of white (It's Kona Bluebell), I integrated some white prints that I don't usually use, and I avoided darks. It seemed to take forever to choose a border print. And now I definitely want to make more quilts with pale pastel-y backgrounds! 

Reducing the size by 50% was definitely a challenge. Why can't I just follow the directions?!  Many pieces were cut at 3/4" and 1" and weren't always a pleasure to sew. I'm sure that they would have been really easy if I had done them at full size. There might have been a lot of swearing and seam ripping. And yet every time I finished a block I felt like I had accomplished something (and deserved to eat a New Mexican chocolate truffle).  I like to reinvent!

The Great Granny Squared pattern book can be found here, and each week's customized pattern pdfs can all be found here. My block fabric is an assortment of Pam Kitty Morning, Lori Holt, Atsuko Matsuyama, Bonnie & Camille and Riley Blake.

Did you see that Lori announced another sew along on her blog last week? I already have the pattern!

I'm linking up today with Finish It Up Friday at Crazy Mom Quilts.

more strawberries

If you're joining me today from Sherri's and Sinta's blogs, welcome! I'm glad that you hopped over to see the finished mini Dwell pillow. It was a fun project to work on. Just scroll on down to my entry from a few days ago to read all about it.  

I'm currently adding to my strawberry collection for the Strawberry Social quilt! I've made another ten berries this week.

Red, ripe strawberries.

Not-quite-ripe pink strawberries.

And the, um, confused berries. 

The striped strawberry and double strawberry were interesting experiments. I love the stripe and double berry fabrics. I wasn't sure that they would look good when chopped into tiny pieces for the berry cap, so I substituted similar fabrics. And now I think that those two berries just look confused! They might find themselves on the back of the finished quilt. (Hey, that's better than the way I treat imperfect real strawberries!)

I am loving how the whole berry bunch looks grouped together! 

The finished Strawberry Social quilt has 25 berries, but I'm determined to keep on sewing. How big can I make this quilt? The pattern is by Margot Languedoc and can be purchased from her website. I'm sewing with an assortment of Pam Kitty Morning, Lori Holt, and Riley Blake ginghams, and I plan to add some Flower Sugar into my next batch. 

Thank you for stopping by today!

mini dwell pillow!

Oh happy day! It's finished! Presenting the mini Dwell pillow!

This is my first entry into the "A Year Of Schnibbles" sew along hosted by Sinta and Sherri... except that it's not a Schnibbles! This month's assignment was to make a mini quilt using a Thimble Blossoms pattern. I made 3 extra houses and adjusted the borders so that I could finish with a 20" square. I've used an assortment of my happy fabrics from Lori Holt, Pam Kitty Morning, Bonnie & Camille and Atsuko Matsuyama. 

The little houses are all hand quilted in the ditch - nearly every seam is stitched. The hand quilting was fun for hours... and then I just wanted it to be finished, NOW. 

I spent a few days auditioning backing and binding fabrics. I am so happy with this butter floral and red gingham from Pam Kitty Picnic. That gingham is scarce! I needed to do a big internet search to find it. And I picked up a new, fluffy down pillow insert from Pottery Barn. 

So happy! I think that more pillows will be in my future!

I'm linking up today with Finish It Up Friday at Crazy Mom Quilts.

hand-quilted houses

I'm getting reacquainted with hand quilting! I spent several hours this weekend working on the mini Dwell houses.

It's been years since I last did any hand quilting. I taught myself how to do it by reading books and magazines, and by studying museum quilts. All of my early quilts were hand quilted. The second quilt that I made was covered with Baptist fans! Maybe I was too new to the hobby to be scared away by all that handwork! I've relied on the artistry of longarm quilters for the past ten years, and I do love the additional design elements that they bring to my quilts. But it is rewarding to know that I can still do this on my own. Well, those first few stacked stitches were a bit rough, but I got back into the groove quickly.

My brass thimble with the recessed tip is like an old friend. I'm glad that it still fits! I remember that it took me quite awhile to find one that would fit my larger fingers. 

I like to baste in a pastel color that won't distract from my design. Here I have basted in mint green, and I am using white quilting thread. All of the vertical and horizontal sashing has been quilted in the ditch, and I'm now going back and quilting the roofs, doors and pinwheels so that they'll pop. 

I think that this will be done soon! 

I'm linking up with the Monday Design Wall at Patchwork Times today. Hop on over to see what other quilters are working on this week.

mini dwell blocks done!

Presenting all 12 mini Dwell blocks!

Yes, I only needed nine blocks. But I just couldn't stop sewing! In the past few days I added more yellow and blue to my lineup. I was trying to get an even distribution of color. And remember how I wanted to try lavender and lilac? Nope... that was just too much.

My twelve blocks will result in a more square-ish quilt instead of a 13" x 15" rectangle. I also changed Camille's pattern slightly by omitting the really simple houses. These are a mix of assorted fabrics by Lori Holt, Pam Kitty Morning, Bonnie & Camille, and Japanese prints. 

I have to tell you about why I chose the bird toile background. I have had a long fascination with toile. I had toile Bicentennial curtains in my bedroom when I was a boy. My bathroom is papered in black and white toile. My bedroom has black and white toile drapes and toile shams (gotta block out that ugly security gate on the fire escape window!). My living room has toile chairs and pillows. They're well worn, but still toile. And there was a gold and white toile duvet cover years ago, shredded by my former cat housemates! Yikes, that's a lot of history with this print! So you see why I hoard all of the Pam Kitty toiles. I'd love to have a toile print like this in pale blue or pink on white. 

And now I need to finish this project in secret. It will make it's reappearance at the May 1 parade on Sherri's and Sinta's blogs. Don't worry, it will definitely be here, too!

dwell mini

Ah, the joy of starting a new project! This time it's the mini Dwell pattern by Camille Roskelley of Thimble Blossoms!

I watched everybody else making their mini Dwell quilts on Instagram a few months ago. Oh, how I wanted to play along! But I had a FEW other quilt projects going on. Too many projects make me nervous - I'm a finisher!

Well, I had the perfect opportunity to make my own mini Dwell blocks! For years I have been wanting to join the "A Year Of Schnibbles" sew along group, hosted by Sinta of Pink Pincushion and Sherri of A Quilting Life. This was going to be my first month. Then an interesting thing happened. This month the group took a break from the Schnibbles patterns, and instead assigned our choice of a Thimble Blossoms mini pattern. I knew immediately what I would make! 

Each house measures 3" x 4" and they are very simple to piece. The finished top is only 13" x 15".

I'm trying to keep my colors all evenly distributed. So there are the red and pink houses, and a blue group, too. I need to add in a bit more green and yellow in my future blocks to get the balance right, and I'm even playing with some lavender and lilac fabrics. 

I love these houses with the pinwheel centers. I did my favorite pink and green color combo house, and I just couldn't resist making my own signature pink and grey "Grey Dogwood" house!

Six blocks done and three more to make. I have an idea for the setting that's a little different from the pattern. Actually, I could just keep making them. I certainly have enough fabric. Can you imagine a huge quilt with hundreds of these? I can! But the project is due at the end of April, so I think that I'll need to control myself!